This handbook has been created to act as a quick reference guide for you to use in the daily and routine performance of your duties. As such, it is not intended to replace the multitude of professional development classes that are offered by NYSSFA and SFMI. We trust that you will also find this to be a great resource for basic knowledge concerning day-to-day activities that you will be involved in.
AHERA - Asbestos Hazard Emergency Response Act. Most people will use the term AHERA when talking about asbestos management.
ASBO - Association of School Business Officials. This is the professional development organization for Business Administrators, just like NYSSFA is for Directors of Facilities.
BCS - The Building Condition Survey is performed at every school district in 5 year intervals. This survey is conducted by your architectural firm and you as a director will be heavily involved in this process. The survey is designed to give a state of the facilites report and ultimately reveals difficiencies that need to be address by the district.
BOC - Building Operator Certification. This is a certification that stems beyond the role of a Director of Facilities. There is a BOC training course offered through NYSSFA.
BOCES – Board of Cooperative Educational Services. There are 37 BOCES locations across the state and there is a BOCES for every district. BOCES membership does not include New York City, Buffalo, Rochester, Yonkers, and Syracuse city schools, also known as the “Big Five”. From a director’s perspective, BOCES is available to provide both services and purchasing opportunities for your district. Not every DOF participates in the BOCES purchasing programs, but it certainly can be a powerful tool for you. More details are provided in the Procurement section of this manual.
CAPP - Certified Asset Protection Planner. This is title given to someone in a district responsible for the management of the district's asset inventory.
CM - Term used to reference a Construction Manager.
CMMS - Computerized Maintenance Management System. This is a software package that you use for work orders, inventory management, preventative maintenance work and so on.
DEC - Department of Environmental Conservation. See the section on DEC.
DOH - The Department of Health is an office of the state that impacts our schools significantly, from issuing Swimming Pool Permits, to kitchen inspections, and assisting with health concern such as Covid. You will typically work with your local Health department when the need arises.
LEA - A Local Education Agency Designated Person. This designation is for the person responsible for overseeing the districts asbestos management. More details are given in the AHERA section.
NYSCOSS - NY State Council of School Superintendents. This is the professional development group for school superintendents.
NYSED – New York State Education Department. This is referred to as SED and it is the department in Albany that oversees all K-12 schools in New York State
NYSED Facilities Planning – Facilities Planning is the branch of SED that oversees our world. There is a section in this handbook that goes into more detail on this organization.
NYSSBA - NY State School Boards Association. The professional development group for school board members.
NYSSFA - The NY State School Facilities Association is the professional development organization for the state's school district's Director of Facilities.
OGS - Office of General Services. This is the department that manages State Contracts for procurement.
PESH - PESH is the NY Public Employee Safety and Health Bureau. PESH enforces safety and health standards promulgated under the OSHA and several state standards. PESH is a branch of the NYS Department of Labor (DOL).
SFMI (School Facilities Management Institute) - This is a subsidiary of NYSSFA and it is a non-profit charitable organization. SFMI is a piece of our organization that provides the professional development classes, webinars, videos, and other training opportunities for our association members.
Each district has a purchasing policy and reviewing that policy is one of the first things you will do in your district. Your Business Administrator will typically go over the district’s purchasing guidelines with you so you know what steps you must take to acquire goods and services. We will outline each of these steps below.
Get Quotes
This is a common option for buying goods or services. You district purchasing policy will dictate how many quotes you need to acquire. This is based on the amount of purchase you are seeking. For example, your district may require 3 quotes for anything over $500, and 2 quotes for anything between $250 and $500. There is also a maximum purchase allowance with quotes and that is $25,000 for materials and up to $35,000 if it is for materials and labor. Equipment purchases can be the exception to this rule.
Equipment Purchases
You should have a line item in your budget for Capital Equipment purchases. The amount you have in that budget account is set when your district’s budget is approved by public vote. You cannot add funds to this account once it has been approved by the voters. The public voted on a budget that said maintenance was going to spend $X dollars on equipment and if you exceeded that amount, you are basically going against what you told the public you would spend. This is an area you will want to work with your Business Administrator on. Be sure you plan ahead with what you need to buy, get prices and allow for price increases as there are months between the approval of the budget and the implementation of the budget. Due to the circumstances described with budget approval, you are able to purchase equipment for an amount greater than $25,000 without repercussions. You can use the 3 quote process, or you can use one of the other forms of acquiring equipment, such as a NYS Contract Price.
New York State Contract Purchasing
New York State, through the Office of Government Services (OGS) allows vendors to submit offers of special discounts for schools, municipalities, parks and recreation, water authorities, and other state affiliates. Awarded vendors are given a New York State Contract number for products they have on contract. There is a very large number of vendors in the NYS Contract system. You can buy tractors, cameras, furniture, carpeting, electrical supplies, plumbing supplies, paint, technology, and more. There are contracts for labor as well. So if you were going to buy a new 40 hp diesel tractor for your district, there will be a few vendors on state contract that you can contact and select the tractor you like best. You are not locked into one brand for most items. You issue a purchase order for the equipment you want and note the state contract number and provided quote and you are good to go. However, if you are buying a product that is not on state contract or is brand that you feel is better than the one on state contract, you can utilize a Purchasing Network. Below is a list of some frequently used contracts, which lists vendors who are part of this contract. Please note that these contract awards can change, but most vendors tend to remain active on this list.
OGS CONTRACTS
- Athletic Equipment
- Flooring Contract
- Elevator Services
- Industrial & Commercial Supplies and Equipment
- Vehicles, Class 1 thru 8
- Vehicle OGS Marketplace Link
Purchasing Through BOCES
BOCES BID LISTS -
This service provides leadership and coordination for component school districts, municipalities and counties in cooperative bidding. Representatives of the school districts and agencies work with BOCES personnel to develop standard specifications for necessary items. BOCES then prepares proposals and bids, solicits vendors to bid, requests samples as needed and coordinates the analysis and decision making process for cooperative bids. Savings are generated not only from the millions of dollars saved, but also from the time saved by the individual participants.
BOCES Bids
Every BOCES is a little different and is dependent on the makeup of components and the RIC associated with it. Each BOCES service offerings are in direct correspondence to the demographics and regional locations being served. The offerings of the BOCES under the Cooperative Purchasing CoSer will be directly dependent on the districts that utilize the services. Bids being offered are often dictated by the request of the participating districts. Most bids offered by the BOCES will be because two or more Participants are interested in have the solicitation done. This can be 2 districts or the BOCES & a district.
General Outline of the steps in a BOCES bid:
- Send Requisition Listing to Participants
- Participants Return Requisition Listing with their Requirements for Period indicated on the Bid. This would include anticipated quantities and any additional items that are not already outlined in the Requisition Listing.
- BOCES combines all requirements into one master bid listing that becomes the bid. list/specifications within the solicitation document.
- BOCES advertising the bid and may post the bid on a website where vendors can down loan the document directly from the site. Many entities use www.BidNetDirect.com
- Legal Ads are put in our official papers.
- BOCES receives the bids by the due date.
- BOCES reviews the bids received for responsiveness and prepares tabulation.
- Tabulation is reviewed with bid specification by the Bid Committee and the responsive & responsible low bidder is then determined.
- Recommendation for award is prepared and sent to the WFL Board.
- Letters of award (& non-award) are prepared for vendors.
- Letters are issued &to Participants with award information.
- Contract information is posted to BOCES website.
- Award information is posted on the www.BidNetDirect.com website.
Bid Participants Responsibilities for each bid:
- Provide the BOCES with the quantities and items when requested.
- If available, participate on the Bid Committee. Committee will review the specs and the bids received.
- The Committee, which is comprised of the Participants and the Purchasing Staff, together make the recommendations that the BOCES Board will consider for award.
- Once awarded if there are any issues that are not easily solved with the awarded vendor, contact the BOCES to help obtain a resolution.
BOCES Responsibilities for each bid:
- Coordination of the Bid: collect the quantities and compile into one master document that will be provided to the Bidders.
Purchasing Networks
Purchasing Networks are national contracts, not state wide like our NYS Contract. There are a number of Purchasing Networks and over the years many have merged or acquired other networks. Today the most popular networks are Omnia (was National IPA), KPN (Keystone Purchasing Network), and Sourcewell are ones that immediately come to mind. NOTE: Prior to using a Purchasing Network, make sure your Board of Education has a policy which allows this.
Preferred Source
This is a term you will see in the NYS purchasing guidelines. The preferred souces are Corcraft, NYSPSP, and NYSID. If you are able to purchase the product you need from one of these Preferred Sources, you should do so. There are products from these sources that may fit into your inventory of items, but you are not going to find tractors, mowers, lighting, flooring, and such from these preferred sources.
Sole Source
This one is for a vendor who is the sole source for the product you wish to purchase and therefore you are unable to get competitive bids on the item. For example, there is a company who manufactures an infield grooming machine for baseball fields and they sell this item direct, so there isn’t a distribution network for their product. If you want to purchase this machine, you have to buy it direct from the manufacturer, so this would be a sole source product. In this case, you justify why you need this product specifically and note it as sole source.NOTE: Prior to using a Purchasing Network, make sure your Board of Education has a policy which allows this.
Piggyback Contracts
In many cases, you can purchase products or services by utilizing a contract of a local municipality, county, or neighboring district(s). For instance, if the county for your district has put out a bid for sidewalk replacement, you may be able to piggyback on their contract and use the same vendor at the same cost the county is paying. It is never a bad idea to ask districts in your area if they have bid services or materials that can also utilized by your district. NOTE: Prior to using a Piggyback Contact, make sure your Board of Education has a policy which allows this.
Local Purchases
Purchasing locally can be a problem. As much as we like to support our local businesses in our community, we must use caution when purchasing in this fashion. More than likely, your local hardware store or sign shop is not a part of any type of purchasing contract. Even though you will save money by driving only 5 minutes to the local hardware store versus 25 minutes to the big box store on contract, auditors will not like the local purchasing practice. Use discretion and purchase minimally locally or use multiple quotes to justify these purchases. Many auditors will say, “you could have ordered it as a NYS contract purchase and got the item the next day. What was so important that you couldn’t go the correct way to purchase the item?” We all do make these local purchases, so just be mindful of how much you buy and if you don’t need it today, you may want to buy it from a NYS Contract vendor. Of course, small purchases within your purchasing policy can be made locally and you are encouraged to do business with local vendors.
Schedule N Purchases
The “Schedule N” Purchasing program is a State Funding mechanism offered thru the NYSED Office of Facilities Planning. The program, created from previous Safe Act legislation, focuses on giving school districts the ability to make on going improvements related to the School’s Physical Security Systems.
There are two main areas in which the Schedule N program covers: Video Surveillance and Door Hardening.
- Video Surveillance: A district can purchase and be reimbursed up to a total of $35,000 a year of video cameras. The cost per camera cannot exceed $2000. The cost may include the camera, the installation, and the cable for the camera. This does not include any software or server costs associated with the camera. The purchase must be completed and paid for by the end of their fiscal year, June 30th. The district will then submit the Schedule N form and receive reimbursement at some point in the next fiscal year. However, the reimbursement is not at the full amount, it will be at the district’s capital building aide rate just like a capital or capital outlay project. Example, if a district spends $35,000 and their building aide rate is 80%, they will receive $28,000 in reimbursement. Note: The Video Program does not require a Building permit approved by the Office of Facilities. Also note that you cannot exceed $35,000 in camera expenses on your form. In other words, you can’t spent $38,000 on 20 cameras and then submit the form thinking you will get back $35,000. You claim will be rejected by the state and you will receive no aid if you are to do this. If you need to spend more than $35,000 on cameras that you wish to get aid on, you must do it through an approved SED project.
- Door Hardening: The door hardening program is meant to make it more difficult for an intruder to enter a space through any said door. NYSED will reimburse a district for: the physical door, door frame, windows, door hardware, and the associated electronics to unlock the door ( card reader, strike, power, door contact). Intercoms and door release can also be funded. The door hardening program does not have a total dollar amount limit per year as the video program does. However, it has a type of door limit. The tiers are as follows:
- A District Building Main Entrance (usually 2-3 allowed per building) - $10,000 per door.
- Any Exterior Door - $5,000 per door.
- Any Interior Door - $1,000 per door.
The reimbursement for the door program is the same as the video program above with one exception. The program also does not require a building permit, but the district’s architect of record does need to review the door work defined on the form and provide their professional license on the form.
Included in this section are three documents: A comprehensive document that outlines the above programs in detail, the actual Safe Act legislative narrative, the Schedule N reimbursement form. NOTE: These purchases must be part of your district's safety plan.
New York Secure Ammunition and Firearms Enforcement Act ( NYSAFE):
IMPACT ON SCHOOL DISTRICT BUILDING AID
- The NYSAFE Act enhances NYSEL 3602 6-c aid for the purchase of stationary metal detectors, security cameras and safety devices for electrically operated partitions. BOCES are not eligible for this aid.
- The NYSAFE Act changes the existing provisions of NYSEL 3602 6-c in three ways:
- In addition to the devices specifically mentioned in the original statute, expenses for electronic security systems and hardened doors approved by the Commissioner on or after July 1, 2013 are now eligible for this aid.
- All eligible expenses for this aid, not just the additional devices mentioned above, will now be aided at the current year RWADA aid ratio plus 10%; however, the aid ratio enhancement applies only to eligible expenses incurred during the 2012-13 through 2022-23 school years. Note: The RWADA aid ratio is not necessarily the same as the selected aid ratio for Building Aid; the annual calculation of all ratios can be viewed on the Building Summary Aid Report (BLD-SBA)
- The purchase of electronic security systems and / or hardened doors must be included in the school district’s school safety plan.
- The NYSAFE Act impacts only State Aid for security cameras, etc. as provided under NYSEL 3602 (6-c). It has no impact on regular building projects aided via assumed amortization (NYSEL 3602 (6)(e)); i.e., expenses for security cameras, metal detectors, electronic security systems and hardened doors are not eligible for the new NYSAFE 10% enhanced RWADA Aid ratio if they are included in capital projects subject to the regular Office of Facilities Planning review process and aided under assumed amortization.
- Reporting: Districts will continue to claim base year expense for all items eligible for this aid on SAMS Form FB Schedule N, and SED State Aid Office approval of SAMS Form FB will constitute ‘Commissioner’s approval’ of aidable base year expense. Starting with 2012-13 expense reported in 2013-14 SAMS, Schedule N will contain one or more new sections for reporting base year expense for electronic security systems and hardened doors. The new sections will include an item requiring the district to note whether the purchased electronic security systems and/or hardened doors are included in the school district’s safety plan. If a district indicates that the items are included in the safety plan, the overall SAMS certification by the superintendent will be considered legal certification of this assertion.
- Cost Allowance and System Scope: As required by law, the Office of Facilities Planning will prescribe maximum cost allowances for electronic security systems and hardened doors which will be published when available and displayed on Schedule N on 2013-14 SAMS. Although the cost allowances have not yet been set, please note the following regarding this aid: The purpose of this statute, including the NYSAFE amendments, is to allow a school district to purchase and install security systems and devices separate from traditional capital construction projects and in student-occupied buildings. It is not intended as a method to allow installation of comprehensive security systems which would otherwise be subject to the standard building permit review process at the Office of Facilities Planning. Districts are advised not to purchase/install security systems of a cost/scope that could possibly be subject to the standard review process with the expectation that the expense could be claimed for aid under this statute. If a claim for an installation is rejected by the State Aid Office for exceeding the cost allowance under SAMS Schedule N process, it will also be rejected by Facilities Planning because it was completed prior to the issuance of a building permit. In this situation it is possible no aid will be paid for the installed system.
The Office of Facilities Planning has published guidance on eligible expenses and cost allowances: http://www.p12.nysed.gov/facplan/documents/NYSAFEActImplementation.pdf
All specific purchase/construction questions, and questions on eligibility of specific equipment, may be directed to the Office of Facilities Planning (518-474-3906).
All other questions regarding the new provision in the NYSAFE Act may be directed to the State Aid Office (518-474-2977).
Link to NYS Educational Management Services Purchasing Handbook
Link to Piggybacking Law - Exception to Competitive Bidding
Link to Seeking Competition in Procurement from the NYS Comptroller Office
Filtration 101 for Schools
The HVAC industry (heating, ventilation, and air conditioning) is a multibillion-dollar global industry employing hundreds of thousands and has a presence in virtually every building. Each letter in HVAC represents a separate industry requiring a wide range of engineering disciplines to develop and manufacture the products demanded today.
The Air Filter
Within an HVAC system, the V stands for ventilation which in this context, can be defined as the process of supplying or removing air by use of a fan, from a space for the purpose of conditioning the air to control temperature, humidity, or pressure for example. Filtration in this context can be thought of as the process of removing particles from that air and the air filter is the specific device that removes those particles.
The air filter is a single component in a much larger and more complex HVAC system. However, since all the ventilated air is intended to flow through the air filter, it can affect the entire system and thus the occupants within the building. Because of this, the air filter is a critical component and must be selected to optimize the HVAC system’s design criteria. In order to do so, it is helpful to understand the three main performance attributes of an air filter and how they work together.
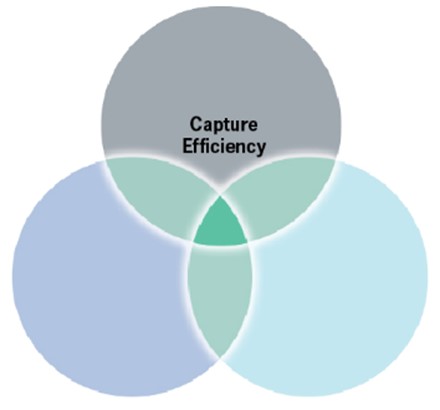
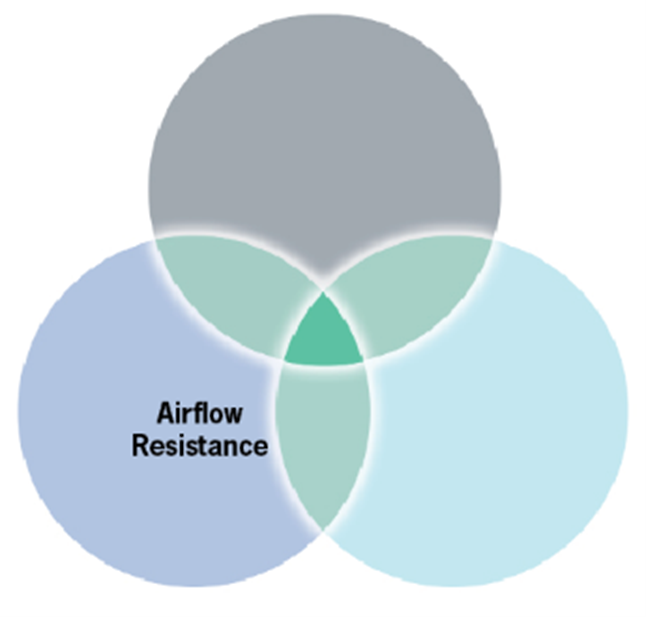
An air filter should remove the percentage of specific particles sizes according to its rated value (particle capture efficiency) while not restricting airflow through the filter and into the space (resistance to airflow) and should perform those two functions while holding the dirt collected within the body of the filter for a reasonable service life to reduce maintenance expenses (dirt holding capacity).
Each of the three performance attributes works in conjunction with the others. When constructed properly, the best air filter performs in the intersection of all three and delivers optimum performance: high particle capture efficiency with a low average resistance to airflow with a reasonably long service life.
Particle Capture Efficiency MERV Value
Particle capture efficiency is the effectiveness of the air filter in removing particles. There are two major rating systems commonly used today. MERV (Minimum Efficiency Reporting Value) is contained within ASHRAE Standard 52.2 and ISO16890 is a filter test standard created by the International Organizations for Standardization.
ASHRAE Standard 52.2- 2017, Method of Testing General Ventilation Air-Cleaning Devices for Removal Efficiency by Particle Size, is currently the dominant test standard in North America and provides guidance on how to test a specific air filter and award it a Minimum Efficiency Reporting Value (MERV). This value is then used to apply a specific MERV level to a filter based on the level of protection the application or facility requires as recommended by cognizant authorities. Particles are grouped into three size ranges, 0.3 microns to 1, 1 to 3.0 microns, and 3.0 to 10 microns. A MERV value is assigned based on the filter’s ability to capture a certain percentage of particles in each size range.
ISO 16890 Air Filters for General Ventilation is an international test standard that replaced EN779 in July 2018. This test standard classifies air filters based on the removal efficiency of particulate matter (PM) for three size ranges; PM1, PM2.5 and PM10. ISO16890 assigns a value to a filter based on particle capture within one PM range. Unlike ASHRAE 52.2, the ISO standard incorporates a conditioning step procedure to account for the benefit of a temporary electrostatic charge which can inflate a filter’s particle capture efficiency performance.
During the COVID-19 pandemic, the ASHRAE Epidemic Task Force provided the HVAC industry with core recommendations for schools and universities. Many state and local officials adopted or refer to these for basic guidelines regarding air filtration. These recommendations call for a minimum filtration efficiency of MERV 13. The ISO16890 equivalent of MERV 13 is ePM1 -50%. See the comparison chart below.
HVAC systems can be configured with a single air filter stage while others can have multiple stages of air filtration. If the HVAC unit is a single-stage type, that air filter should be a minimum of MERV 13. If the unit has multiple stages, the final stage should be a minimum MERV 13 while the prefiltration in those units can be less than MERV 13.
Note: Particle capture efficiencies, (MERV values), are not additive. A MERV 5 filter followed by a MERV 8 filter does not equal the same performance as a single MERV 13 filter.
MERV Versus MERV-A
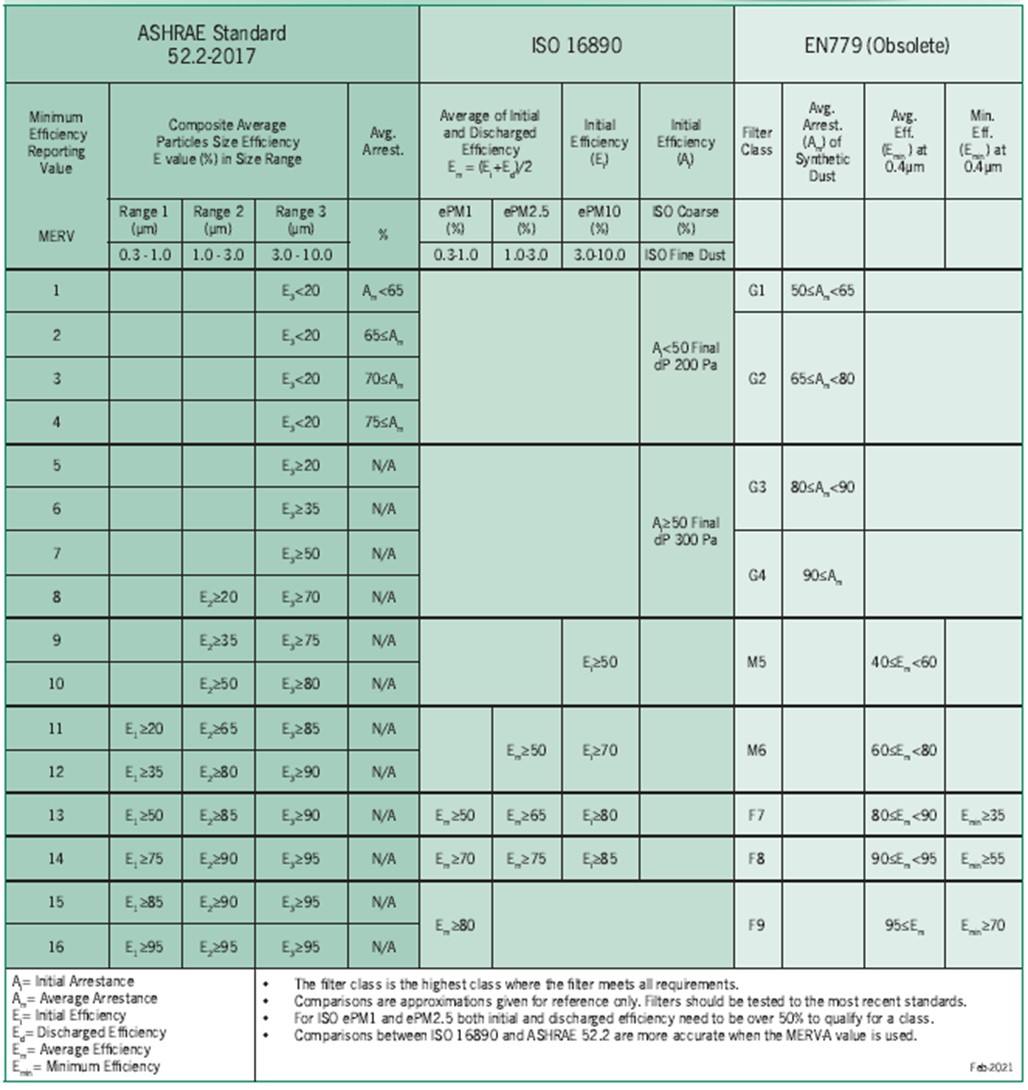
A filter’s MERV value is important because the user can refer to the MERV chart and see the percentage of particles within each size range the filter is rated to remove. Since a higher MERV generally comes with a higher pressure drop, filter manufacturers have developed techniques to achieve higher MERV, but with lower pressure drops. To do this, electrostatically charged filter media is used. There are positive and negative attributes with this type of air filter.
It’s helpful to understand how a typical N95-style face mask works and how this relates to electrostatically charged air filters. The 95 in N95 stands for 95% particle capture efficiency and in this case, on 0.3-micron particles. That’s a very high particle capture efficiency; slightly higher than a MERV 16 air filter. However, while you can breathe relatively easily through an N95 mask, the same mask made from MERV 16 filter media would be very difficult to breathe through because the airflow resistance (pressure drop) would be very high.
An N95 mask accomplishes high particle capture efficiency with low airflow resistance by relying on a thin layer of fabric with a very low resistance to airflow. This fabric layer also carries an electrostatic charge, creating what’s known as an electret. This charge attracts particles out of the airstream onto the fibers (much like how a magnet attracts metal) and the charge holds them in place. The high particle capture efficiency with low resistance is an ideal solution for respiratory face masks, but the technology faces challenges when used on air filters.
An N95 respiratory mask is designed for limited use and the volume of air we breathe is much smaller than the amount of air an HVAC system moves during a typical day. As large volumes of air move through the electrostatically charged filter, the ultra-fine accumulating dirt particles begin to insulate the charge from attracting dirt particles. As this process builds, more and more dirt particles slip past until eventually, the charge is adding no value to the particle capture efficiency performance. The MERV value of this filter falls. The ASHRAE 52.2 committee is aware of this loss in efficiency phenomenon and created a supplementary test procedure to MERV known as Appendix J. This test procedure removes the benefit of any charge on a filter and delivers a MERV value without it. This gives a more realistic view of how the air filter will perform in a real-world setting after a period of time has passed and its charge is no longer effective.
This is known as the MERV-A value.
Airflow Resistance Pressure Drop
All air filters present a measurable amount of resistance to airflow. As air weaves through the fibers of the filter media, the buildup of air increases the pressure upstream of the filter compared to the downstream side. This is commonly referred to as pressure drop and is measured in inches of water gauge, abbreviated as " w.g.
Specifications provided by air filter manufacturers should list the initial pressure drop when the filter is brand new at a standardized volume of airflow. All filters tested according to ASHRAE 52.2 and labeled with a MERV value are tested at 2000 cfm (cubic feet per minute) or 500 fpm (feet per minute) on a 24” high by 24” wide air filter.
As dirt loads on the filter, pressure drop increases, less conditioned air is flowing into the space, and the desired comfort level of the room is not maintained. The length of time for this to occur varies based on the performance attributes of the air filter, the volume of airflow, and the cleanliness of the source air.
When airflow is restricted, there are two possible responses based on the controls within the HVAC system.
If the unit is equipped with a variable frequency drive fan (VFD) and set to adjust fan speed based on pressure drop, the fan will speed up to restore the proper airflow. At each interval when the fan speed increases, energy cost likewise increases. At some point, the pressure drop has increased to the point where the fan can no longer maintain proper airflow and the filter should be changed.
On systems with a constant-speed fan and no way to increase the fan speed, the airflow into the room will gradually decrease as resistance increases. At some point, this filter will need to be replaced to restore the proper airflow.
A widely used rule of thumb for both systems is to change the filter when the initial pressure drop doubles. This is not an absolute rule but is helpful to use as a starting point to determine when to change the air filters in each system. The rationale behind this is the cost and performance drop-off associated with a pressure drop that has doubled is more expensive than the cost to change the filter.
Dirt Holding Capacity (DHC)
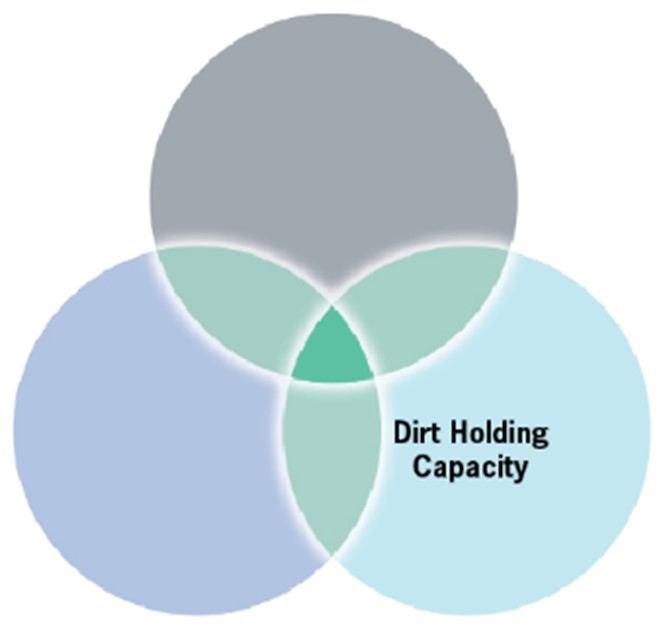
The third performance attribute relates to service-life. Air filters capture dirt from the air as it passes through, but the filter must also hold that dirt and prevent it from working loose and continuing downstream. The amount of dirt the filter can hold directly affects how long the filter can be left in service. Changing air filters can be an expensive and time-consuming task for any maintenance department. Not only does it incur a direct expense, but it also prevents or delays workers from doing other important projects which may have significant cost-saving benefits to the facility. If the facility hires outside vendors for filter changeouts, that can often be a major expense depending on the size of the facility or campus.
Dirt holding capacity is a product of particle capture efficiency. A filter that is more efficient at capturing dirt is going to add more dirt to the filter over the same amount of time. But the limit for how much dirt a filter can hold is based in part on airflow resistance. As dirt accumulates in the filter, airflow is restricted and eventually reaches a point at which it must be changed.
Generally speaking, air filters with greater filter media area can hold a larger amount of dirt which increases their service life. A 24” x 24” x 2” high-capacity, high-quality two-inch MERV 8 pleated panel filter with 17 sq feet of filter media area can hold 175 grams of dirt when tested under ASHRAE 52.2 test procedures. However, a 24” x 24” x 12” high-capacity MERV 14 V-bank style filter with almost 200 sq ft of filter media can hold over 475 grams.
The optimum air filter for each application is one that captures an acceptable amount of unwanted particle sizes, (particle capture efficiency) holds that dirt within the body of the filter for a reasonable length of time (dirt holding capacity), and performs those two functions while still flowing the required volume of clean air into the occupied space (resistance to airflow).
The ideal filter; high capture efficiency, high dirt holding capacity with low resistance to airflow.
How to Identify Optimum Air Filters for Each Application
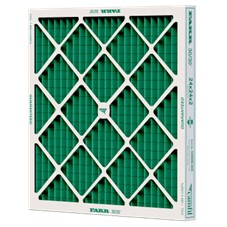
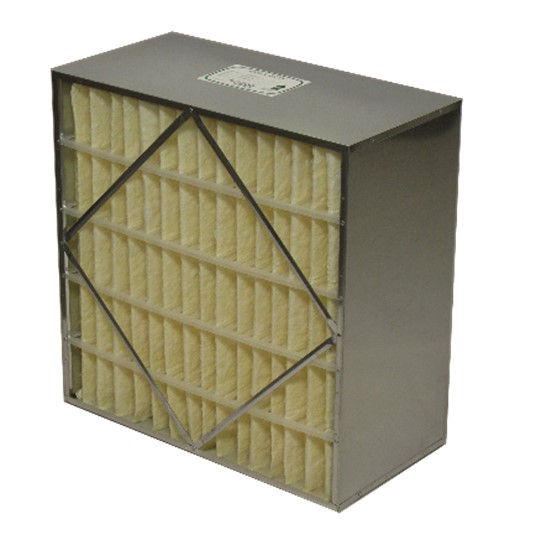
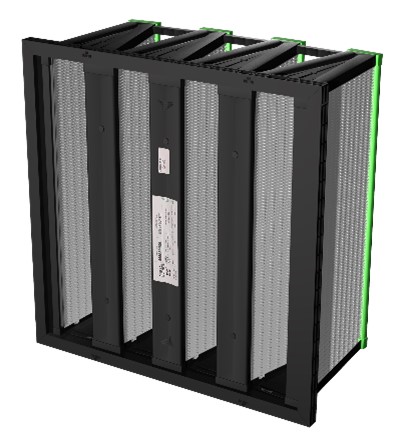
It’s first helpful to recognize the four basic styles of air filters; panel filters; box style, pocket (bag) filters, and V-bank style.
Panel Filter
2 - Rigid Box Style Filter
3 - Pocket (bag) Filter
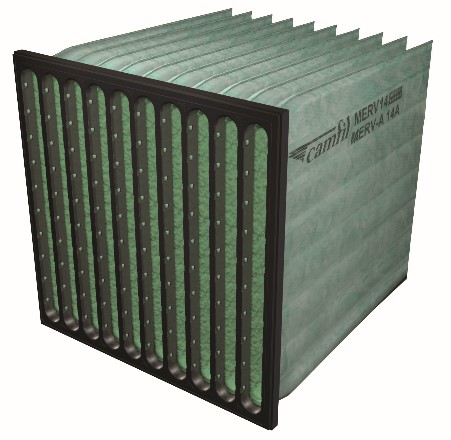
4 - V-Bank Style Air Filter
Selecting The Optimum Air Filter
The first step to selecting the optimum air filter is to determine if there is a minimum particle capture efficiency (MERV value) required. Many schools and universities have followed recommendations from cognizant authorities that state MERV 13 is the minimum filter efficiency, but higher efficiency is better.
Generally speaking, air filters with a higher MERV value have a higher resistance to airflow (pressure drop) which the air handling unit’s fan must be powerful enough to overcome. When upgrading filters in the air handling unit to those with higher MERV values, it’s important to keep this in mind. Check the operating specifications of the unit to ensure the fan is rated to overcome at least twice the pressure drop of the higher-rated air filter to ensure the system operates correctly and is not damaged.
Air Handling Unit Configuration
Once the minimum filter efficiency has been determined, the next step is to review the air handling unit the filter will be installed in. Assuming the unit is in good operating condition and capable of running at rated capacity, the first detail to notice is if the unit is designed to hold a single stage of air filtration or is a multi-stage air filtration unit.
Single-stage: First determine the maximum air filter depth that will fit into the filter holding frame or sliding track. This is important because there are more air filtration options available with deeper filters and deeper filters generally have a lower pressure drop. Single-stage units generally hold one, two, or four-inch filters, but there are some that can hold six-inch or deeper filters. With a single-stage unit, there is only one opportunity to remove all the harmful contaminants from the air so selecting the best filter is important.
Multi-stage: While air handling units can contain three or even four stages of air filtration, two stages are the most common. In multi-stage units, the first stage is known as the prefilter and the last stage is known as the final. The function of the prefilter is to capture larger particles while allowing finer particles to pass through. The final air filter is specifically designed to capture smaller particles. Using a prefilter protects the final filter from quickly being overwhelmed with large particles and extends its service life. The prefilter should be a lower MERV value, typically MERV 8 or 9, and the final filter in schools and universities should be a MERV 13 or higher.
Installing Air Filters
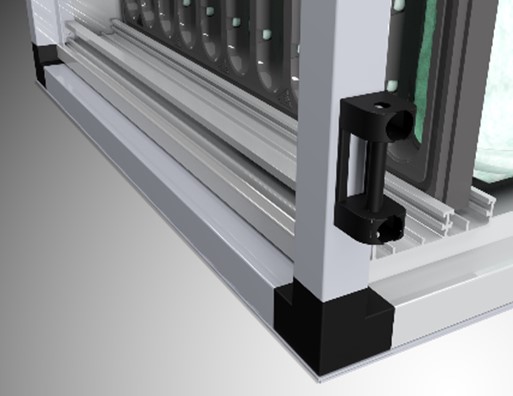
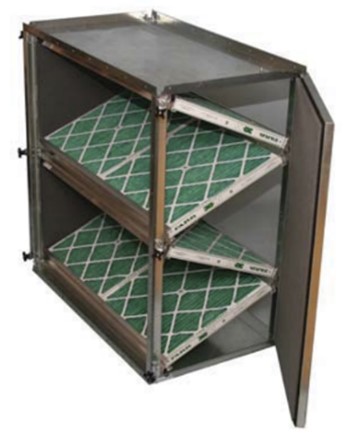
There are three basic methods to hold filters within an air handling unit; a single holding frame for built-up banks, tracks that multiple filters (with or without headers) sit in a vertical position and are slid into position, and V-bank track configuration tracks set at an angle.

Monitoring Air Filters
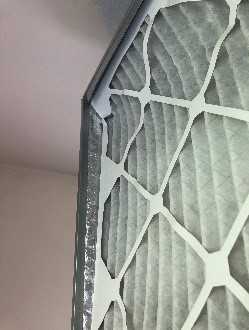
Air filters can be exposed to harsh weather conditions like rain, snow, and ice. They can experience turbulent airflow and depending on the situation, high dirt loads. As they are often out of sight, it’s important to establish procedures to monitor the condition of the air filter on a regular basis otherwise, a damaged filter can go unnoticed for a long period of time while dirty air is bypassing into the building.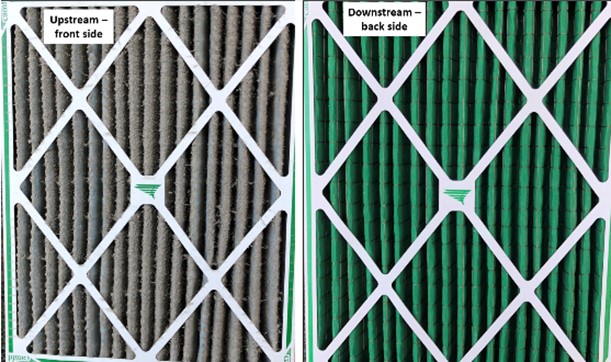
Pressure Drop
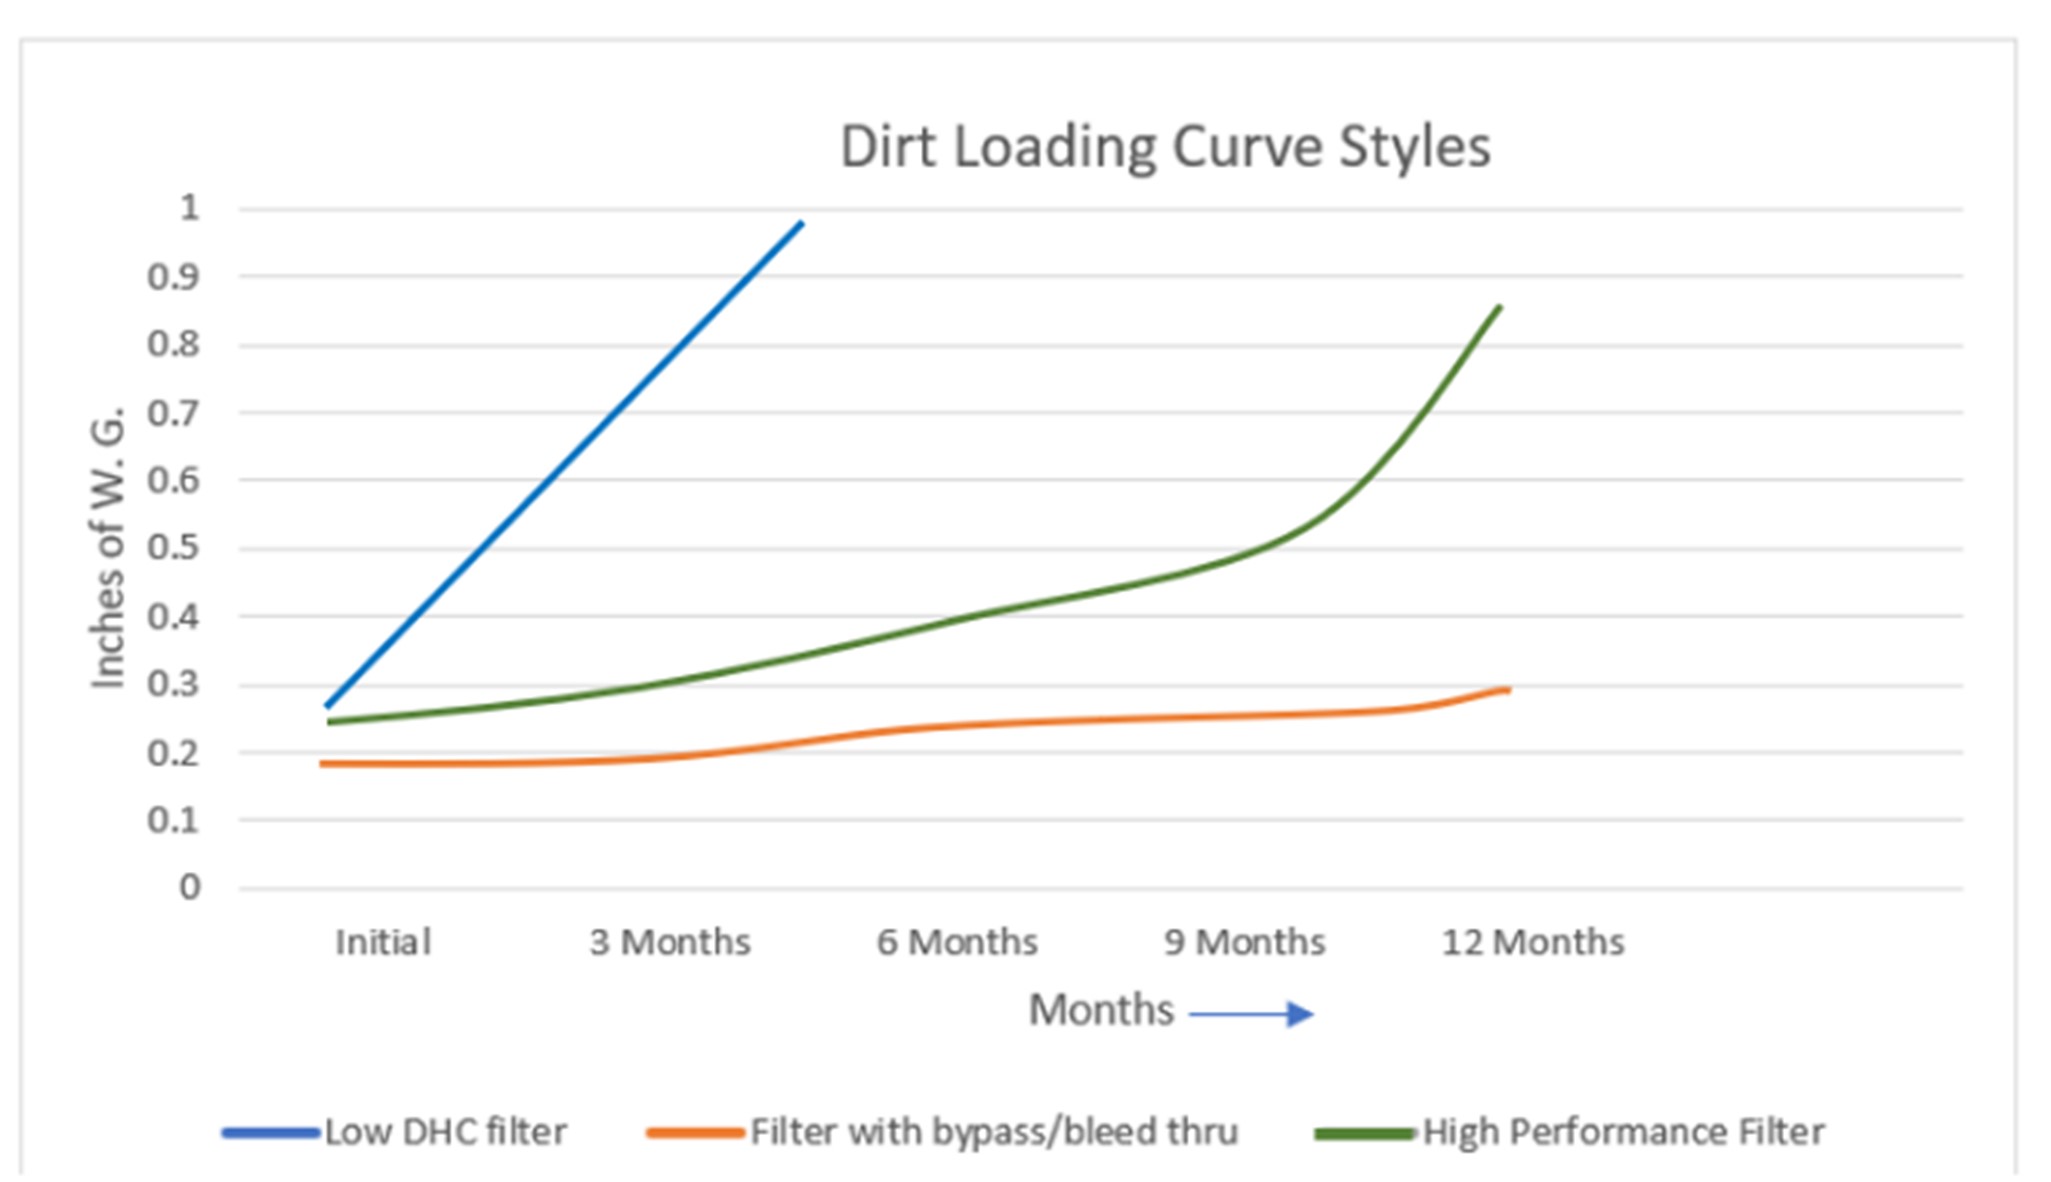
The preferred method is to monitor the condition of an air filter using pressure drop. All air filters exhibit resistance to airflow as air works its way through the body of the filter. This is known as pressure drop and is typically measured using a Magnehelic gauge and displayed in inches of water gauge. As dirt is captured, resistance increases as the air has fewer pathways through the filter. Regularly monitoring and recording pressure drops creates historical trends that can be used to base maintenance around.Recording pressure drop helps to develop dirt loading curves which can be an indication of the performance of an air filter. In the example below, the blue line was produced from a filter with low DHC so the pressure drop increased rapidly. If this filter had not been changed, the pressure would have dropped to near zero when the filter buckled and collapsed under the pressure. The filter represented by the orange line never showed an increase in pressure drop which on paper would be an indication of a good air filter. However, visual inspection revealed unfiltered air was bypassing the sides of the collapsed filter which was why the pressure was not increasing.
The green line revealed the optimum air filter in this example. The curve displayed a gradual increase in pressure drop until near the end of its service life when it increased much more rapidly. This indicates an air filter that loaded evenly across the entire surface area and utilized all the available filtering area.
When To Change Air Filters
If historical trends or reliable dirt-loading curves have not been developed, a rule of thumb to follow when first installing filters is to base filter changeouts by scheduling changes when the initial pressure drop has doubled. The theory behind this is at that point, the cost of energy to push air through the filters is higher than the cost of the filter, labor, and disposal expense. This is a particularly good rule for single-stage units and prefilters in multi-stage units.
However, this is not an absolute rule, and many situations occur when filters should be changed long before the pressure drop doubles. Final filters with high-performance prefilters can maintain a low-pressure drop for a year or more. But caution is warranted; since filters capture all sorts of unknown particles out of the air, a firm service life is often established to ensure the safety of building occupants.
How To Dispose Of Air Filters
While some metal filters are designed to be cleaned and reinstalled, any fabric media-based air filter should be disposed of when the service life is over. Air filters should not be vacuumed or compressed air blown through in an attempt to extend service life as this will damage the filter media and create a path of bypass once reinstalled. State and local municipalities may have requirements for filter disposal which should be followed.
During COVID, there were cautions issued by organizations about the potential risk from active viruses caught within the body of an air filter. While perhaps this response was overly cautious, common sense dictates general protective wear is recommended. However, in areas where exhaust filters are used specifically to remove air from an area like a science research lab, work with the department to understand the potential contaminants and take additional precautions as necessary.
BLEACHER INSPECTION
The bleachers in your facilities are to be inspected annually to insure the safety of your students, faculty, and spectators. The person performing the inspection should be qualified to do so and must document the details of the inspection process. Having your permanent bleachers be a part of your BCS is definitely a good idea, as repairs or replacement of permanent bleachers can be extensive.
There are three types of bleachers typically found at most schools which must be inspected: Permanent, Portable, and telescopic. Portable bleachers are those usually around your baseball and softball fields. These are usually bleachers that can be relocated if necessary. Permanent bleachers are those anchored to the ground like those around your football or soccer fields. Telescopic bleachers are found indoors in your gymnasium and pool areas. These bleachers can be extended outward when used either manually or by some type of powered motor. Bleachers should have non-skid surfaces in the walk areas to reduce the chance of a slip and fall. Some bleachers are extened and retracted by hand, while others have a motorized system to move them. The wheels on the bottom of your bleachers need to be clean and rotate freely. A wheel not operating in the proper manner can damage the finish or wood on your gymnasium floor. You should do regular checks on your bleachers to be sure the wheels are not damaging your gymnasium floor. Bleacher inspections should also look for any loose or worn parts, missing fasteners, or broken pieces that could cause injury.
Inspection of Telescopic Bleacher:
- Columns, cantilever arms, caster horns, wheel pins, tier catches (row locks), guide rods, upper and lower guides, stop pins, lift angles, floor and wall attachments, wall bucks and all frame weldments.
- Deck nosing, riser beams, end caps, deck supports and deck support wheels, section connectors, diagonal bracing, cross and tension bracing, brace connections, frame connections, outrigger, hinges, truncation supports (if applicable), handles, end panels, warning plates, chairs/bench seating, seat supports, seat boards and riser boards.
- Transition and intermediate steps, step hinges; step end caps, rubber pads, step lighting, step connections and safety walk tape.
- End Rails, front rails, rear rails, aisle step rails, rail socket attachments, hardware (set screws), socket and railing weldments.
- Wiring and wire harness, disconnects, contactors, fuses, circuit breakers, receptacles, plug adapters, aisle lights and wiring, transformers, limit switches, delay switches, relay boxes, junction boxes, pendant control cord and receptacle box.
- Power Frame System: Motor and gearbox, bearings, roller chain, master links, drive wheels, drive shafts, weights, torque tubes, spacer plates, torsion springs, mounting brackets, motor alignment and weight adjustments.
- Engineered to order or (ETO) products related to jobs based upon the required operational usage specified by Owner, but not limited to items such as; end curtains, end panels, hydraulic assist dollies, forklift assist systems, Air compressed lifting systems, floor pins and program supports.
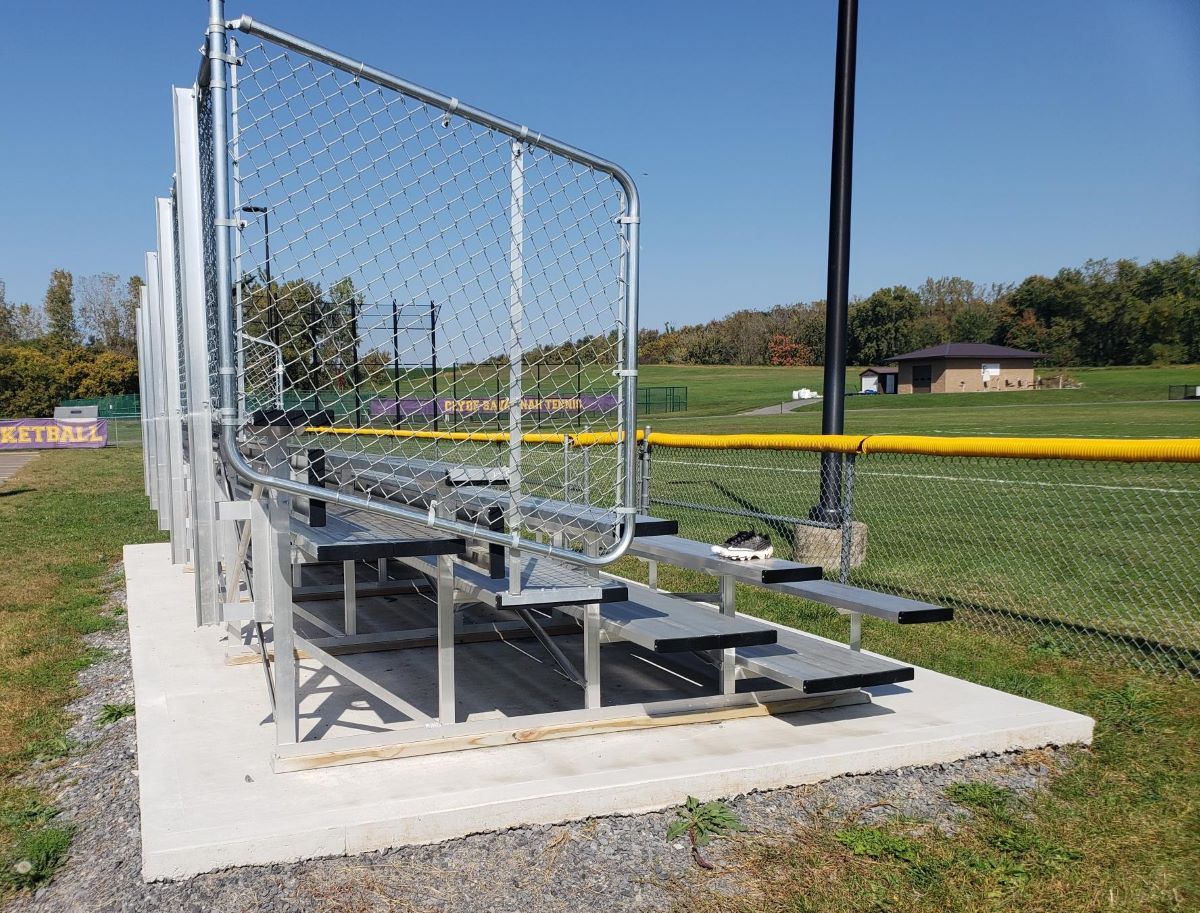
Inspection of Outdoor Bleachers
- Make sure bleachers are level and stable.
- Bleachers should not wobble when you walk on them.
- Inspect bleacher structure for signs of rust or rot.
- Check for broken welds.
- Inspect for loose or missing fasteners.
- Check for damaged or missing cross member braces.
- Check guardrails for missing or loose fasteners.
- Be sure guardrails/handrails are ridgid and not moved easily.
- Check seating and foot boards for missing or loose fasteners.
- Inspect for broken, splintered, or cracked seating and foot boards.
- Verify that seating and foot boards are not warped.
- Check for any tripping hazards.
Automated External Defibrillators (AEDs)
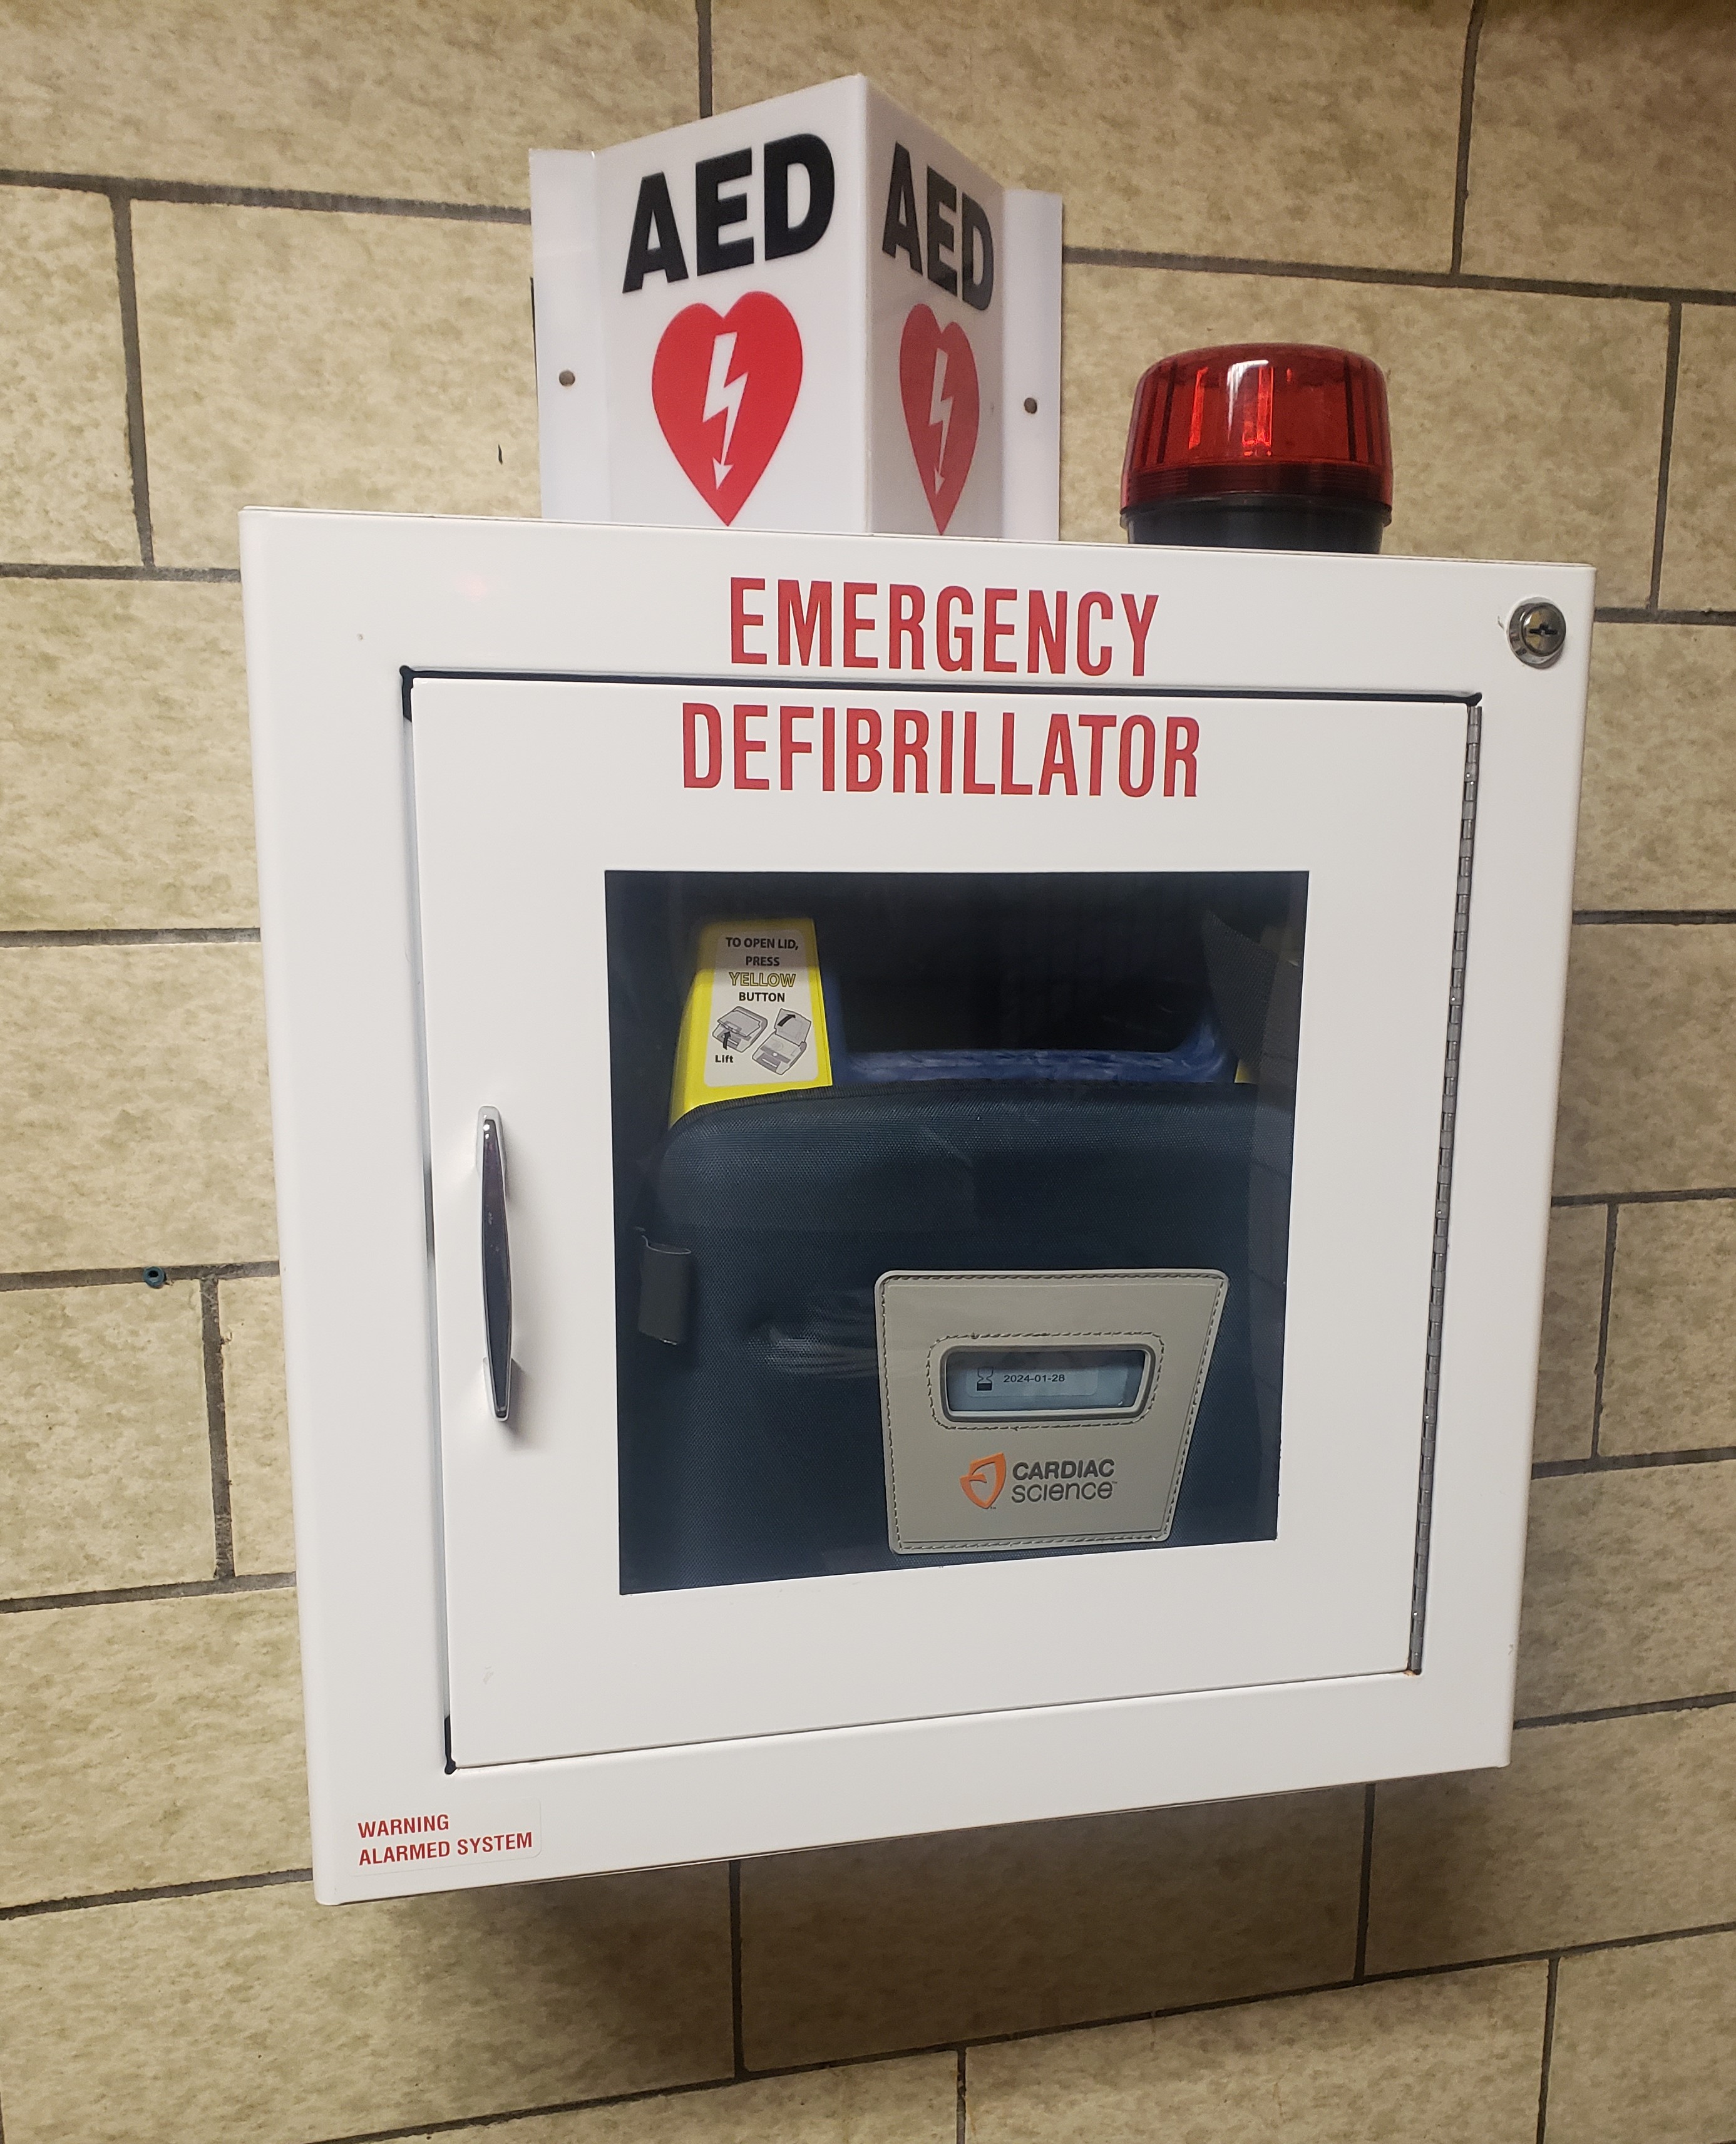
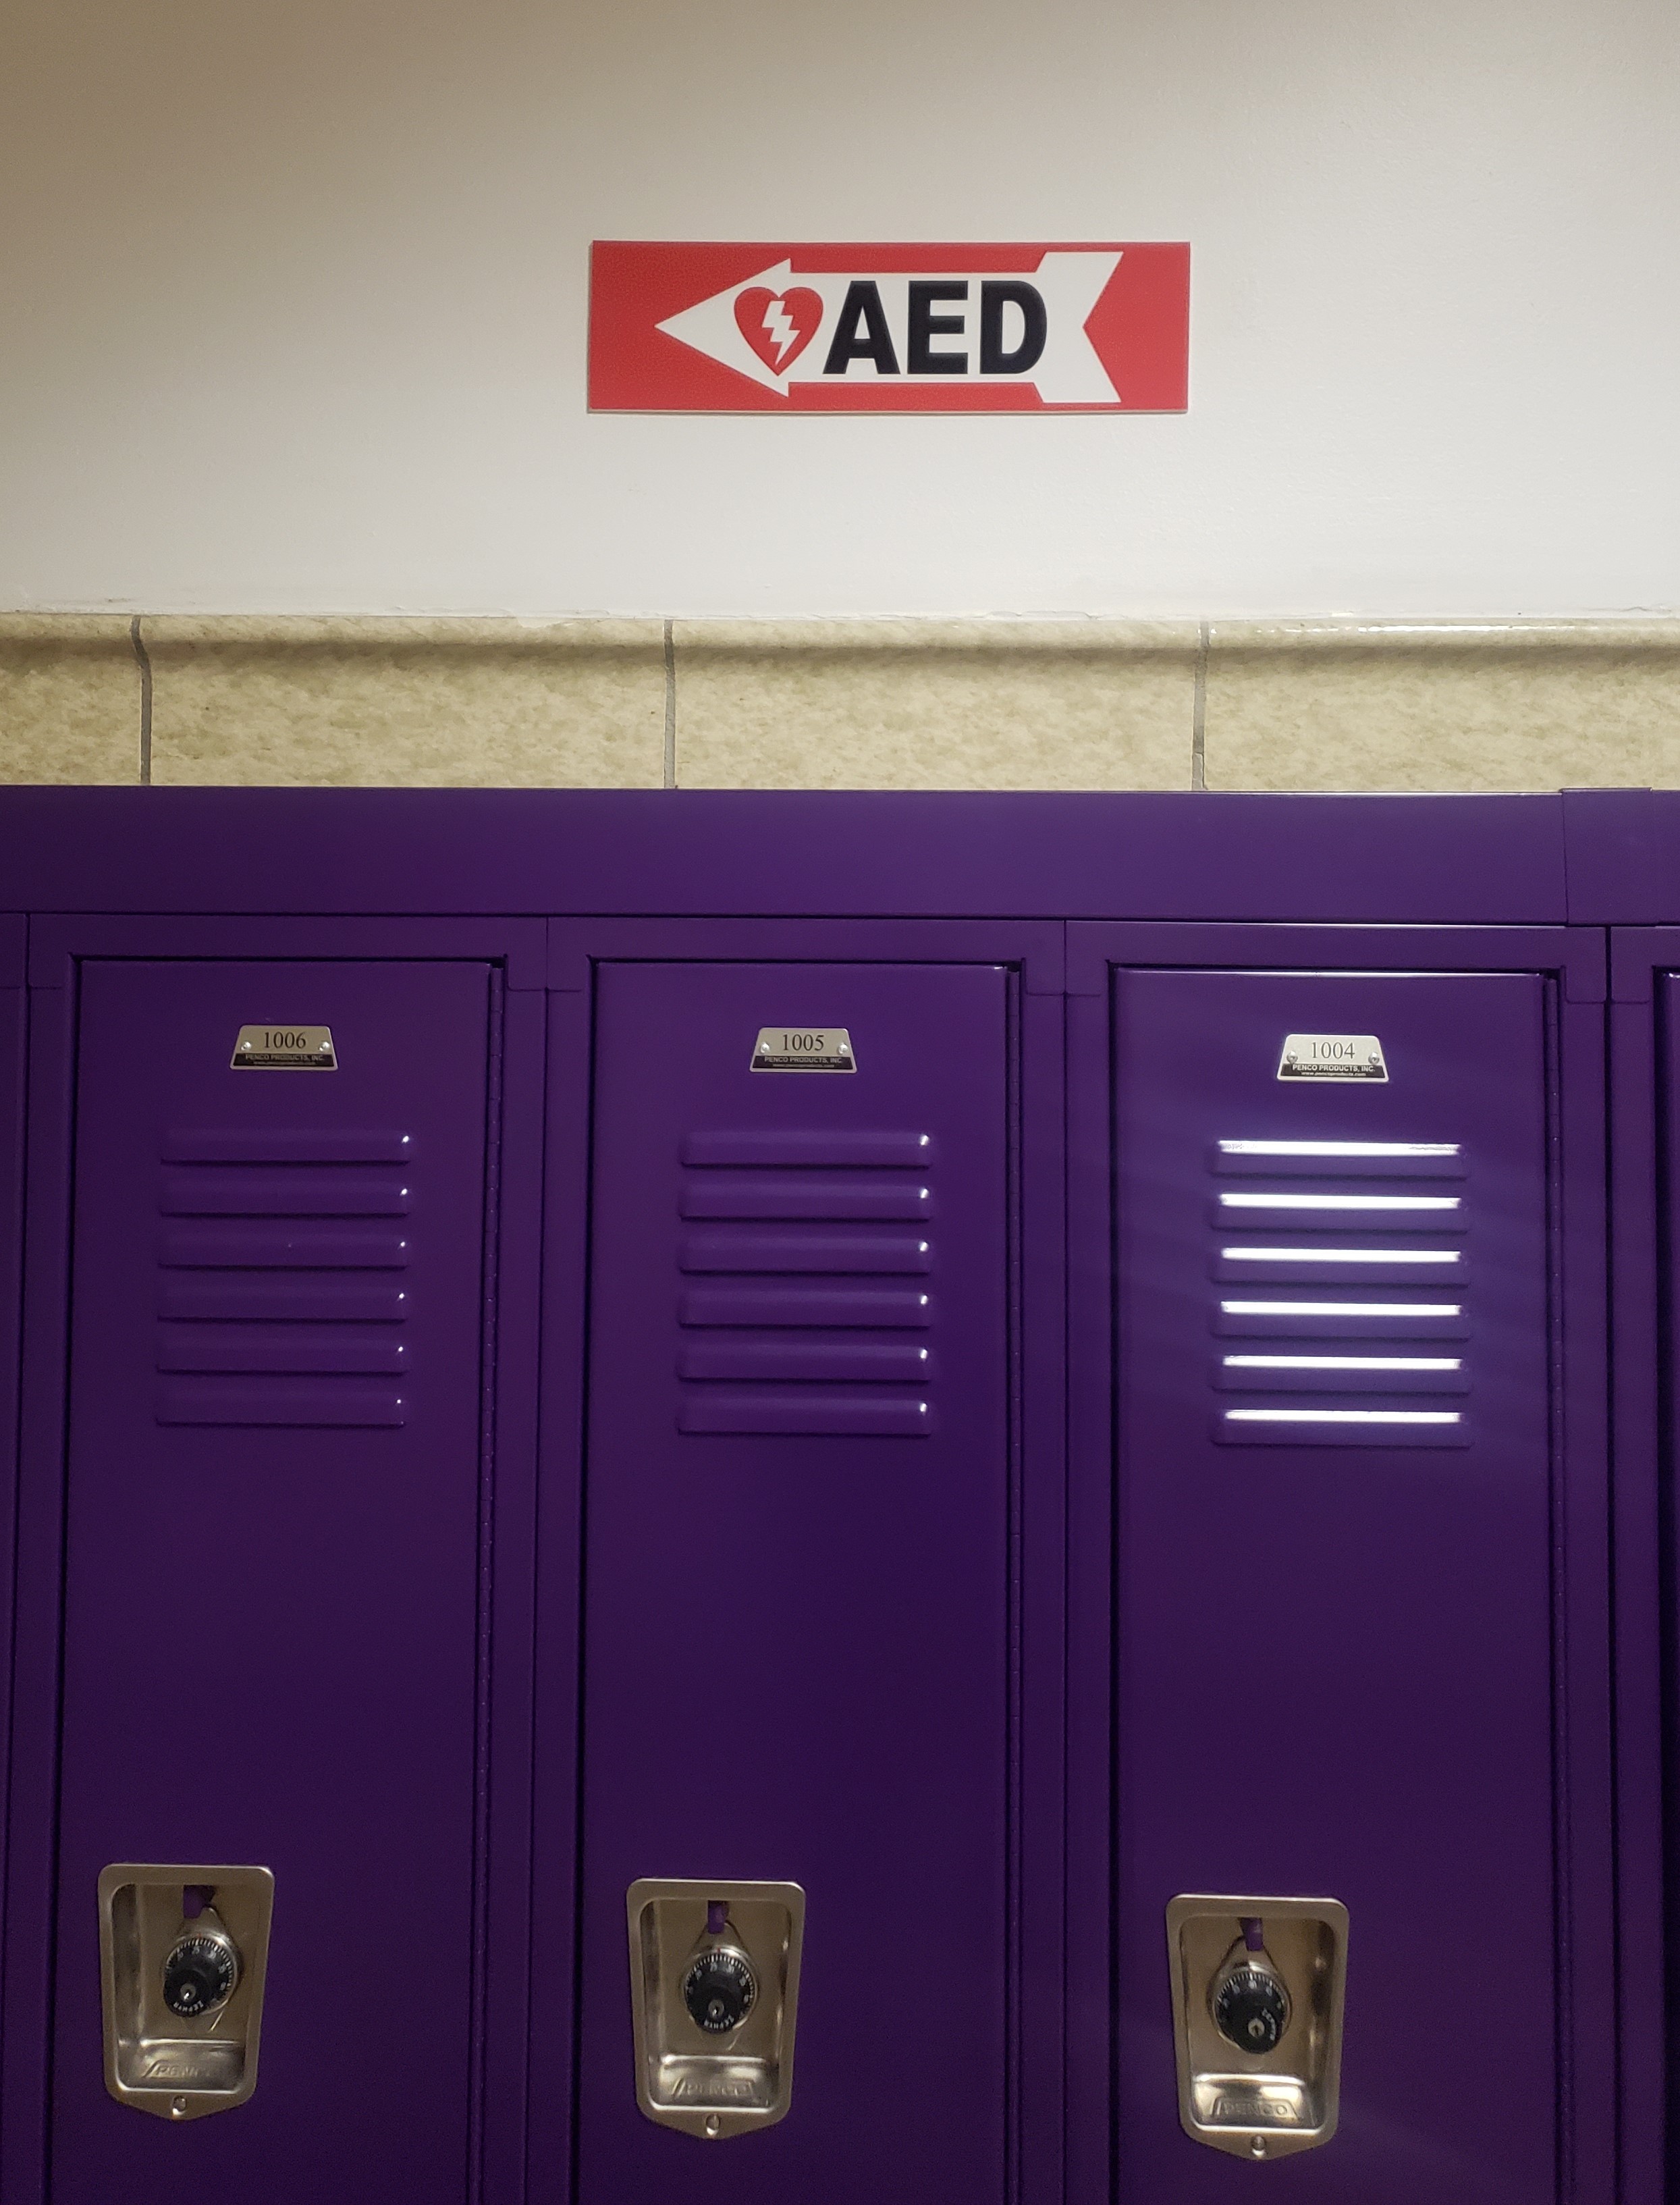
Every district has AEDs and they must be located reasonably in your buildings and must also be clearly identified for fast and easy access. AEDs should be within 3 minutes of every location within your school. AEDs should be present at athletic events and accessible and not locked in an office. You should have an AED in these specific areas: Fitness Center, Gymnasium, Nurses Office, and Swimming Pool. You should have a decal on your school doors indicating an AED is in the building. You should make use of wayfinder signs to help find the location of an AED.
Public Health Law, Article 30, Section 3000-b
Education Law, Section 917
Section 136.4 of the Regulations of the Commissioner of Education
Effective Date - September 1, 2002
Maintenance Checks
- Check to see if the AED shows any visible damage.
- If your AED is stored in an alarmed cabinet, verify the audible alarm is functioning.
- The active status light should be green.
- The AED must not be beeping.
- A log must be kept and maintained for the monthly maintenance checks.
- The batteries and electrode pads have expiration dates. Be sure this is noted for each AED and these components are never expired.
CLICK HERE for the AED Log in PDF format.
CLICK HERE for the AED Log in Word format.
Compliance Issues
Definitions
Automated External Defibrillator (AED) – A medical device approved by the United States Food and Drug Administration that is:
- Capable of recognizing the presence or absence, in a patient, of ventricular fibrillation and rapid ventricular tachycardia.
- Capable of determining, without intervention by an operator, whether defibrillation should be performed on the patient.
- Upon determination that defibrillation should be performed, automatically charges and requests delivery of an electrical impulse to the patient’s heart.
- Upon action by an operator, delivers an appropriate electrical impulse to the patient’s heart to perform defibrillation.
Emergency Health Care Provider
- A physician with knowledge and experience in the delivery of emergency cardiac care.
- A hospital licensed under Article 28 that provides emergency cardiac care.
- Public Access Defibrillation (PAD) Provider – A person, firm, organization or other entity possessing or operating an AED.
- Nationally Recognized Organization – A national organization approved for the purpose of training people in the use of an AED.
- Posting Notice – The public access defibrillation provider shall post a sign or notice at the main entrance to the facility or building in which the AED is stored, indicating the location where any such AED is stored or maintained in such building or facility on a regular basis.
- A person, firm, organization or other entity may purchase, acquire, possess and operate an AED pursuant to a collaborative agreement with an emergency health care provider. This includes a written agreement, written practice protocols and policies and procedures to assure compliance with the law. The PAD provider shall file a copy of the agreement with the Department of Health and with the appropriate regional council prior to operating the AED.
- No person may operate an AED unless the person has successfully completed a training course in the operation of an AED approved by a nationally-recognized organization.
- The PAD provider shall cause the AED to be maintained and tested according to applicable standards of the manufacturer and government agencies.
- The PAD provider shall notify the regional council of the existence, location and type of any AED it possesses.
- Every use of an AED shall be immediately reported to the appropriate local emergency medical service system, as required, and the emergency health care provider.
Collaborative Agreement
Possession and Operation of an AED
Application of Other Laws
- Operation of an AED shall be considered first-aid or emergency treatment for the purpose of any statute relating to liability.
- Operation of an AED shall not constitute the unlawful practice of a profession under Title VII of the Education Law.
To Implement an AED Program
- Identify a Medical Director – The role of the medical director should be defined in the collaborative agreement. The American Heart Association provides a Physician Oversight Package explaining the medical director’s role.
- Contact your local EMS – New York State Law requires that a Notice of Intent and Collaborative Agreement be filed with the local EMS agencies:
- Identify a Core Group – Identify various staff in the decision making process.
- Review AED Manufacturers and Available State and Local Contracts – Contact AED manufacturers to arrange for demonstrations, facility walk-through and financial requirements. Some manufacturers may include equipment, training and medical director in one package.
- Emergency Plan – AED protocols and procedures should be included in your emergency plans.
- Training – Train personnel with programs such as the American Heart Association’s Heartsaver/AED course.
- File Paperwork – File your Notice of Intent and Collaborative Agreement with the local EMS agency and notify the local EMS/Ambulance Squad that you have AEDs.
- Awareness – Be certain the AEDs are available and accessible.
AEDs in Schools
- Requires each school district to provide and maintain on-site in each instructional school facility AEDs in appropriate quantity and properly placed to assure access during emergencies.
- The following shall be considered:
- The number of students, staff, and other individuals reasonably anticipated to be within the facility.
- The physical layout of the facility including: Location of stairways and elevators; number of floors; location of classrooms and other areas where large congregations of individuals may occur, and other unique design features of the facility.
- Instructional School Facility means a building or other facility maintained by a school district where instruction is provided to students pursuant to its curriculum.
- School-sponsored or school-approved curricular or extracurricular events or activities means events or activities of a school district that are associated with its instructional curriculum or otherwise offered to its students.
- School-sponsored athletic contest means an extra class intramural athletic activity of instruction, practice and competition for pupils in grades 4 through 12.
- School-sponsored competitive athletic event means an extra class interschool athletic activity of instruction, practice and competition for pupils in grades 7 through 12.
- Whenever an instructional school facility is used for a school-sponsored or school-approved curricular or extracurricular event or activity, the public school officials and administrators responsible for such facility shall ensure the presence of at least one staff person who is trained, pursuant to Public Health Law, in the operation and use of an AED.
- During any school-sponsored athletic contest or school-sponsored competitive athletic event held at any location, public school officials and administrators responsible for such contest or event shall ensure that AEDs are provided on-site and that at least one staff person who is trained, pursuant to public health law, in the operation and use of an AED, is present during such contest or event.
- Each AED device shall be approved by the Food & Drug Administration for adult use and/or pediatric use, as appropriate for the population reasonably anticipated to be served by such device, and shall be used according to the manufacturer’s instructions with consideration of operating procedures, maintenance and expiration date.
The following definitions will apply:
Carbon Monoxide Detector requirements became a requirement starting in 2015. The full SED document on CO Detectors can be found HERE There are two types of systems that may be used to detect carbon monoxide and sound an alarm. They are self- contained (residential style) carbon monoxide alarms, and carbon monoxide detection systems. The use of either type of system or both types of systems, within a building in accordance with regulations is permissible. A school district/BOCES would need to determine for itself which system (or systems) is best to be used in each of their buildings. The carbon monoxide systems can be a part of your fire alarm system, where the devices are wired into your fire alarm panel and are monitored just like your smoke heads. The carbon monoxide system can also be a stand alone system with all the detectors wired to a central control panel that is monitored.
Education (school) buildings will require the detection of carbon monoxide in the following areas under the new regulations: all classrooms that contain devices that may emit products of combustion, such as science lab with gas burners; all classrooms adjacent to garages; areas served by fuel fired heating/ventilating and makeup air units; areas served by heating/ventilating units that pull air from spaces that contain equipment or systems that may emit products of combustion; and non-classroom area(s) that contain devices that may emit products of combustion.
ALARMS WILL BE PLACED IN:
- Every classroom containing a carbon monoxide source in the space (See guidelines for examples);
- Every classroom adjacent to a garage (or area that has an overhead door).
- Every non-classroom space containing a carbon monoxide source in the space (Alarm generally to be placed between the source equipment and the door (or other opening) providing access between the space and other areas of the building). Such rooms would be the kitchen and boiler room.
- Outside every non-classroom space containing a carbon monoxide source in the space at a location that maximizes detection of and notification of the building occupants.
- Either all spaces served by a carbon monoxide-producing heating/ventilating/air conditioning (HVAC) system (See definition in guidelines.); or alternately two interconnected alarms (one in the first space served by the carbon monoxide-producing HVAC system, and the second located in an approved location). If two interconnected alarms are used, the approved location may be the corridor in the vicinity of the area served by the HVAC system, or a main office area. The intent is to locate the second alarm in an area that would result in the fastest notification of the occupants.
- Rooms adjacent to the boiler room and outside the entrance doors to the kitchen and boiler room.
INSPECTION PROCEDURE
Carbon Monoxide Detection Systems
- Replace CO Detector when Required by Manufacturer Instructions and Recommendations
- Replace CO Detector when Not Operating Properly
- Replace CO Detector when End‐Of‐Life Signal is Produced
- Inspection Testing Maintenance Periodically Per NFPA 720 [Code Enforcer Can Require More Frequent ITM When Warranted] Exception: Inaccessible Due to Safety ‐ If Approved, Test During Shutdowns at 18 Months Intervals
- Inspection and Test Intervals ‐ Annual, Semiannual, Quarterly, Monthly, Weekly
- CO detectors that are hard wired into your fire alarm system are to be checked annually when your fire alarm system has its annual inspection and PM.
- Functional System Detector Testing Annually for Detectors Installed After January 1, 2012
- Electronic Checks Using Magnets, Analog Values, Or Other Means are Not Acceptable Maintenance Interval ‐ Per Manufacturer's Instructions and As Needed
- Maintain ITM records for One Year After Next Required ITM Activity of that Type Per NFPA 720
- Supervising Station Must Maintain Records for 12 Months Per NFPA 72
Carbon Monoxide Alarms (Single Stand Alone Device)
- Inspection Testing & Maintenance Per Manufacturer Instructions and NFPA 720
- Inspect and Test Monthly
- Replace Batteries at Intervals Per Manufacturer's Instructions
- Replace CO Alarm when Required by Manufacturer Instructions
- Replace CO Alarm when Not Operating Properly
- Replace CO Alarm when End‐Of‐Life Signal is Produced
Carbon Monoxide NYCRR Code
Monoxide Alarms in Commercial Buildings
Chapter 541 of the Laws of 2014
19 NYCRR Part 1228
Section 1228.4
Effective Date - June 27, 2015
Transition Period: June 27, 2015 – June 27, 2016
Compliance Date - June 27, 2016
Carbon Monoxide Detection shall be provided in accordance with the provisions of Section 1228.4 in every Commercial Building that: (1) contains any carbon monoxide source (including, but not limited to, any garage or any other motor vehicle-related occupancy) and/or (2) is attached to a garage and/or (3) is attached to any other motor vehicle-related-occupancy. This covers the provision of carbon monoxide detection, and the application, installation, performance, and maintenance of carbon monoxide alarms and carbon monoxide detection systems in new and existing commercial buildings. The term Commercial Building means any new or existing building that is not a one-family dwelling, a two-family dwelling, or a building containing only townhouses.
Definitions
- Carbon Monoxide Source: Any appliance, equipment, device or system that may emit carbon monoxide (including, but not limited to, fuel fired furnaces; fuel fired boilers; space heaters with pilot lights or open flames; kerosene heaters; wood stoves; fireplaces; and stoves, ovens, dryers, water heaters, and refrigerators that use gas or liquid fuel) and other motor vehicle related occupancies.
- Central Location: The point that, in the judgment of the authority having jurisdiction, maximizes (1) the detection of carbon monoxide, (2) the notification of occupants in normally occupied areas, and (3) the notification of occupants prior to entering normally occupied areas.
- Commercial Building: Any new or existing building that is not a one-family dwelling, a two family dwelling, or a building containing only townhouses.
- Classroom: A room or area that (1) is located in a school, (2) is a place where classes are taught, and (3) is occupied or capable of being occupied by six or more persons (including students and teachers) at any one time. The term school means any building used, in whole or in part, for educational purposes but does not include a school attended only by students above the 12th grade.
- Detection Zone: Means a story of a commercial building, however:
- If a story is arranged so that two or more separate carbon monoxide-producing HVAC systems are used to serve separate portions of the story, each such portion of the story shall be deemed to be a separate detection zone.
- If a story contains one or more classrooms, each classroom shall be deemed to be a separate detection zone and the portion, if any, of the story that is not a classroom shall be deemed to be a separate detection zone.
- If a portion of a story is used as a garage, the portion used as a garage shall not be deemed to be a detection zone and the portion not used as a garage shall be deemed to be a detection zone.
- If an entire story is used as a garage, such story shall not be deemed to be a detection zone.
- Existing Commercial Building: Means a commercial building that was constructed prior to December 31, 2015.
Commercial Buildings Required to have Carbon Monoxide Detection
- General Rule:
- Carbon monoxide detection shall be provided in every commercial building that (i) contains any carbon monoxide source and/or (ii) is attached to a garage and/or (iii) is attached to any other motor vehicle-related occupancy.
- Exceptions:
- Carbon monoxide detection shall not be required in a commercial building that is (a) classified entirely in storage Group S or Utility and Miscellaneous Group U under Chapter 3 of the 2010 BCNYS and (b) occupied only occasionally and only for building or maintenance equipment.
- Carbon monoxide detection shall not be required in a commercial building that is a canopy (as defined in the 2010 FCNYS).
Detection Zones Required to be Provided with Carbon Monoxide Detection
- General Rule: Where a commercial building is required to have carbon monoxide detection, carbon monoxide detection shall be provided in each detection zone and in which at least one of the following triggering conditions exists:
- Triggering Condition 1: The presence of any carbon monoxide source in a detection zone.
- Triggering Condition 2: The presence in a detection zone of a duct opening or other outlet from a carbon monoxide-producing HVAC system unless (a) carbon monoxide detection is provided in the first room or area served by each main duct leaving the carbon monoxide source in such carbon monoxide-producing HVAC system and (b) the signals from the carbon monoxide detection equipment in the first room or area served by each such main duct are automatically transmitted to an approved location.
- Triggering Condition 3: The presence of a garage or other motor vehicle-related occupancy in location that is adjacent to a detection zone even if there are no openings, penetrations, or air transfer openings between the detection zone and the adjacent garage or other motor vehicle-related occupancy. However, in the case of a detection zone that is not a classroom (a) it shall not be deemed to be a triggering condition if the garage or other motor vehicle-related occupancy is attached to, but not located in, the commercial building in which such detection zone is located, and the attachment between the garage or other motor vehicle-related occupancy and the commercial building is only through a covered walkway that is open (without sidewalls or drops) on 50 percent or more of its perimeter and (b) the presence of an adjacent garage shall not be deemed to be a triggering condition for such detection zone if the garage is attached to, but not located in, the commercial building in which the detection zone is located, and the garage is an open parking garage that complies with Section 406.3 of the 2010 BCNYS.
- Exceptions for Detection Zones that are not Classrooms: Carbon monoxide protection shall not be required to be provided in such detection zones if (i) such detection zone has ambient conditions that would, under normal conditions and with all required ventilation and exhaust systems installed and operating properly, activate the carbon monoxide detection devices that otherwise would be required in such detection zone or (ii) such detection zone is open (without sidewalls or drops) on 50 percent or more of its perimeter, and there is no area that could be occupied within such detection zone that is not open on 50 percent or more of its perimeter.
Placement of Carbon Monoxide Detectors
- Where a detection zone is required to be provided with carbon monoxide detection, the carbon monoxide detection shall be placed as follows:
- Detection zones less than 10,000 square feet: The carbon monoxide detection shall be placed in a central location within such detection zone.
- Detection zones 10,000 square feet or greater: The carbon monoxide detection shall be placed in a central location within such detection zone and at such additional locations within such detection zones may be necessary to assure that no point in the detection zone is more than 100 feet from carbon monoxide detection.
- Exception: In the case of a detection zone having an area 10,000 square feet or larger that (a) contains only one carbon monoxide source, (b) is not served by a carbon monoxide-producing HVAC system, (c) is not adjacent to a garage or other motor vehicle-related occupancy, and (d) is not a classroom, compliance with the following shall be an acceptable alternative – Carbon monoxide detection shall be placed in a central location within such detection zone and at one of the following locations: (1) in an approved location between the carbon monoxide source and the remainder of the detection zone or (2) on the ceiling of, or at another approved location in, the room containing the carbon monoxide source.
Detection Equipment
- Carbon monoxide detection shall be provided by carbon monoxide alarms or carbon monoxide detection systems as required by the regulation and described below.
Carbon Monoxide Alarms
- Power Source
- General Rule: Carbon monoxide alarms shall receive their primary power from the building wiring where such wiring is served from a commercial source, and when primary power is interrupted, shall receive power from a battery. Wiring shall be permanent and without a disconnecting switch other than that required for overcurrent protection.
- Exception: Carbon monoxide alarms powered solely by a 10-year battery shall be permitted in (a) existing commercial buildings and (b) commercial buildings without commercial electric power.
- Listing – Carbon monoxide alarms shall be listed in accordance with UL 2034.
- Combination Alarms – A combination carbon monoxide/smoke alarm shall not be deemed to satisfy the requirements.
- Interconnection – In a new commercial building, where a carbon monoxide alarm is installed in a normally unoccupied detection zone, such carbon monoxide alarm shall be interconnected with a carbon monoxide alarm that is placed in an adjacent and normally occupied detection zone. An approved sign shall be placed in an approved location in the proximity of each carbon monoxide alarm installed in a normally occupied detection zone that is interconnected to one or more carbon monoxide alarms installed in one or more normally unoccupied detection zones. Such signs shall identify and describe the location of each normally unoccupied detection zone that contains any such interconnected carbon monoxide alarm.
- Manufacturers’ Instructions – Carbon monoxide alarms shall be installed, operated and maintained in accordance with the manufacturers’ instructions. However, in the event of a conflict between the manufacturers’ instructions and the provisions of the regulation, the provisions of the regulation shall be followed.
Carbon Monoxide Detection Systems
- General – Carbon monoxide detection systems shall comply with NFPA 720. Carbon monoxide detectors shall be listed in accordance with UL 2075.
- Combination Detectors – Installed in carbon monoxide detection systems shall be an acceptable alternative to carbon monoxide detectors, provided such combination detectors are listed in accordance with UL 2075 and UL 268.
- Notification Appliances – As defined in NFPA 720, shall comply with NFPA 720.
- Power Source – The power source for carbon monoxide detection systems shall comply with NFPA 720.
Additional Requirements in Group E Occupancies
- In a new commercial building that (i) has an occupant load of 31 or more and (ii) is classified, in whole or in part, as Educational Group E under Chapter 3 of the 2010 BCNYS, carbon monoxide alarm signals shall be automatically transmitted to an approved on-site location that is normally staffed by school personnel during normal school hours.
Maintenance
- Carbon monoxide alarms and carbon monoxide detection systems shall be maintained in accordance with NFPA 720. Carbon monoxide alarms and carbon monoxide detectors that become inoperable or begin producing end-of-life signals shall be replaced as soon as practicable.
Connection of Carbon Monoxide Detection Systems to Control Units and Off-Premises Signal Transmission
- Carbon Monoxide Detection Systems: Shall be installed in accordance with the regulation and shall have off-premises signal transmission in accordance with NFPA 720.
- Arrangement of Carbon Monoxide Detection System Circuits:
- Signal – Carbon monoxide detection systems shall not activate a fire signal to a fire alarm control panel.
- Fire Alarm System Notification – Carbon monoxide detection systems shall not activate any notification appliance that announces a fire alarm or any other alarm that is not distinctive from a fire notification as required by NFPA 72.
- On-Site Notification – When notification of a carbon monoxide detection system is permitted to be transmitted to an approved location, at least one approved notification appliance, shall be provided within every building that transmits a signal to an approved location.

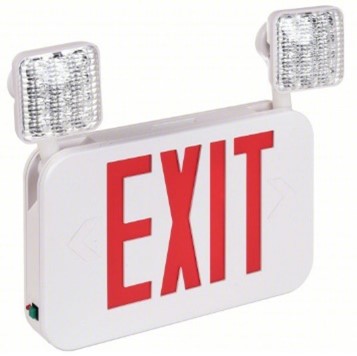
Exit signs stay on all the time and many of them have two sets of bulbs. One set of bulbs operates on building power, and the other set, which comes on only when there is a power failure, are low voltage bulbs that operate on battery power. Therefore, an exit sign that appears to be working normally may not work at all during a power failure, because the low voltage bulbs have burned out or the battery is faulty.
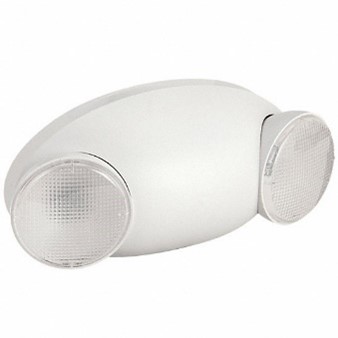
Frequency: According to NFPA 101: Life Safety Code, all Emergency Exit Signs and Emergency Lights are to be inspected and tested both monthly and annually.
Testing Procedure
- Check to see if the sign is currently illuminated, if not check the bulb.
- Check to see if there are any trouble codes flashing (some units will flash an LED if the device is in fault). If so, correct the fault.
- Press or hold the test button per the manufacturer’s directions and verify the exit sign is illuminated in test mode and that the emergency lights have come on if they are present.
- Press or hold the test button for the emergency lights and verify they are working.
- An annual test is also required, with the lights being operated on emergency power for the full minimum of thirty minutes. The best time to perform this test is during your emergency generator test.
- Written records documenting the inspection and testing must be maintained for three (3) Years.
- Monthly Test Procedure - Once a month perform the required 30 second test on all battery-operated emergency and exit lights. You may perform this test yourself by pushing and holding the “push to test” button located on the device for a minimum of 30 seconds to ensure the battery and lights are fully functional. If you notice dimming lights or burnt-out bulbs, you will need to arrange for maintenance or repairs. Repeat this process for each emergency and exit light. Exception: For battery-operated self-testing/self diagnostic exit and emergency lighting which automatically runs 30 second tests and a diagnostic at least 30 days, only a visual inspection needs to be performed monthly.
- Annual Test Procedure - Annually perform the required 90 minute test and inspection described in NFPA 101, Sec. 7.9.3. You may perform this yourself as the manufacturer’s documentation should include instructions. However, many fire protection service providers will provide this service. The only way to effectively test all emergency and exit lights for 90 minutes is by cutting off AC power to the lights. Everything else to the relevant breaker will also lose power, so this test will require appropriate planning.
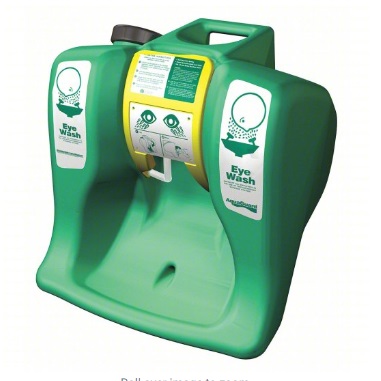
Eyewash stations are to be tested monthly and these inspections should be documented. You can document the inspection in your maintenance software, or you can use inspection tags that are placed on the showers and eyewash stations. There are 2 general types of eyewash stations and those are ones that are plumbed directly to a water supply line, and those that have a water reservoir (gravity fed).
GRAVITY FED EYEWASH STATION
PLUMBED EYEWASH STATION
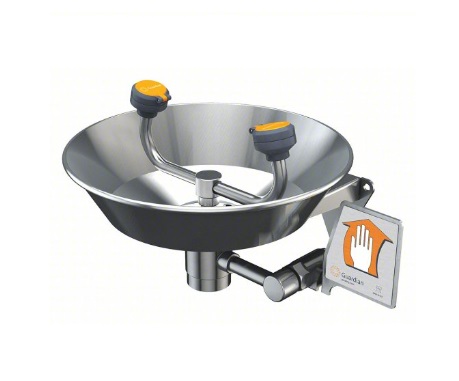
EMERGENCY SHOWERS
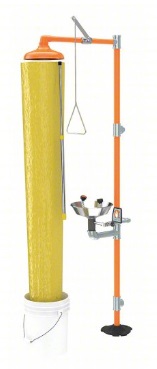
Facilities Planning Notes Concerning Emergency Showers and Eyewashes
- Emergency showers shall be provided for high school chemistry laboratories and any other spaces where chemicals are corrosive, caustic, or immediately injurious to the skin of the occupants.
- Emergency eyewash stations shall be provided in shops, laboratories, and other spaces based on program use where chemicals, paint, or particulates would likely injure the eyes. In addition, chemistry preparation rooms with sinks shall be provided with emergency eyewashes or have an eyewash available within a travel time of ten seconds or approximately 55 feet from the hazard.
- Boiler rooms and maintenance areas where occupants are handling chemicals, paint or particulate injurious to the eyes shall be provided with an emergency eyewash station.
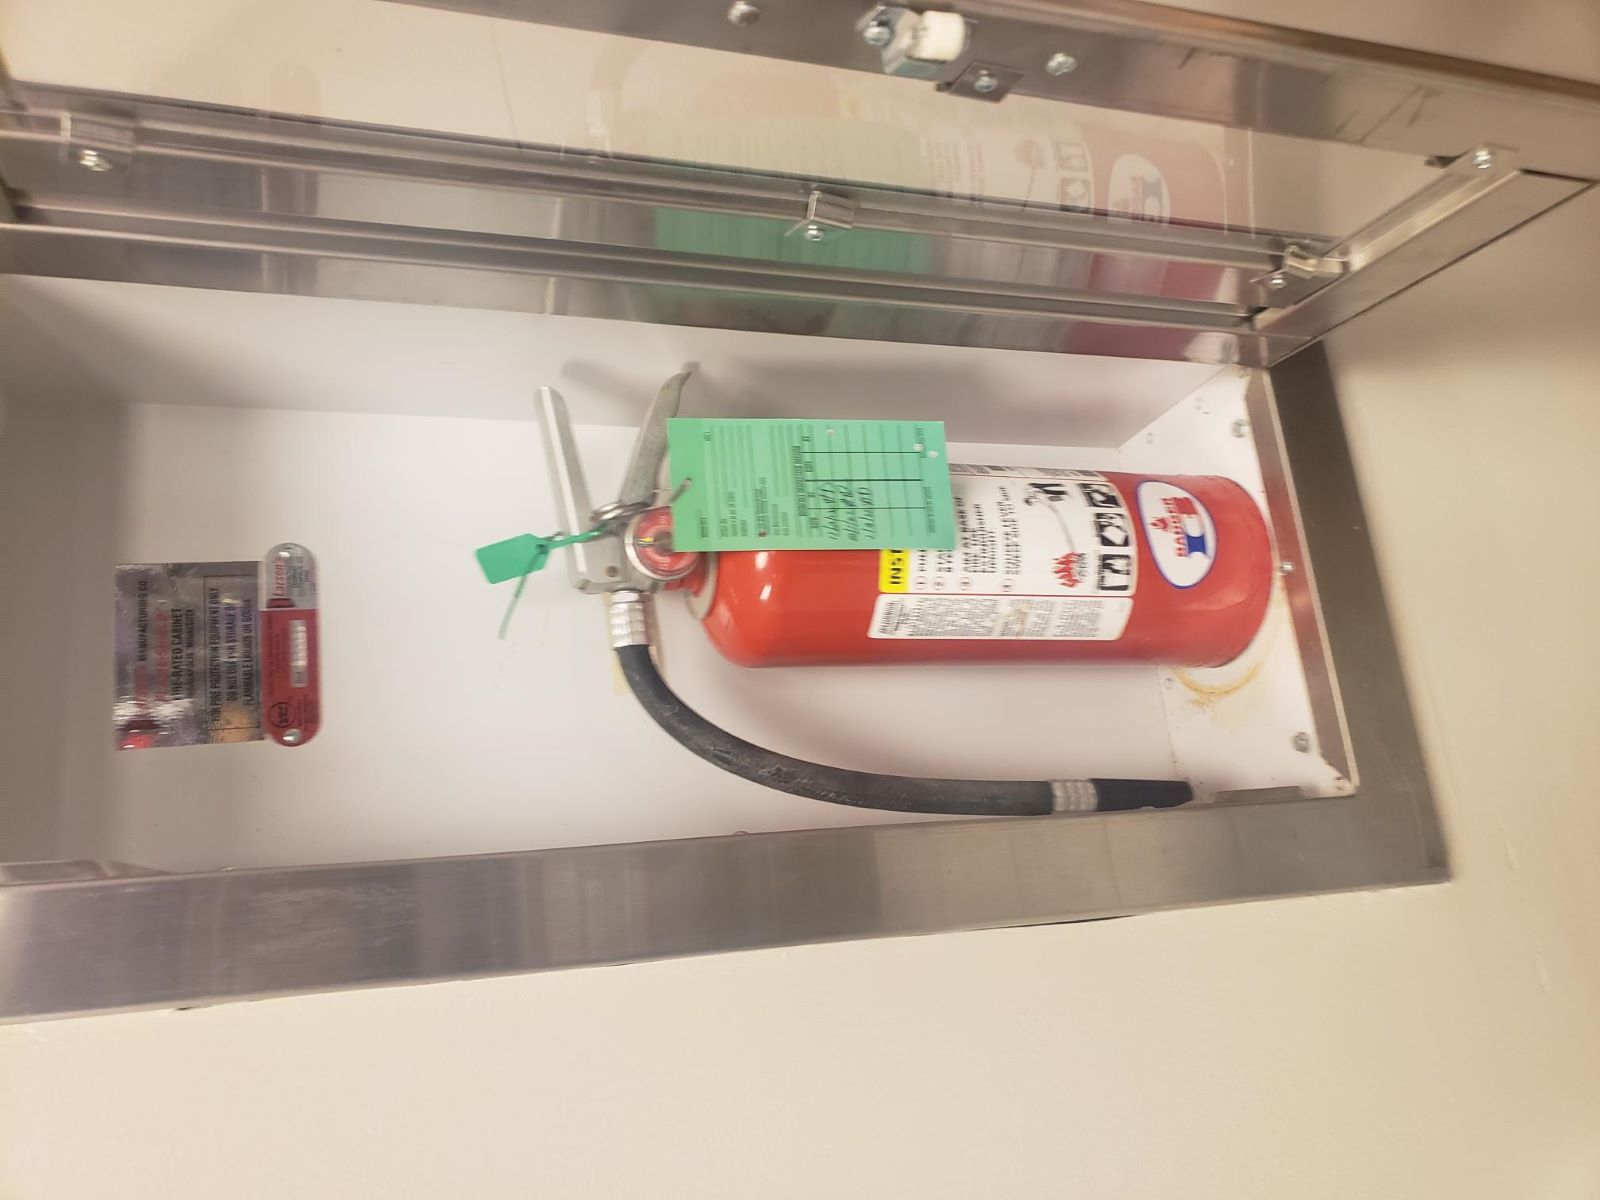
It is strongly recommended to have your fire extinguishers identified and if possible, create a map showing the location of each of your extinguishers. This will greatly assist your staff when doing their monthly inspections to be sure each extinguisher was checked. You should also keep either a spreadsheet or put information in your CMMS that indicates when additional inspections are due for your extinguishers such as the 6- year internal inspection and the 12-year hydrostatic test. When you perform the first monthly check after your fire extinguisher service company has done their annual inspections, you should use the list you created to verify all necessary tests were performed on each extinguisher and that the new inspection tags have been added. See the example below.
Another great way to manage your fire extinguisher inspections is with a map within your CMMS, which allows the person doing the inspection to work against a predetermined total of extinguishers. It reduces the chance of the person doing the checks of missing an extinguisher and the map provides a the visual so the inspections can be done efficiently.
| Extinguisher Number | Extinguisher Location | Extinguisher Manufacturer | Extinguisher Model | Extinguisher Serial Number | 6 Year Inspection Due Date | 12 Year Inspection Due Date |
|---|---|---|---|---|---|---|
| FEX-1 | Hallway by HS-120 | Amerex | B456 | BE-662611 | 10/24 | 10/30 |
| FEX-2 | Hallway by HS-136 | Badger | WP-61 | W-244167 | 10/25 | 10/31 |
| FEX-3 | Hallway by HS-145 | Amerex | 425 | EB-260962 | - | 10/27 |
Dry Chemical Extinguishers
You are expected to check your fire extinguishers monthly and each extinguisher should have an inspection tag attached that is signed and dated by the person doing the inspection. The inspection process is simple, and these are the steps taken to perform this task.
- The fire extinguisher should be accessible, unobstructed and marked so it clearly visible.
- The fire extinguisher should be in its proper location.
- The pressure gauge on the extinguisher should read in the green (operable range). If not, you should need to have the extinguisher serviced.
- Lift the fire extinguisher to verify it is in fact full.
- Verify that the locking pin is in place and the tamper seal/strap is intact.
- For wheeled extinguishers, make sure the condition of the tires, wheels, carriage, hose, and nozzle are acceptable.
- For non-rechargeable extinguishers, operate the push-to-test pressure indicators.
- Initial and date the tag.
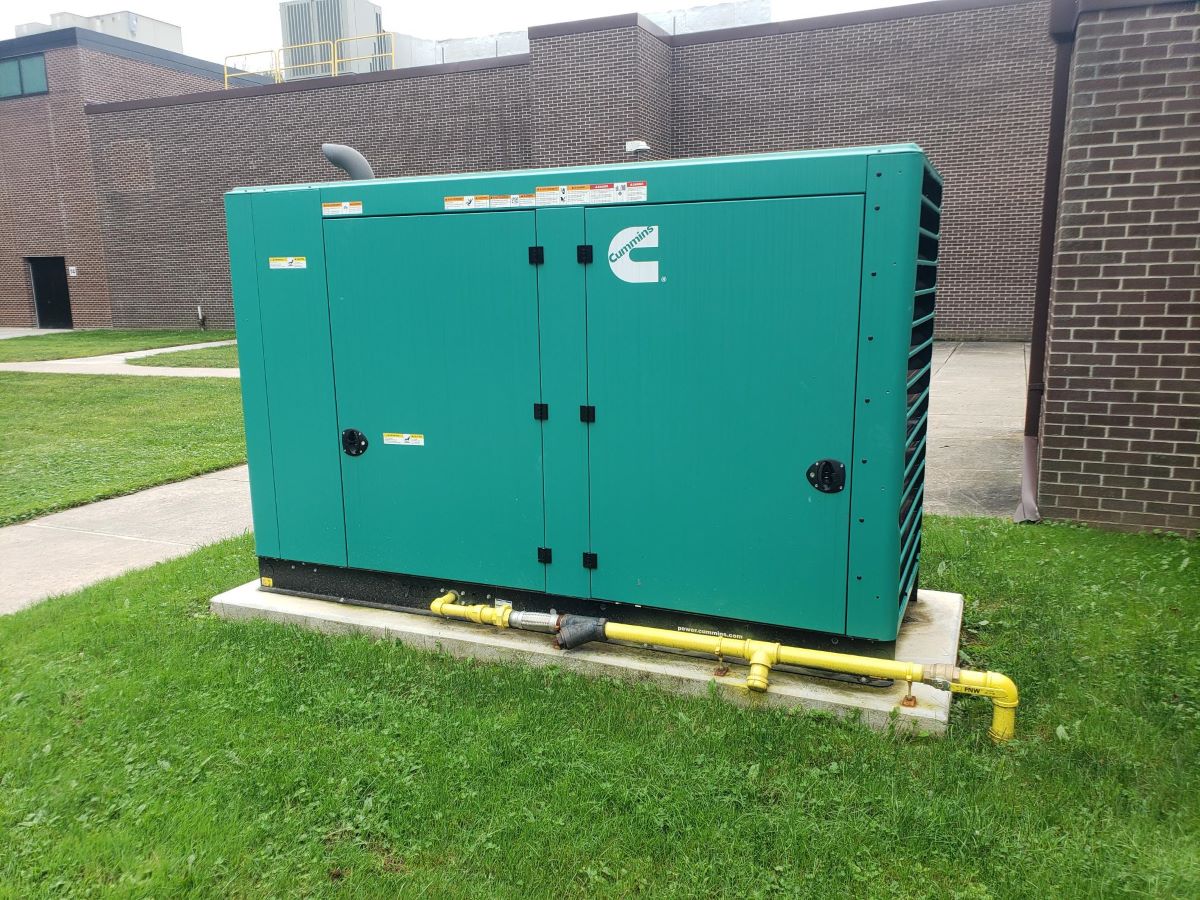
When you have your generators inspected, this inspection should also include your automatic transfer switches (ATS). The generator may start and run, but if all the transfer switches do not engage to supply power to the proper panels, your emergency power system will not function properly.
Learn what your generators will power. Getting a thorough test on your emergency power system is also a good item to include in your BCS. Not all school buildings are equipped with generators and not all generators are sized to handle the full electrical requirements of the facility. In many cases, the generators will only supply power to life safety devices, heating systems, network servers, kitchen coolers and refrigerators, and of course lighting. Make sure you know what will not work when you lose power. If you have or will be doing a capital project that impacts the electrical system or any critical components, be sure these items are incorporated into your emergency power grid. You need to determine if your emergency power system will handle the new load that needs to be added to your system. If your generator is not sized to handle the electrical demand, you may need to shed power. As modifications to your buildings takes place over years, sometimes more electrical demand is added without realizing the impact this can have on the generator.
Complete documentation of all inspections, maintenance and testing must be maintained at the facility. NFPA 110 can be referenced for the complete and detailed requirements.
Copies of the NFPA materials, including the 2012 LSC (NFPA 101), the 2012 HCFC (NFPA 99), and the 2010 Standard for Emergency and Standby Power Systems (NFPA 110) can be obtained from the National Fire Protection Association, 1 Batterymarch Park, Quincy, Massachusetts, 02169, or through the NFPA website.
- Before getting into the generator inspection, it is good to know how your emergency power should operate should you have a power failure.
- Generators installed after 1974 must be able to supply power for at least 90 minutes. Those in 1974 and prior, must run for 60 minutes.
- For systems installed after 1974, an emergency light should activate within 10 seconds of a power loss.
- Emergency lights should be arranged so that a space will not be in total darkness.
- All areas of assembly with 100 or more occupants must have emergency lighting.
- Areas of assembly constructed after 1984 with occupancy of 50 or more requires emergency lighting, along with other areas required by code. Areas of assembly include swimming pools, gymnasiums, auditoriums, cafeterias, large group instructional rooms, and so on.
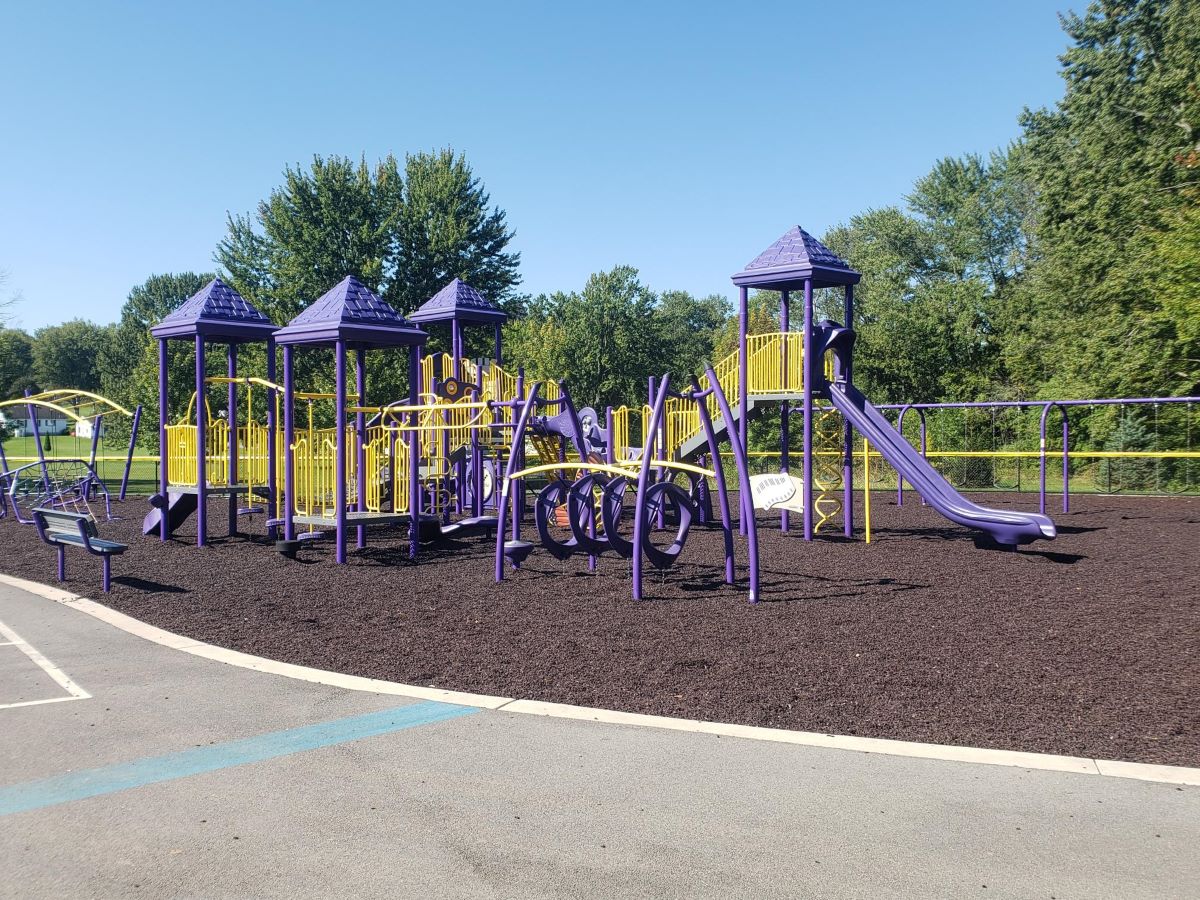
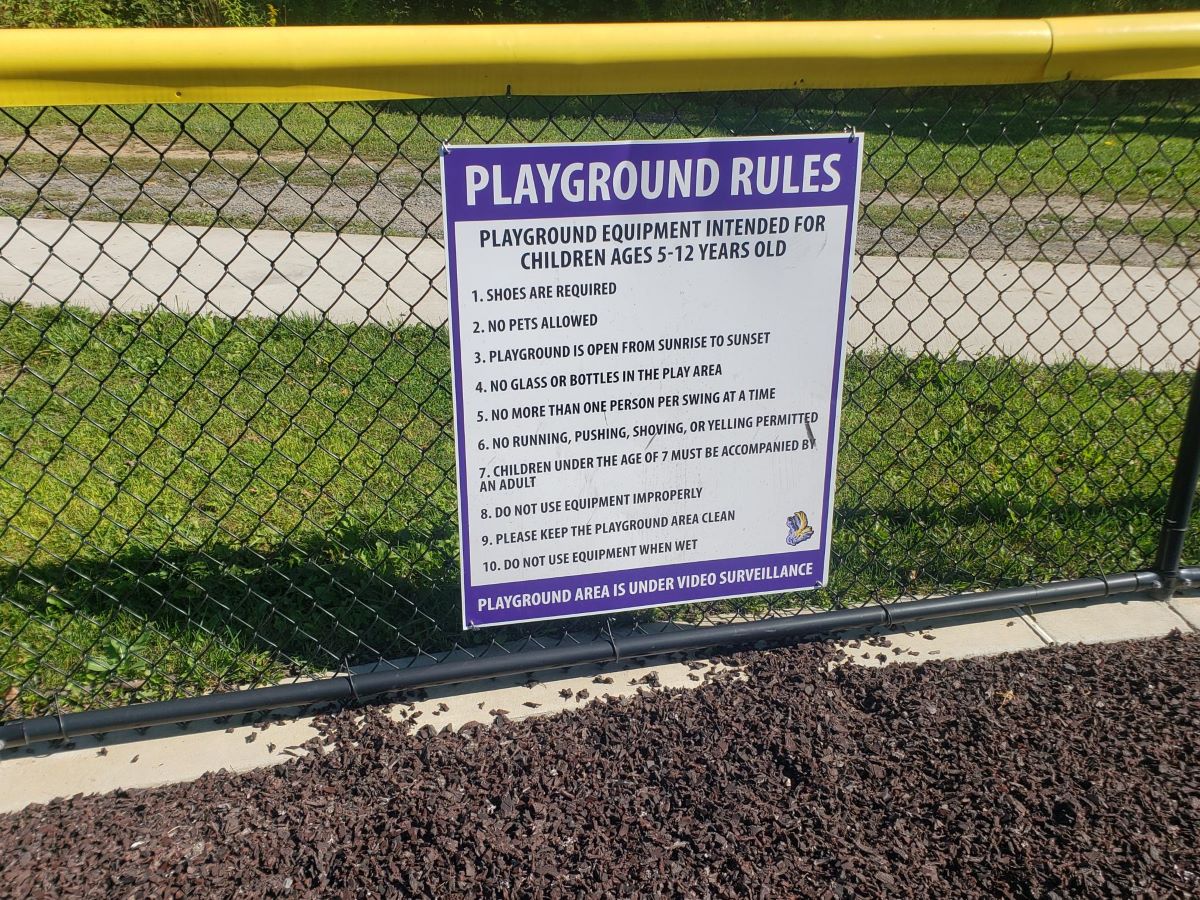
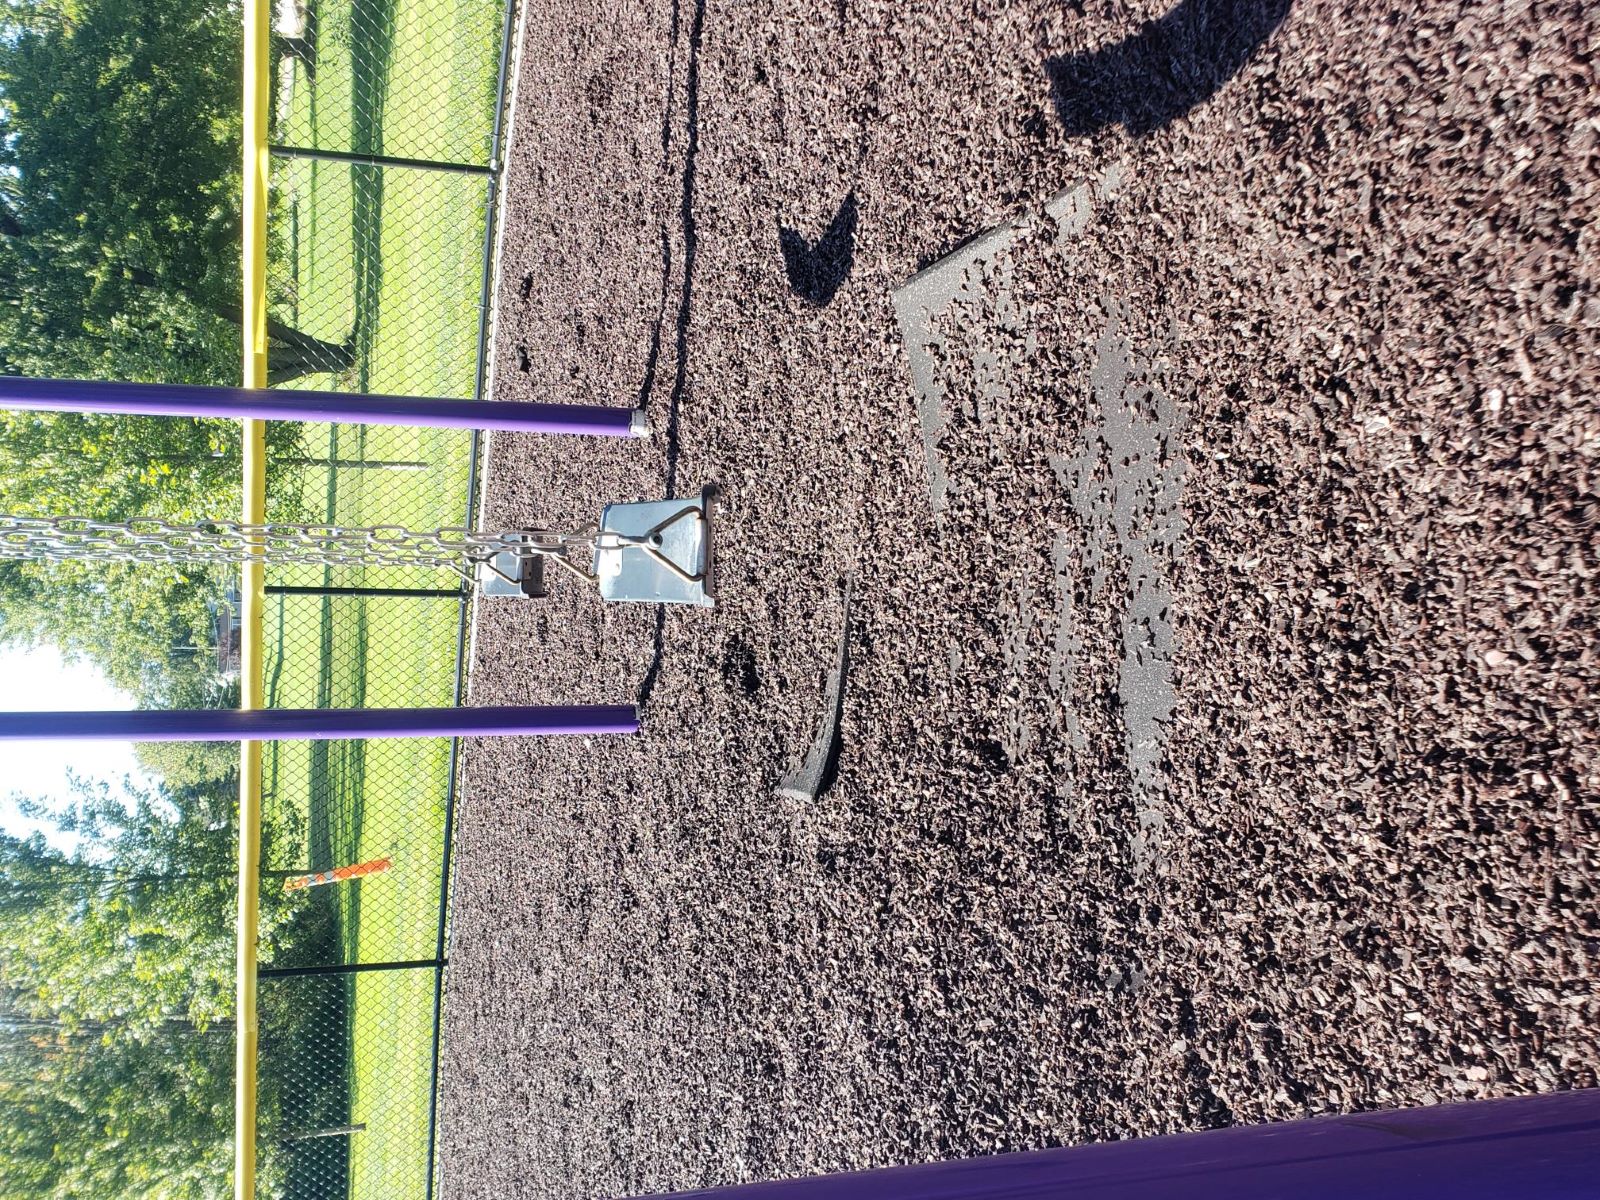
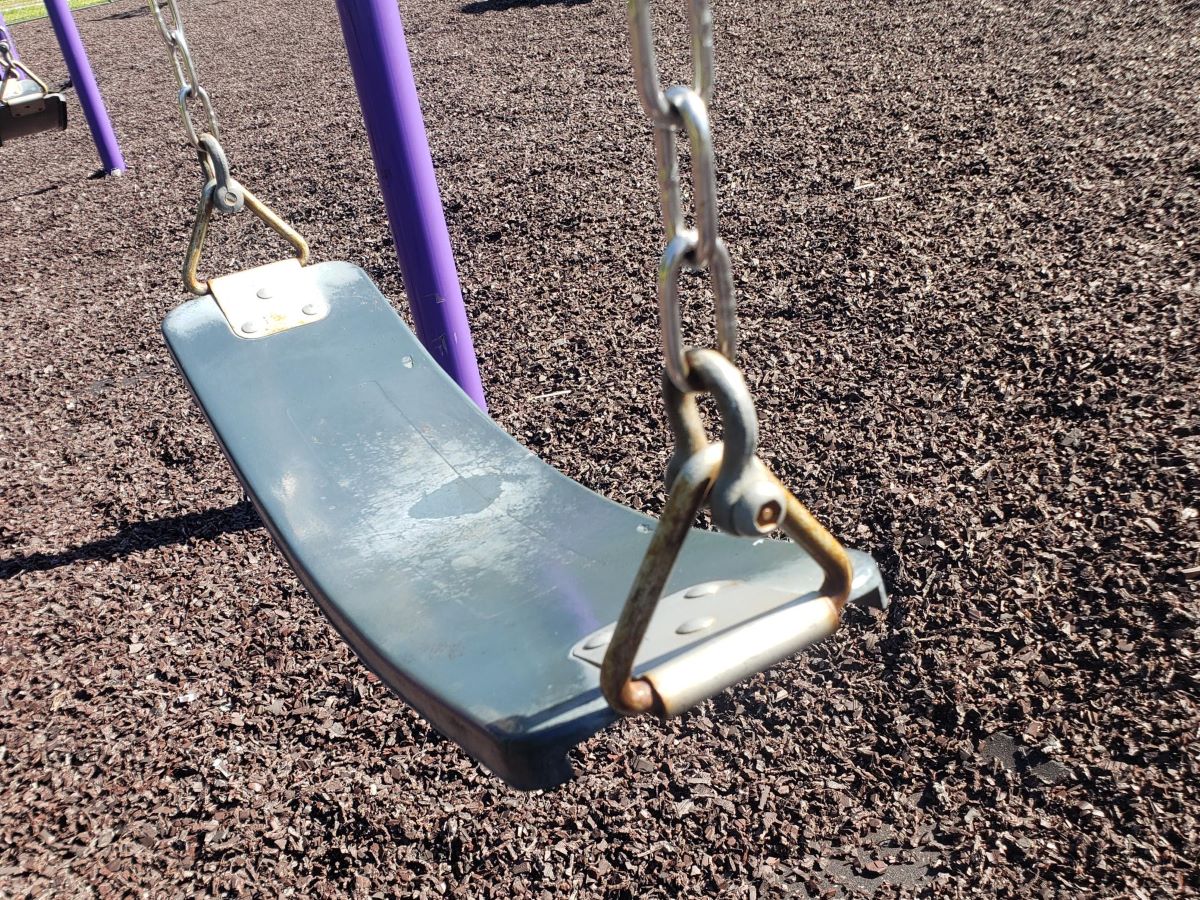
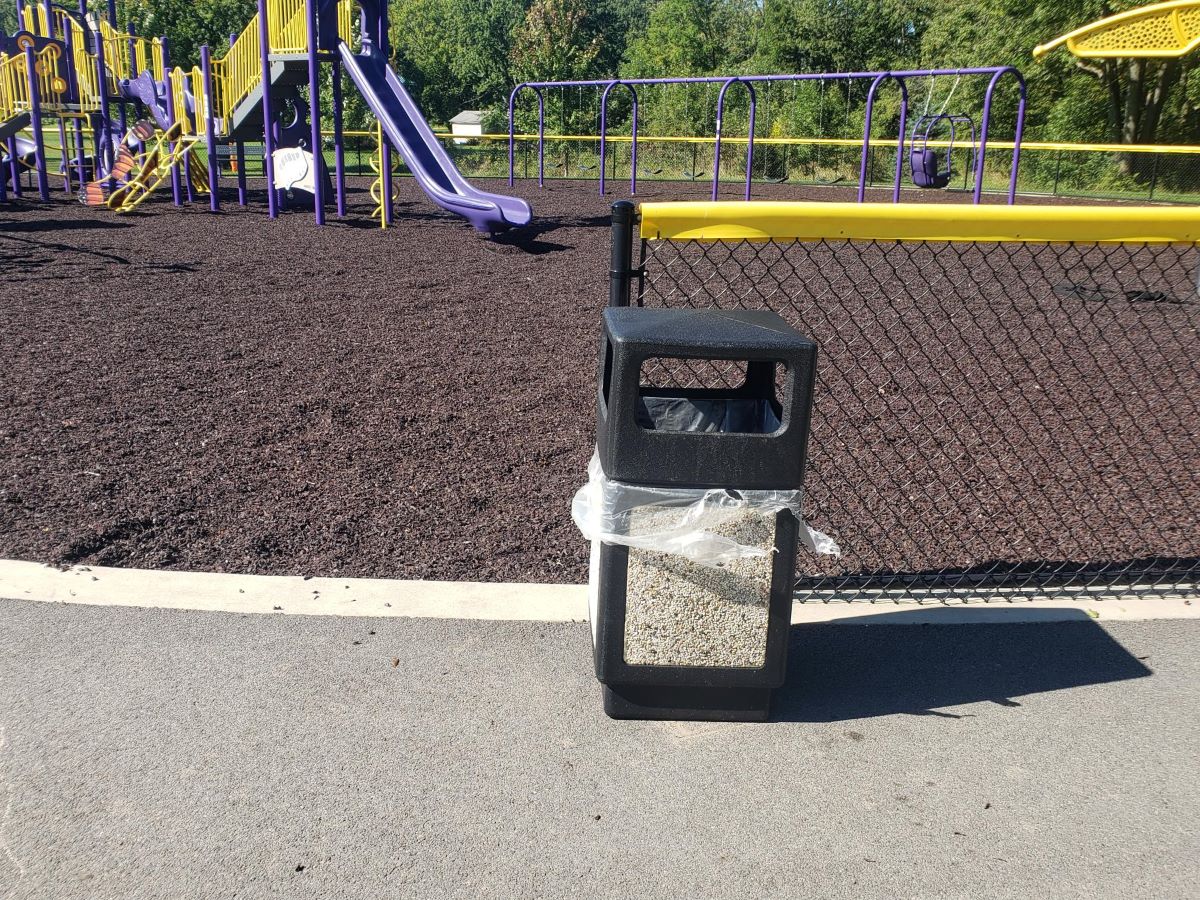
Indoor Pest Management
Pest Management is a requirement and an important part of keeping staff and students safe and healthy. NYSED Facilities Planning has a section on Pest Management and we are going to paraphrase their document, which is 11 pages long. You may have someone on your staff who is registered with the DEC to apply pesticides, or you may be like most districts and hire a licensed professional to handle your pest management needs. The short version is you can only apply pesticides in or around your school if you are licensed by the DEC and you follow the 48-hour advance notification requirements of the Pesticide Neighbor Notification Law. Spraying pesticides near playgrounds and sports fields requires and emergency situation and the approval of your school board. This is detailed below.
Introduction
The development and implementation of an integrated pest management (IPM) program is the key in achieving pesticide use reduction, while providing effective and economical pest control. The Board of Regents amended Part 155 of the Regulations of the Commissioner of Education and now requires the establishment of a least-toxic approach to IPM (§155.4(d)(2)). Pesticides should only be considered as a last resort when other methods have proven unsuccessful. Even then, only the least toxic and pest-specific pesticides should be used. Any public or nonpublic elementary or secondary school that decides to use a pesticide product as a last resort in addressing a pest problem, must comply with the Neighbor Notification Law (section 409-h of the Education Law) -see page 10 of this guide.
WHAT IS IPM (Integrated Pest Management)?
IPM is a process for managing, preventing, and suppressing pests with minimal impact on human health, the environment, and nontarget organisms.
IPM's goal is to create an inhospitable and an unfavorable environment for pests by removing their food and shelter, and by restricting their access into building structures. Good housekeeping is the cornerstone for this process.
Pesticide applications may only be performed by individuals currently certified by the DEC as pesticide applicators or by a certified pesticide technician or an apprentice working under the direct on-site supervision of a certified applicator pursuant. It is illegal for individuals other than those noted above to apply any pesticide products in a school building or on school grounds. If a school determines that pesticides should be applied, it is strongly recommended that schools only employ mature individuals (over 21) to apply pesticide products in schools and on school grounds. In addition, the 48-hour advance notification requirements of the Pesticide Neighbor Notification Law must be followed - see Public Notification, Education, & the Neighbor Notification Law below.
PEST IDENTIFICATION
Without going into great detail, it helps if you can identify the pest you are dealing with prior to taking action. This is especially true when dealing with bed bugs. If you are not certain, you can contact your pest management company, or your BOCES Health and Safety Officer.
PREVENTATIVE ACTIONS
Here are some simple recommendations to help manage pest control
- Keep doors shut properly when not in use.
- Place weather stripping/door-sweeps on doors.
- Caulk and seal openings in walls, around pipes, cracks, and crevices.
- Install or repair screens on windows, vents, floor drains, and louvers.
- Routinely clean floor drains and grates.
- Fix dripping faucets.
- Sweep and mop floors daily.
- Empty trash baskets daily and wash them when necessary.
- Vacuum carpeted areas daily using a high efficiency particulate air (HEPA) vacuum system.
- Keep vegetation, shrubs, and wood mulch at least one foot from structures.
- Remove tree stumps and wood debris.
- Power-wash areas with accumulated debris, such as floor drains, loading docks, dumpsters, and food carts.
- Regularly clean grease from ovens, exhaust vents, and grease traps.
- Ensure that dumpster, recycling, and trash compactor bins close securely and dumpsters are kept away from the buildings.
- Repair cracks and leaks in damaged floors, walls, and roofs.
- Replace moldy ceiling tiles, carpet, and other damaged items.
The following are some suggested steps in implementing this program. Students and staff should be educated to do the following in classrooms, faculty rooms, offices, and lockers:
- Consume food only in designated areas.
- Clean up and properly dispose of leftover food.
- Do not leave food in lockers or desks.
- Store food and beverages only in designated areas and in tightly sealed containers.
- Promptly dispose of any trash that contains food.
- Keep instructional food items (items used in home & career class) in tightly sealed containers.
- Keep areas in and near refrigerators, vending machines, and microwaves clean and free of spills.
RECORD KEEPING
- According to the EPA, "accurate records of inspecting, identifying, and monitoring activities show changes in the site environment (reduced availability of food, water, or shelter), physical changes (exclusion and repairs), pest population changes (increased or reduced numbers, older or younger pests), or changes in the amount of damage or loss."
- Copies of pesticide labels, MSDS, as well as the date, time, and pest-specific pesticide application locations must also be recorded. Finally, the name of the applicator and a photocopy of their DEC certification should also be retained. Information on pesticide products must also be recorded pursuant to Occupational Safety and Health Act (OSHA) regulations. All IPM and pesticide application records should be made available for inspection to anyone who wants to review such materials.
- The State Pesticide Reporting Law (PRL) (Chapter 279 of the Laws of 1996) mandates pesticide applicators and technicians, including school districts who employ certified applicators, to record and report, at least annually, all pesticide applications to DEC. This reporting requirement includes pesticide applications that have been performed by DEC certified school personnel. The annual report must be sent to DEC no later than February 1 of the year following the calendar year for which the report is submitted. The information and records maintained for each pesticide application must be retained for at least three years. The information which must be maintained includes: the EPA registration number of the pesticide which was applied; the product name; the quantity of each pesticide used; the date on which the pesticide was applied; and the location of the pesticide application by address (including the five-digit zip code). The pesticide dosage rate, the method of application, the target organism, as well as the place of application must also be recorded. Questions pertaining to this law should be directed to the: DEC Bureau of Pesticides Management, Pesticides Reporting Section at 1-888-457-0110 (toll-free from within New York State).
You will need to have a document that is your Integrated Pest Management Plan. This plan does not need to contrain great detail, but basically spells out how you will manage this program. If you ever receive complaints concerning rodents or insects in or around your buildings, you may need to share this document with those inquiring or investigating. Below is a sample plan for you to use if you do not have this document on hand.
CLICK HERE for the MS Word document.
CLICK HERE for the PDF version.
ESTABLISHMENT OF TOLERANCE AND RESPONSE ACTIONS
A tolerance and action threshold defines the point at which specific pests can no longer be tolerated, thus initiating a pest-specific treatment action. For example, the presence of rodents inside a school building poses a potential health threat that must be addressed as soon as possible. One fly in a classroom should elicit a very different response than the sighting of a bee's nest on a playground. Remember, eliminating the source of food will help prevent pest issues. When you see a problem, note it and keep an eye on the issue. Take action as needed.
IPM response actions include the use of mechanical, biological, and physical treatments and, as a last resort, least toxic pest specific pesticides. Traps should never be placed in areas readily accessible to students where they may be disturbed, moved, or tampered with. The use of vacuums, screens, caulk, and traps are examples of mechanical and physical controls for managing pests such as flies, ants, and termites. For example, a strong vacuum, including a crevice attachment, can suck cockroaches, their droppings, and their eggs from cracks. A tablespoon of cornstarch in the vacuum bag will ensure the pest's death.
Information on biopesticides may be found at www.epa.gov/pesticides/biopesticides/ . Unfortunately, biopesticides are not yet available for all pests. In the absence of such products, it is important that schools be very careful not to use any products which are known, probable, or possible carcinogens, neurotoxic organophosphates, or pesticides classified by the EPA as having high acute toxicity.
The State Education Department strongly recommends that schools only employ mature individuals who are at least twenty-one years old to apply pesticide products in schools and on school grounds, who are also certified by the DEC as a pesticide applicator. DEC law requires that the applicator must provide a copy of the pesticide label to the building owner prior to the actual application.
DEC further requires the person applying a pesticide to possess a copy of the label for the product, which is being applied at the time of the application, as well as their current DEC applicator certification card. It is illegal for any individual other than those noted above to apply any pesticide products in a school building or on school grounds. Specific questions relating to the DEC pesticide regulation may be directed to DEC regional offices throughout the state.
Public Notification, Education, & the Neighbor Notification Law
If you are going to apply a pesticide, you need to know and follow these notification requirements. The Pesticide Neighbor Notification Law, Section 409-h of the Education Law applies to all public and nonpublic elementary and secondary schools and details specific parties who must be notified, as well as the times and circumstances related to such notification.
This requirement states that schools provide a written notice to all parents, guardians, and staff at the beginning of each school year that includes the following points:
- a statement that pesticide products may be used periodically throughout the school year.
- a statement that schools are required to maintain a list of parents, guardians, and staff who wish to receive 48 hour written advanced notice from the school of an actual pesticide application.
- the name of the school representative to contact for further information.
At least 48 hours prior to an actual application, an additional written notice must be disseminated to all parents, guardians, and staff that have registered to receive the advanced application notification. This notification must explain the following:
- the specific date and location of the upcoming pesticide application;
- the pesticide product name and EPA product registration number;
- the name of the school representative to contact for further information.
The 48-hour notice must also include the following statement:
This notice is to inform you of a pending pesticide application to a school facility. You may wish to discuss with the designated school representative what precautions are being taken to protect your child from exposure to these pesticides. Further information about the product(s) being applied, including any warnings that appear on the label of the pesticide(s) that are pertinent to the protection of humans, animals, or the environment, can be obtained by calling the National Pesticide Telecommunications Network Information phone number 1-800-858-7378 or the New York State Department of Health Center for Environmental Health info line at 1-800-458-1158.
If a public health emergency exists which does not allow for the full 48 hour prior notification, the school must still make a good faith effort to notify those on the 48 hour list prior to the application.
The 48 hour notification registry and written notification provides parents and staff an opportunity to receive an accurate and timely accounting of what pesticide products have been and will be used in school buildings and on school grounds.
The following applications are not subject to prior notification requirements:
- a school remains unoccupied for a continuous 72 hours following an application;
- anti-microbial products;
- nonvolatile rodenticides in tamper resistant bait stations in areas inaccessible to children;
- nonvolatile insecticidal baits in tamper resistant bait stations in areas inaccessible to children;
- silica gels and other nonvolatile ready-to-use pastes, foams, or gels in areas inaccessible to children;
- boric acid and disodium octaborate tetrahydrate;
- the application of EPA designated biopesticides;
- the application of EPA designated exempt materials under 40CFR152.25;
- the use of aerosol products with a directed spray in containers of 18 fluid ounces or less when used to protect individuals from an imminent threat from stinging and biting insects including venomous spiders, bees, wasps, and hornets;
In general, a school district can avoid the 48-hour notification process by designing an IPM program that is restricted to the above noted items.
Finally, all schools must also provide additional written notification to all parents, guardians, and staff three times each year to inform them of any pesticide applications that have occurred. Notification must occur at the following intervals:
Notifications must include the following information for the period since the previous notice:
- the dates and locations of pesticide applications;
- the products used for each application which required prior notification;
- information on emergency applications;
- a reminder that persons may add their names to the 48-hour notification registry.
In addition to the requirements specified in the Pesticide Neighbor Notification Law, it also recommended that schools post a notice concerning any actual pesticide applications at the entrance of the building. A posted notice will serve to inform individuals not on the 48-hour registry and visitors to the building of the applications.
RESOURCES
BOCES Health and Safety Offices | Contact the State Education Department
NYS Integrated Pest Management Program, 315-787-2353.
Healthy Schools Network | 518.462.0632 | www.healthyschools.org
IPM Institute of North America | 608.232.1528 | http://www.ipminstitute.org/school.htm
National IPM Network | http://www.csrees.usda.gov/nea/pest/pest.cfm.
NY Coalition for Alternatives to Pesticides (NYCAP) | 518.426.8246 | http://www.crisny.org/not-for-profit/nycap/nycap.htm
State Department of Health (DOH) | 800.458.1158 | http://www.health.state.ny.us/
State Department of Environmental Conservation (DEC) | 518.457.0300 | http://www.dec.state.ny.us/website/dshm/pesticid/pesticid.htm
State Education Department (SED) | 518.474.3906 | www.emsc.nysed.gov/facplan/
State Office of General Services (OGS) | 518.486.7323 | www.ogs.state.ny.us/purchase/snt/awardnotes/71010s940019spec.htm
U.S. Environmental Protection Agency (EPA) | 703.305.7090 | http://www.epa.gov/pesticides/ipm/
University of Florida IPM Program | http://ipm.ifas.ufl.edu/
OUTDOOR PESTICIDE APPLICATION
This section refers to what you spray outside your buildings and is still considered pest management. Environmental Conservation Law (ECL) 33‐0101.35 “Pesticide” means:
- Any substance or mixture of substances intended for preventing, destroying, repelling, or mitigating any pest; and
- Any substance or mixture of substances intended for use as a plant regulator, defoliant or desiccant.
GUIDANCE ON CHAPTER 85, LAWS OF 2010
SUMMARY OF PESTICIDE PROHIBITION REQUIREMENTS AND PESTICIDE ALTERNATIVES REGARDING SCHOOLS AND DAY CARE CENTERS IN NEW YORK STATE DECEMBER 22, 2010
In May 2010, New York State enacted Chapter 85 of the Laws of 2010 (Chapter 85), a new law containing limitations regarding pesticide use on playing fields and playgrounds at schools and day care centers. This guidance is intended to help schools and day care centers comply with the new law, by providing information on its requirements and on allowable alternatives to pesticides for grounds maintenance.
WHAT THE NEW LAW REQUIRES
Amendments to Existing Laws and Identification of Involved New York State Agencies:
Under Chapter 85, new requirements were added to the State Education Law (SEL) and the Social Services Law (SSL). The State Education Department (SED) is responsible for administering the sections of the SEL added by Chapter 85, and the State Office of Children and Family Services (OCFS) is responsible for administering the new sections of the SSL. Also, a requirement was added to the Environmental Conservation Law (ECL) for the State Department of Environmental Conservation (DEC) to develop this guidance. Chapter 85 is summarized in the remainder of this Section of the guidance. See Section E (Where to Read the Law and Ask Questions) for information on where to read the new requirements and which agency to contact with questions. DEC’s role in the implementation of the new requirements is limited to issuing this guidance and to being one of the entities authorized to make determinations regarding emergency pesticide applications. (See Section D Emergency Determinations.)
Guidance: As required under Chapter 85, DEC developed this guidance in consultation with the State Department of Health (State DOH) and the SED. DEC also consulted OCFS.
Pesticide Prohibition and Exceptions: Schools and day care centers are prohibited from using pesticides on playgrounds (includes playground equipment), turf, and athletic or playing fields. The prohibition does not apply to indoor use of pesticides or pesticide applications to buildings or structures (e.g. school buildings, garages). If you have questions about whether a portion of grounds are subject to the law, contact SED or OCFS (see Section E for contact information). In general, “pesticide” covers a broad range of products: insecticides, herbicides, fungicides, rodenticides, and others. The new law specifies that “pesticide” has the same meaning as under Section 33‐0101.35 of the ECL1. However, under the new law, “pesticide” does not include six types of pesticide products, which can be applied on playgrounds, turf, and athletic or playing fields at schools and day care centers. For details about these exceptions, see Section C (Which Pesticides Are Allowed). NOTE: Under a separate new law, (Chapter 205 of the Laws of 2010), fertilizer use restrictions become effective January 1, 2012. Please see “Attention” section at the end of this guidance.
Emergency Pesticide Applications: An exception from the pesticide prohibition is provided for emergency applications, which may be made only as determined by entities specified in the new law (e.g. schools boards and certain State agencies). For further information, see Section D (Emergency Determinations).
Who Must Comply: The new requirements apply to schools and day care centers, as defined in the SEL and SSL. These encompass public school districts (including the New York City (NYC) Department of Education), non‐public schools, boards of cooperative education (BOCES), and child and Head Start day care centers. The law also applies to a school or day care center located at a college or university. The law does not apply to family day care centers, group family day care centers, school‐age child care programs, day care centers in the five boroughs of NYC. To find out if this new law applies to a specific school or day care center, contact SED or OCFS, as applicable (see Section E Where to Read the Law and Ask Questions).
When to Comply: The prohibition, exceptions, emergency allowance and other provisions go into effect on November 14, 2010 for day care centers and May 18, 2011 for schools.
Pesticide Application Requirements: Schools and day care centers must continue to comply with previously existing requirements when applying pesticides, including when applying those pesticides excepted from the prohibition in Chapter 85. Section C (Which Pesticides Are Allowed) and the “Attention” at the end of this guidance provide a summary of existing State requirements regarding pesticide use and pesticide application notification.
HOW TO MAINTAIN CHILD‐SAFE PLAYING FIELDS AND TURF WITHOUT PESTICIDES
Managing Grounds with Alternatives to Pesticides: Many schools and day care centers already care for their grounds without the use of conventional pesticides. Others, however, may be making the shift away from pesticides for the first time. Depending on their current practices, schools and day care centers may only need to fine tune their methods, or they may need to learn a new, systematic approach to sustainable grounds maintenance through alternatives to pesticides. Training in alternative methods of grounds management could help those with less experience successfully make the transition. Check the on‐line resources in this section for links to training programs.
General Guidance on Pesticide Alternatives and Additional resources: There are a number of things to consider when managing grounds without pesticides, ranging from familiarity with the grounds and potential trouble spots to soil and plant health. Because the steps taken for grounds management are specific to each school or day care center, this guidance is necessarily intended as a starting point, rather than a handbook to address every situation at schools and day care centers.
Broad Tips and Concepts: The table on the next two pages outlines overall concepts for use in complying with the new pesticide prohibition. Information on the table serves as an introduction to alternative approaches to grounds maintenance and pest management as well as bottom line rules about soil and plant health. The “right” combination of alternatives to pesticides to prevent and manage pest infestations and for maintaining healthy, resilient grounds is specific to each school and day care center.
References to Resources for Further Information on grounds management without pesticides are provided in the table and following it.
GENERAL GUIDANCE ON PESTICIDE ALTERNATIVES PROPER GROUNDS MANAGEMENT – BASELINE CONCEPTS
Look at the Big Picture
Examine the whole outdoor system. Walk around the site and get an overall understanding of the maintenance needs and where steps should be taken to ensure that it is healthy – able to withstand pests and environmental stresses. Be aware of all possible sources of pest infestations, including dumpsters and recycling containers, and ensure that they are clean and well‐maintained.
Check for these Conditions
Take note of areas and site characteristics that already have, or are prone to, pest or disease problems for plants, turf and soil. The following are examples of important conditions to check for:
- overall health of turf or plants,
- existing pest (insects, weeds, etc.) and disease infestations or areas that appear to have pest‐or disease‐prone conditions. Identify any existing pest/disease to choose proper management method (see Cooperative Extension link below),
- poorly drained soil (i.e. pools of water or mud present), or soil that is hard and compacted,
- shady or sunny areas,
- storm or seasonal damage,
- heavy foot traffic areas.
Make a Response Plan
- Consider whether a certain level of weeds and pests can be acceptable and tolerated at the school or day care centers.
- Decide which areas of the grounds need special attention.
Maintain Soil Health
- Soil Conditions: Keep soils well‐drained, properly watered, aerated, and high in organic matter. A variety of soil aeration tools can be found in garden catalogs and supply stores. Organic matter can be enhanced by adding compost, or leaving grass clippings on the lawn after cutting. Adding organic matter will help with drainage as well as soil fertility. Better drainage in heavy clay soils can also be achieved by adding sand or lighter, loamy soil. Ask at a garden supply store for these materials.
- pH: Check for a healthy pH (pH should be close to 7, which is neutral). Soil testing will help determine pH and if nutrient deficiencies exist. A link to Cornell Cooperative Extension’s soil testing service is provided below.
- Soil Amendments: Consider whether soil amendments, such as compost or fertilizer, are needed and which are appropriate for site conditions. PH and other soil conditions can be adjusted by adding the appropriate compost, fertilizer, or lime, available from gardening catalogs and supply stores.
Web resource for soil testing: http://cnal.cals.cornell.edu/
Select the Right Turf and Plants
- Select turf and plant varieties and/or mixes that are well‐adapted to the site (such as soil type, and sun/shade characteristics) and climate. To the extent possible, select disease‐ and insect‐resistant varieties.
Maintain Healthy Turf and Plants
Manage turf and plants to create healthy conditions that prevent pests and plant diseases. Examples of cultural management practices include:
- Remove diseased plants and debris from the grounds.
- Keep grass longer (at least 3 inches) to promote a healthy root structure that can out‐compete weeds. Keep mower blades sharp to avoid damaging grass. Damage increases its vulnerability to diseases, insects, and weeds.
- Spread new grass seed each year, to cover bare patches and to crowd out weeds in established areas.
- Revisit the grounds frequently to check that the methods used are improving areas of concern and adjust management techniques accordingly.
Web resources for cultural practices: http://www.dec.ny.gov/public/52570.html
SOURCES FOR MORE INFORMATION AND TRAINING OPPORTUNITIES ON MANAGING GROUNDS WITH ALTERNATIVES TO PESTICIDES
Numerous training opportunities and informational resources are available to help school grounds managers and day care center operators with problem‐specific questions and to provide more detailed, step‐by‐step instructions for grounds management without pesticides. Below is a sampling of online resources and suggested titles of books and manuals. Information can also be found in the garden section of a local library (suggested titles below), or by contacting Cornell Cooperative Extension or the Master Gardener Program.
NOTE: References to the resources and links in this guidance will be included on the DEC web site in a set of information on Chapter 85 and the final guidance.
NOTE: Prohibited pesticides could be referenced on internet sites or in resources consulted by schools, day care centers and others. Prohibited pesticides cannot be used at schools and day care centers in New York State, even if referenced in resources, including those listed above. Therefore, when consulting these or any other resources about grounds maintenance options,schools and day care centers should focus on information about pesticide alternatives and soil, plant, and turf care.
WHICH PESTICIDES ARE ALLOWED
Establishing healthy grounds is the best way to prevent pest problems. Should the need for pesticides arise, however, the following is a list of types of pesticide products allowed under the new law and information about how to identify them.
Horticultural oils and soaps that do not contain synthetic pesticides or synergists are generally identifiable by reading the label. Make sure the active ingredients listed are limited to paraffinic oil, mineral oil, petroleum oil, citrus oil, or combinations of salts of fatty acids. Most products labeled as horticultural oil, summer oil, dormant oil, or insecticidal soap will not contain synthetic pesticides or synergists, and will therefore be allowed. If you are unsure, look for the acronym “OMRI” on the label. OMRI stands for the Organic Materials Review Institute and horticultural oils and soaps with that label will meet the law’s criteria. Use Examples: Such oils and soaps are used, among other purposes, to manage some plant pests, such as aphids, spider mites and leaf hoppers.
Pesticides classified as exempt by U. S. Environmental Protection Agency (EPA) are not registered by EPA, because they contain ingredients EPA considers to pose little or no risk. (These products are also known as Minimum Risk Pesticides or 25(b) exempt pesticides.) A list of those ingredients is on the next page. Schools and day care centers considering use of the EPA‐exempt products should investigate the potential uses, as there is more information than is feasible to include in this guidance (EPA resource listed below). Use Examples: Corn gluten meal may be used for managing pre‐emergent weeds (e.g. crabgrass and dandelions); soybean oil may be used on scales, mites, aphids and other insects; and dried blood is sometimes used as a repellent for deer or rabbits.
There is no comprehensive list of EPA Minimum Risk Pesticides, but there are ways to identify them:
Information on EPA‐exempt pesticides can be found at: http://www.epa.gov/oppbppd1/biopesticides/regtools/25b_list.htm
For product label information on registered pesticides listed in this section and to learn whether a pesticide is registered for use in NYS, please search http://pims.psur.cornell.edu/ the online New York State Pesticide Product Ingredient and Manufacturer System.
| Product | Product |
|---|---|
| Castor oil (U.S. Pharmacopeia or equivalent) Cedar oil | Cinnamon and cinnamon oil Citric acid |
| Citronella and Citronella oil Cloves and clove oil | Corn gluten meal Corn oil Cottonseed oil Dried Blood Eugenol |
| Garlic and garlic oil Geraniol | Geranium oil Lauryl sulfate Lemongrass oil Linseed oil |
| Soybean oil | Thyme and thyme oil White pepper |
| Malic acid | Mint and mint oil |
| Peppermint and peppermint oil | 2‐Phenethyl propionate (2‐phenylethyl propionate) Potassium sorbate |
| Putrescent whole egg solids Rosemary and rosemary oil | Sesame (includes ground sesame plant) and sesame oil |
| Sodium chloride (common salt) Sodium lauryl sulfate | Zinc metal strips (consisting solely of zinc metal and impurities) |
| Castor oil (U.S. Pharmacopeia or equivalent) | Cedar oil |
| Cinnamon and cinnamon oil | Citric acid |
| Citronella and Citronella oil | Cloves and clove oil |
| Corn gluten meal Corn oil Cottonseed oil | Dried Blood Eugenol |
| Garlic and garlic oil | Geraniol |
| Geranium oil Lauryl sulfate | Lemongrass oil Linseed oil |
EMERGENCY DETERMINATIONS
The purpose of the new law is to minimize the harmful effects of pesticides on children by limiting the use of aesthetic pesticides in sensitive areas such as schools and day care centers and develop pesticide alternatives. An exception to the pesticide prohibition is provided in the State Education Law (SEL) and Social Services Law (SSL). Use of a prohibited pesticide is allowed, when a determination is made that an emergency application is needed.
Schools and day care centers subject to the law must seek an emergency determination from the appropriate entity. The entities which may make such determinations are identified in the SED and SSL.3 The primary entities are county health departments, State DOH, DEC, and, in the case of public schools’ requests for determinations, school boards.
The DEC, State DOH, SED and OCFS together, based on their interpretation of Chapter 85, have identified a working framework for emergency determinations, so that schools and day care centers know which entity to contact when seeking an emergency determination to apply a prohibited pesticide. Also included in the framework are the types of emergencies DEC, State DOH and county health departments will consider. (State DOH oversees most county health departments.)
- FRAMEWORK FOR IDENTIFYING THE ENTITY A SCHOOL OR DAY CARE CENTER WOULD CONTACT to seek an emergency determination to apply a prohibited pesticide is outlined below, based on whether a public school, non‐public school, or day care center is seeking the determination:
- Public Schools: Each public school must contact its school board to seek an emergency pesticide application determination for any type of situation that may warrant an emergency. The SED has interpreted the SEL to require that the local school boards make all emergency determinations for public schools. Public schools should not contact the State DOH, county health departments or DEC to seek an emergency pesticide application determination. A school board, as it deliberates, may consult those agencies with relevant questions (as well as the in‐house expertise of its grounds managers). Specifically, school boards may contact the county health department or the State DOH to consult on public health‐related emergency situations and they may contact the DEC with questions about environmentally‐related emergency situations.
- Non‐Public Schools and Day Care Centers: These entities should contact either the DOH or the DEC, depending upon whether the emergency request relates to the need to apply a prohibited pesticide for a public health‐related matter or an environment‐related matter, as follows:
- Public Health‐related Emergency Pesticide Application Determinations: Non‐public schools and daycare centers should contact the DOH (the county health department, State DOH district office in certain counties or the state DOH's Bureau of Toxic Substance Assessment), when a pest issue arises that may warrant an emergency application of a prohibited pesticide to protect public health (e.g. residual larvicide treatments on grounds to control mosquitoes that carry Eastern Equine Encephalitis virus). The DOH will make determinations for emergency pesticide applications only when a pest poses a significant threat to public health.
- To Contact the DOH about Public Health‐related Emergency Determinations: Contact the county health department or applicable district office (telephone number for each county on attached list) or the State DOH, Bureau of Toxic Substance Assessment at 518‐402‐7820.
- Environment‐related Emergency Pesticide Application Determinations: Non‐ public schools and day care centers should contact the DEC in writing to seek an emergency determination, when an emergency arises which would significantly affect the environment (e.g. invasive species management). For the form on which requests are to be made to DEC, see the Department website http://www.dec.ny.gov.
- To Contact DEC about Environment‐related Emergency Determinations for Non‐public Schools and Day Care Centers: Contact the DEC Bureau of Pest Management at: 518‐402‐8788. Use the form at the above link to submit requests to DEC for emergency determinations.
Guidance for determining when a Situation is an Emergency
The intent of the new law is to require schools and day care centers to manage grounds and pests without pesticides. Emergency determinations should only be sought or granted for a one‐time pesticide application for a specific situation, which presents a true emergency. To provide guidance on deciding when a situation is not an emergency, the DEC, State DOH and SED, in consultation with OCFS, identified the following situations that these state agencies generally would not consider to warrant an emergency pesticide application determination:
- when the problem can be managed with the allowed products and/or alternative pest management methods (even when it takes time to learn and fully practice pesticide alternatives).
- for routine or repetitive pest problems. Pest problems can occur on a regular or seasonal basis, but they do not usually rise to the level of a public health or environmental threat that constitutes an emergency.
- when the pesticide application would be for purely aesthetic (non‐emergency) reasons.
Where to Read the New Law:
- The State Education Law (SEL), Social Services Law (SSL) and Environmental Conservation Law (ECL) can be read online at: http://public.leginfo.state.ny.us/menugetf.cgi?COMMONQUERY=LAWS
- Schools, see Section 409‐k of the SEL.
- Day care centers, see Section 390‐g of the SSL.
- To read the requirement for this guidance, see Section 33‐0303.7 of the ECL.
Questions About the New Requirements
For public and non‐public schools, direct questions about the new SEL requirements to the SED, Office of Facilities Planning at 518‐474‐3906.
- For day care centers, direct questions about the new SSL requirements to the OCFS, Division of Child Care Services at 518‐474‐9454.
- For help with questions about turf and grounds management without pesticides, Contact the local cooperative extension office, see list at http://cce.cornell.edu/Pages/Default.aspx
- Questions on this guidance: Contact the DEC Bureau of Pest Management at 518 ‐ 402‐8768.
ATTENTION SCHOOLS AND DAY CARE CENTERS: OTHER REQUIREMENTS
Separate from the requirements in Chapter 85, Laws of 2010, there are other new and existing requirements, which schools and day cares must be aware of and comply with, in regard to grounds maintenance and pest management. A summary of them is included below:
New Fertilizer Use Restrictions
Under a separate new law, Chapter 205 of the Laws of 2010, starting January 1, 2012, new restrictions go into effect regarding the use of phosphorus fertilizers and fertilizers on lawns and non‐agricultural turf. As of that date, the following are prohibited on lawns or non‐agricultural turf:
- The use of phosphorus fertilizers, unless establishing a new lawn or a soil test shows phosphorus is needed for growth, and
- The use of fertilizers between December 1 and April 1 annually.
- The use of fertilizers is prohibited within 20 feet of any surface water except:
- Where a continuous natural vegetation buffer, at least 10 feet wide, separates lawn and water.
- Where a spreader guard, deflector shield or drop spreader is used, then the application may not occur within three 3 feet of any surface water.
Additionally, fertilizer cannot be used on any impervious surfaces, and, if such an application occurs, it must be cleaned immediately and legally applied or placed in an appropriate container. Details can be found at www.dec.ny.gov/chemical/67239.html on the DEC website.
Pesticide Certification, Notification, and Reporting Requirements
Anyone who applies pesticides to buildings or grounds at schools or day care centers, including pesticides allowed under the new law, must meet existing pesticide requirements.4 The following is a summary of these requirements:
- The definition of a pesticide is contained in Section 33‐0101.35 of the ECL. Under that definition, all of the exceptions to the ban listed in Section C (Which Pesticides are Allowed) above are classified by DEC as pesticides and are subject to applicable regulations that relate to pesticide use. See http://www.dec.ny.gov/regulations/8527.html for information on DEC pesticide requirements in law and regulation.
- Sections 33‐0905 and 33‐0907 of the ECL and related regulatory requirements in 6 NYCRR Part 325 contain pesticide applicator certification and business or agency registration requirements.4 (Under the regulation, certification is not required when using antimicrobials, except where used in cooling towers (exist at some schools) or other processes not present at schools.)
- Pesticide reporting requirements under Section 33‐1205 of the ECL apply to all pesticides used, except antimicrobials and EPA‐exempt pesticides (also referred to as EPA Minimum Risk Pesticides or 25(b) pesticides).
- Pesticide application notification requirements must be met when using pesticides on structures or grounds, under Section 409‐h of the SEL and Section 390‐c of the SSL.
THIS SECTION COMING SOON
The inspection of Rolling Fire Doors is an annual requirement, and these inspections are typically performed by a door company. There are 2 types of rolling doors with one being tied to your fire alarm system and other is not. Inspections for those tied to your fire alarm system are required to be performed each year. The doors are tested to verify they work in a smooth manner and do not bind when raised or lowered. This is important as these doors will need to drop in the event of a fire. The doors will drop with either the failure of a fusible link or from a signal from the fire alarm system, or both. During a fire door drop test, the technician is required to test by all means of activation. This means if the door can be activated thermally (by fusible links that melt when they reach a certain temperature) or electrically (by a fire door system connected to a smoke or fire alarm), it must be drop tested using all means of activation. It is imperative to keep areas below the doors clear so they can drop and seal. These doors are traditionally found in kitchen areas around service areas. Rollup doors in Technology/Shop are also common. Like all inspections performed by outside contractors, you must file the inspection reports. These reports should be kept on file for at least 3 years per NFPA 80 Standards.
Section 5.2.5 of NFPA 80-2010 states, “horizontal sliding, vertical sliding or overhead rolling fire doors, the following must be verified”:- Labels are clearly visible and legible
- No open holes or breaks exist in surfaces of either the door or frame
- Slats, endlocks, bottom bar, guide assembly, curtain entry, hood, and flame baffle are correctly installed and intact for rolling steel fire doors
- Curtain, barrel, and guides are aligned, level, plumb, and true for rolling steel fire doors.
- Expansion clearance is maintained in accordance with the manufacturer’s listing.
- Drop release arms and weights are not blocked or wedged.
- Mounting and assembly bolts are intact and secured.
- Attachments to jambs are with bolts, expansion anchors, or as otherwise required by the listing.
- Smoke detectors, if equipped, are installed and operational.
- No parts are missing or broken.
- Fusible links, if equipped, are in the correct location: chain/cable, s-hooks, eyes, and so forth, are in good condition; the cable or chain is not kinked, pinched, twisted, or inflexible; and links are not painted or coated with dust or grease.
- Auxiliary hardware items that interfere or prohibit operation are not installed on the door or frame.
- No field modifications to the door assembly have been performed that void the label.
- Doors have an average closing speed of not less than 6 in/sec (152 mm/sec) or more than 24 in/sec (610 mm/sec).
Stage Rigging
By Dana W. Taylor of NFHS.org
Stage rigging (counterweight rigging) describes the mechanisms used to lower and raise the pipes over the stage. These pipes (battens) carry stage lights, curtains, acoustical shells and sometimes scenery. Rigging maintenance begins with an inspection by a qualified inspector.
The ANSI recommendation is that all rigging systems should be inspected annually, a Level 1 inspection that focuses on those system elements that are easily accessed by an inspector. In addition to checking all components of the system, the inspector will look for appropriate signage regarding system-weight capacities and safety/warning signage. The inspector will also ask for the facility logbook (written record of rigging issues, inspections, repairs), crew training documentation and documents pertaining to flame retardancy of all stage curtains.
Following the inspection, the user will receive a written inspection report on the condition of the system, notification of issues and recommended remedies. The inspector will not do any repairs. For motorized rigging, a Level 2 inspection is recommended each year.
Level 2 inspections are more thorough and are recommended every five years, unless the date of the last inspection cannot be determined or equipment has been newly installed, altered or repaired. In those instances, the first inspection will be a Level 2. The Level 2 inspection will likely necessitate the availability of a man lift and will include all elements of a Level 1 inspection, plus a thorough look at those less readily accessible elements of your system.
Cost
Inspection costs vary based on the type and complexity of your system and your proximity to a qualified inspector. You should expect to pay for the inspection and travel costs (transportation, hotel and per diem) for the inspector. The author’s latest Level 1 inspection (Spring 2018) was $2,300 and included two hotel nights, airfare and a one-day inspection of his 17-line set manual counterweight system.
Assistance with the expense of rigging inspections is available from the United States Institute for Theatre Technology’s (USITT) Rigging Safety Initiative. Secondary schools may apply twice each year for a grant covering the cost of the inspection. In some instances, where a recognized inspector is nearby, the grant may cover the entire cost of the inspection. For more information, visit www.usitt.org. The grant also covers four hours of training for up to eight staff members and students. Here is the link to the application
Risk Management, Liability and Protecting Your Investment
Although many rigging accidents can be attributed to user error, rigging inspections should be added to your school risk management and accident prevention programs. With regard to liability, ignorance is not a legally defensible position. Annual inspections, and acting on the inspector’s recommendations may mitigate potential liability should there be an accident. Likewise, ongoing training for school staff and students further shows the school’s desire to protect users and audiences.
Rigging is an expensive part of your school’s auditorium. Consequently, inspections, maintenance and training not only protect your students, staff and audiences but your investment as well.
Additional Standards, Rules and Resources
ANSI E 1.47: Recommended Guidelines for Entertainment Rigging System Inspections CLICK HERE
ANSI E1.4-2014 section 5.2.2.1 Installed systems shall be inspected annually or more frequently, as determined by a qualified person, per the manufacturer’s recommendations and local code requirements.
OSHA 1926.1501(a)(6) A thorough, annual inspection of the hoisting machinery shall be made by a competent person, or by a government or private agency recognized by the U.S. Department of Labor. The employer shall maintain a record of the dates and results of inspections for each hoisting machine and piece of equipment.
The International Building Code (IBC) Section 20.9.1 The rigging system shall be inspected annually. Section 20.9.1.1 The annual rigging inspection shall be performed by a qualified person.
ANSI standards for entertainment technology have been developed by the Entertainment Services and Technology Association and their Technical Standards Program (TSP). The standards may be downloaded free of charge by visiting the ESTA site.
Elevator inspections are typically performed every 6 months with a Certification Inspection done by the Witness Company annually. These inspections can be performed at any time during the year, but you should try to schedule these inspections to allow for the inconvenience of taking the elevator out of service during your PM or inspection procedure.
The time intervals for inspections and testing of elevators, as determined by the NYS Department of State (Table N1, Appendix N of ASME A17.1, 2000 edition) will apply to all elevators. In general, elevators must be inspected every six months. Various elevator devices must be tested every one, three or five years, depending upon the device being tested.
Persons performing elevator inspections must be certified by an organization in accordance with the requirements set forth in the Standard for the Qualification of Elevator Inspectors (ASME QEI-1). The tests must be witnessed by persons holding the same qualifications as inspectors.
Maintenance, repair, and replacement activities performed on elevators must be performed by elevator personnel. Elevator personnel are persons who have been trained in the construction, maintenance, repair, inspection or testing of equipment. Although they may have the certification that they meet ASME QEI-1, it is not a requirement to hold this certification for maintenance, repair, and replacement activities. Building owners should determine which edition their elevator installation was provided under, and research the specific requirements for their elevators. Each installation should have a code data plate located on the equipment, indicating the edition of the standard at the time of installation, the edition of the standard at the time of alteration, and the items altered. The following documents and/or document sections may help in determining specific elevator requirements:
- ASME A17.1-2000, “Safety Code for Elevators and Escalators
- Section 8.6, “Maintenance, Repair, and Replacement”
- Section 8.11, “Periodic Inspections and Tests”
- SME A17.2-2004, “Guide for Inspection of Elevators, Escalators, and Moving Walks”. This document is helpful in that it calls out the different inspection and testing procedures for previous editions of ASME A17.1 back to the 1955 edition, and includes some requirements from editions of ASME A17.1 prior to 1955. There are some earlier editions of this document that may be available, and would be acceptable to assist in determining inspection and testing procedures for installations prior to the date of issuance. These are: ASME A17.2-2001, “Guide for Inspection of Elevators, Escalators, and Moving Walks”; ASME A17.2.1-1996, “Inspectors’ Manual for Electric Elevators”; ASME A17.2.2-1997, “Inspectors’ Manual for Hydraulic Elevators”.
Inspection Certificates:
You will receive a document from your Witness Inspection Company that will state when the certification expires, note any violations, and will be specific to each elevator inspected. Some companies will give you an elevator certificate that you can post in the elevator, and others will give you an inspection report that is meant to be filed in your office. Your fire inspector will most likely ask to see copies of your elevator inspections, so these should be filed and readily available for those requesting to see a copy of this document.
Repairs of Defects:
All defects as found in such periodic inspection reports shall be corrected within 90 days after the date of test. All corrections should be documented, and this document should be placed in the file with your inspection report.
Pre-Start Inspections
Prior to using a lift, you must begin with a lift inspection and function test. These inspections are done each day and if you are using the lift on multiple shifts, they need to be inspected prior to each shift. This allows operators to find and fix problems prior to starting the job. Inspections can also catch problems that may go unnoticed before creating a hazard. Walkaround visual inspections should occur daily, at shift changes or any time a new operator takes over the machine.
Daily electric scissor lift inspections typically include:
- Checking for visible leakages (oil or battery fluids) or foreign objects.
- Looking for dents, weld or metal cracks or other visible damage.
- Checking the machine decals and placards to be sure they are clean and legible.
- Inspecting scissor arms and centering link, as well as the platform gate to ensure it closes properly.
- Checking the hydraulic fluid levels and cleanliness.
- Verifying all applicable manuals are located on the machine
A function check must also be completed before each use in an area free of overhead and ground-level obstructions. Accessories and attachments should also be inspected.
General Maintenance Checklist
Below are OSHA’s (Occupational Safety and Health Administration) guidelines for scissor lift maintenance. Be sure to reference the machine’s factory-issued manuals to ensure complete compliance.
Operational
- Check all fluid levels including oil, fuel, coolant and hydraulics. Inspect the machine thoroughly for leaks.
- Check the wheels and tires. Look for worn tire treads and cracks or bubbles in the sidewalls. Make sure tire pressure is at the correct PSI. Check wheels for any structural damage.
- Test the steering and brakes to ensure they are fully operational.
- Check the battery and charge level to ensure power isn’t lost on the job.
- Test all emergency controls to make sure they are working. This includes horns, gauges, lights and backup alarms.
- Make sure all personal protection devices are in place and working properly. These include safety harnesses, fall protection gear and more.
Structural
Inspect these areas for signs of any problems:- Air, electric, pneumatic, and hydraulic systems
- Insulating components
- Written warnings, placards and instructions
- Mechanical fasteners and locking pins
- Cable and wiring
- Outriggers and stabilizers
- Guardrails
- Loose or missing parts
If any scissor lift components are damaged, missing or not working correctly, do not use the lift until it has been fully repaired. Work zone hazards must be removed or enclosed by barriers to keep the lift at a safe distance.
Battery Maintenance
Powered partitions are popular in school gymnasiums, large group instructional rooms, cafeterias, and other large spaces. You are required to test the operation of the door’s safety system each year. You are also required to train anyone who will be operating these doors (operators cannot be a student). Your staff can perform the safety tests and if your staff does perform this test, you must have a written procedure for the test. Typically the maintenance of these partition doors is a daunting task and it is usually performed by a contractor. If you have your partition doors on a preventative maintenance schedule with a contractor, you can also ask them to perform the safety test.
Current through 2023 NY Law Chapter 276
Section 409-F - Electrically operated partition and door safety
The board of education, trustees, principal or other person in charge of every public or private school or educational institution within the state, wherein classrooms or other facilities used by students are found to have electrically operated partitions, doors or room dividers, shall arrange for, and require, that:
- Appropriate and conspicuous notice regarding the safe and proper operation and supervision of the electrical device operating such partition, door or room divider is posted in the immediate vicinity of the operating mechanism;
- There is established a procedure for the notification of all school employees and all other persons who regularly make use of the area where such device is located of the safe and proper procedure for the operation of the mechanism and of the applicable penalties for disabling safety equipment required pursuant to this section; and
- Every electrically operated partition or room divider shall be equipped with safety devices which, subject to standards established in rules and regulations promulgated by the commissioner, stop the forward motion of the partition or room divider and stop the stacking motion of the partition or room divider when a body passes between the leading panel of such partition or divider and a wall, or when a body is present in the stacking area of such partition or divider.
Any person who disables or directs another person to disable any safety equipment required pursuant to this section shall be guilty of a violation punishable by not more than fifteen days imprisonment, or a fine not to exceed one hundred dollars, or both such fine and imprisonment.
N.Y. Educ. Law § 409-F
Suggested Wall Partition Inspection Checklist:
- Remove Winch Set Screws and inspect key and keyway (If applicable)
- Apply Loctite to set threads on set screw and re-install set screws.
- Install 3/16 Roll Pin to assure that drive pipe will not dis-attach from winch.
- Check all set screws, nuts and bolts on the motor/winch unit to ensure that none have worked loose.
- Check each limit switch to ensure that it is working properly and that the screws are tight. Make adjustments as deemed necessary for proper operation.
- Ensure that the splices on the drive pipe are secure.
- Visually inspect the bottom and top batten for any bends or separation of the splices. Assure that bottom batten pipe has not slid out of sleeve.
- Check for any tears in the curtain/vinyl/netting.
- For Fold-Up Curtains: Assure that cable drums are equally spaced, and that hoist cable is wrapping properly throughout system applicable.
- Assure that all pre-wraps are consistent.
- For Roll-Up Curtains: Assure that belt pre-wraps are consistent throughout curtain. Re-fasten bottom stop strips as deemed necessary.
The following suggested or similar wording for this notice must be posted at every control station:
CAUTION
ELECTRICALLY-POWERED PARTITION
Control stations must be attended by staff members while the partition is in motion.
Staff members must stand on opposite sides of the opening or closing partition.
Students must stay away from the partition when in motion.
It is probably one of those things that you look at a lot, but probably do not give it much thought. I’m here to tell you that if you haven’t put any attention towards your sports field light towers, you need to start doing so. Most manufacturers recommend an annual visual inspection of light tower poles.
When I started as a Director of Facilities in September of 2009, the district that hired me had just removed all the light poles for their football field. Earlier that year, it was discovered that poles manufactured by Whitco Co. LLP were failing and poles had come crashing down from Texas to Pennsylvania. The Consumer Product Safety Commission had issued a recall for stadium light poles that may crack and fall, and the poles are our district were part of that recall. Our poles had cracks around the welds at the pole bases.
A light tower falling down can do significant damage, and cause injury, even death. I would perform visual inspection on your light poles at least once per year and would recommend doing them twice with one being before spring sports and the second before fall sports. Light pole manufacturer’s recommend an annual inspection of the poles. These inspection procedures include a magnaflux test and dye penetrant testing, along with visual inspections. I would suggest you speak with your lighting manufacturer to determine the recommended inspection frequency and the type of testing to be done.
Visual Inspection Checklist
- Check the concrete base for cracks and erosion causing exposure of more of the base.
- Mounting studs and nuts should be clean and rust free.
- Look closely around the area where the tube of the light pole is welded to the mounting plate for corrosion, cracks, and flaking of the galvanized surface.
- Any damage to the poles from being struck by equipment should be brought to the attention of a structural engineer. Dents in the pole could increase the likelihood of failure.
- Document your visual inspection. Take and file photographs of any changes in conditions to the pole.
- Any rust spots should be addressed immediately. Contact your pole manufacturing company to see what paint should be used and what procedure must be done for surface preparation.
- When you have a formal inspection by a structural engineer, be sure to get documentation and keep this on file.
This is a link to an article on the history of failing light towers.
If you have information or questions regarding other stadium light poles, contact the Consumer Product Safety Commission (CPSC) at (800) 638-2772 or send an e-mail to info@cpsc.gov.
Per NYS Fire Code 607.3.3.3.1 Tags. When a commercial kitchen hood or duct system is inspected, a tag containing the service provider name, address, telephone number and date of service shall be provided in a conspicuous location. Prior tags shall be removed or covered.
You are also required to have your kitchen hoods cleaned every 6 months. This cleaning procedure should include the filters for the hood, the hood itself (both inside and outside surfaces), any grease collectors, and the fan for the hood. Document the cleaning process and keep a record of the cleaning process.
Every building owned, leased, or operated by a school district or BOCES must be inspected annually by a certified code enforcement official or building safety inspector (previously known as a code enforcement technician) using the NYSED Public School Building Fire Safety Report. Annual fire safety inspections may not commence earlier than 45 days prior to the school’s annual due date. NYSED will email a reminder to superintendents of schools that their annual inspection is due. Although we call this an annual inspection, actual inspections occur every 11 months, which means inspections are not being held the same month each year.
The results of the annual fire safety inspection must be reported to the New York State Education Department (NYSED) via the secure NYSED Application Business Portal – Fire Safety application. The updated process includes an annual requirement that all school districts and BOCES verify the ownership and use for all buildings that are on the NYSED Fire Safety System. This process must take place prior to entering any Fire Safety Report data into the Portal. After all buildings have been verified, the annual inspection data can be entered. Once the annual fire safety inspection has been successfully entered into the Portal, and the superintendent has certified the accuracy of the inspection data in the Portal, a certificate of occupancy will be automatically generated and will be available for printing by the school district or BOCES. Unlike in the past, certificates of occupancy are not mailed from SED.
Fire inspection regions (previously known as zones) have been reconfigured to be consistent with previously identified zones in the SEDREF system. The city school districts in Buffalo, Rochester, Syracuse, and Yonkers have been integrated into the Fire Inspection Regions where these school districts are geographically located. The annual fire safety inspection includes an entire existing building, exclusive of any addition which is under construction. Once an addition has been completed, the designing architect or engineer must execute a Certification of Substantial Completion (FP-CSC) for the portion of the new building or addition proposed to be occupied. Additionally, the entire building including the new space to be occupied must then be inspected by a certified code enforcement official or building safety inspector; after which the school district or BOCES must obtain a new certificate of occupancy for the entire building using the same process noted above.
Questions related to the Fire Safety Report or Certificates of Occupancy may be directed to the Office of Facilities Planning at 518-474-3906.
The slides for the changes made to entry of the fire inspection via the portal can be found at http://www.p12.nysed.gov/facplan/documents/UpdatedFireSafetyProcessPresentation.pdf
At the time of the inspection, please be sure to have the following available for review:
- Carbon Monoxide Alarm Inspection Testing & Maintenance Records
- Record of annual fire alarm system tests
- Record of emergency light testing
- Elevator inspection certificate(s)
- Record of Fire Extinguisher Inspections, including a map of the fire extinguisher locations and the type of extinguisher
- Record of 6-month inspection of kitchen hood AES systems
- Record of 6-month cleaning of kitchen hoods
- Record of annual fire sprinkler system inspections & tests
- Record of annual standpipe system inspection- hose, etc.
- Record of annual hydrant(s) flow test if private
- Record of testing & maintenance of emergency and standby power systems, including building generators
- Certificates are posted that indicate that each boiler has been inspected in compliance with Section 204 of the Labor Law (done every 2 years)
- Records of inspection, testing & maintenance of electrically operated partitions maintained on premises and available for inspection. NOTE: The inspection/testing/maintenance intervals are those recommended by the manufacturer.
- Records of inspection, testing and maintenance of sliding and rolling fire doors.
- Hazardous Materials Inventory & SDS sheets.
- Written Fire Safety Plan including evacuation procedures for evacuation of students who have disabilities or special needs.
- Area of Refuge 2 Way Communication System testing
- Grease Traps have been secured and signage has been added. You should have a map/print showing the locations of all grease traps.
- Verify that all doors can close and latch.
- Emergency Rescue Window are all able to open easily and there is nothing blocking them.
In addition to the items listed above, a few other points you should be aware of for fire safety are listed below. Here is a link to the Fire Code, which details each nonconformance item in the NYSED fire report.
- No combustible storage in mechanical, elevator control, boiler, and electrical rooms
- Portable electric space heaters are UL Listed and have a tip over safety feature. These must be plugged directly into an outlet and not an extension cord or power strip. Note: The addition of a heat source in a room will throw off your HVAC control for that room as it will sense an over temperature condition and try to cool the room down to the setpoint, defeating the purpose of the portable heater.
- No material is to be stored within 24” of the ceiling.
- No wall in a classroom can be covered with more than 50% of combustible materials (paper).
- No paper on doors.
- Windows for classrooms are no blocked and you can see into the classroom from the hallway.
- No wedging of doors.
One thing you will surely be forced to deal with is what is affectionately called electrical outlet growth. This is when items suddenly appear in classrooms that should not be there. Those items include strings of lights or the now popular LED light tape, plug-in air fresheners, strip plugs, home appliances such as coffee makers, toasters and microwaves. You will find many of the Amazon purchases are for items that are not UL Listed. Make sure your district has a policy on what can be brought into classrooms and you will need to enforce these guidelines to adhere to the fire code.
Teachers should be aware of the following:
- Extension cords not in use, other than for temporary use.
- Art work and teaching materials are limited to not more than 50% of the specific wall area to which they are attached.
- Power strips have surge protection/circuit breaker, are not piggy backed into one another and are directly connected to receptacles (no extension cords).
- Portable electric space heaters are UL approved, have a tip over safety switch & are directly connected to a receptacle (not a power strip).
- Curtains must have certification of flame treatment.
- The area in front of the Rescue windows must be clear. There should be no decorative materials on or hanging in front of the rescue windows.
- No hanging from the light fixtures or ceilings.
- Fire exiting directions must be posted in classrooms and kept clear.
- In order to be able to be attached to the light fixtures, Cozy Shades or other light coverings need to be tested by a certified testing company such as UL WITH the fixtures that they are used with. They also must have been tested to meet NFPA 701.
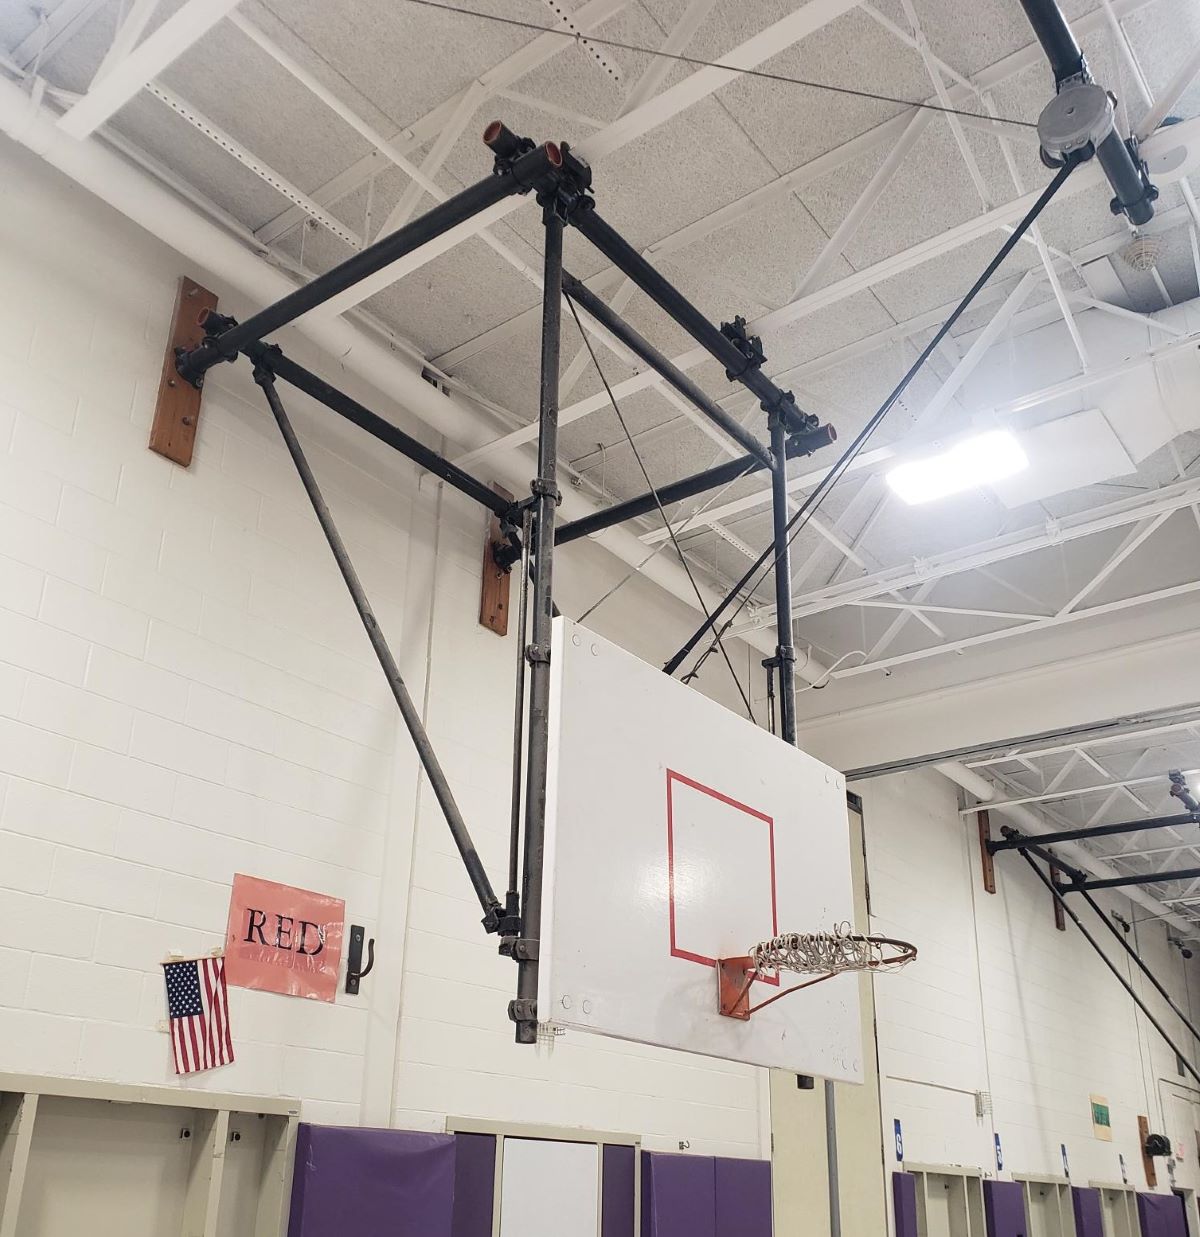
Backstop Inspection:
- Examine cable drum on winch for excessive wear or looseness. Ensure cable is wrapping correctly and that cable stacking does not occur.
- Check key switch operation. Make sure keys work properly, and that winches respond correctly. (If applicable)
- Make sure winch is still properly anchored. Make sure anti-rotation bolts are installed.
- Check cable sheaves for excessive wear or looseness. Make sure cable is still passing through the sheave.
- Inspect cable clamps, aircraft cable, and safety belt for fraying or tears.
- Make sure connection to backstop is secure, and that clamps are right in their original position.
- Inspect safety belt structure attachment. Make sure bolts and clamps are still tight, and that the unit has not slipped.
- Inspect backstop attachment and superstructure. Make sure all bolts and clamps are tight and have not shifted.
- Check for cracks, corrosion, or other signs of damage/excessive wear.
- Make sure back, front, and side braces are still at proper length, and that the jackknifes are folding correctly.
- Assure that Jackknife set-screws are secured.
- Check height adjuster for loose clamps and binding that keeps it from operating correctly.
- Lubricate inner tubes of height adjusters.
- Inspect bank and goal for cracks and bending.
- Check that all hardware is present and not loose.
- Make sure rim is still 10’ from the floor, level.
- Check padding for tears, missing pieces, or loose sections.
- Make sure backstop is still vertically plumb.
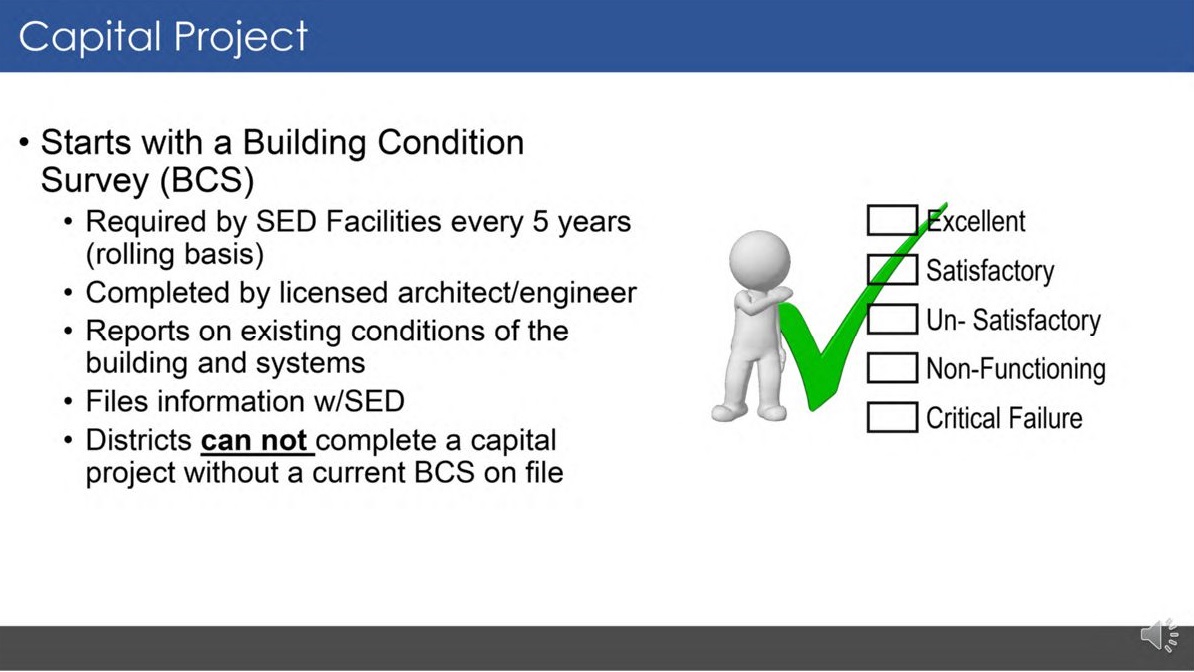
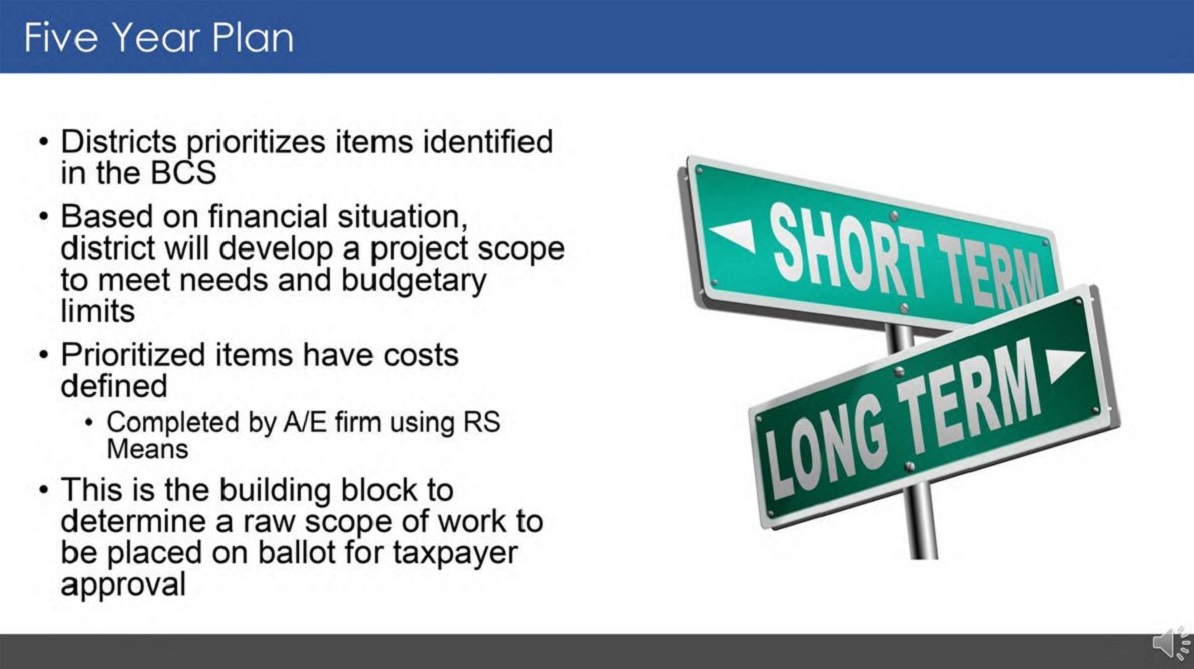
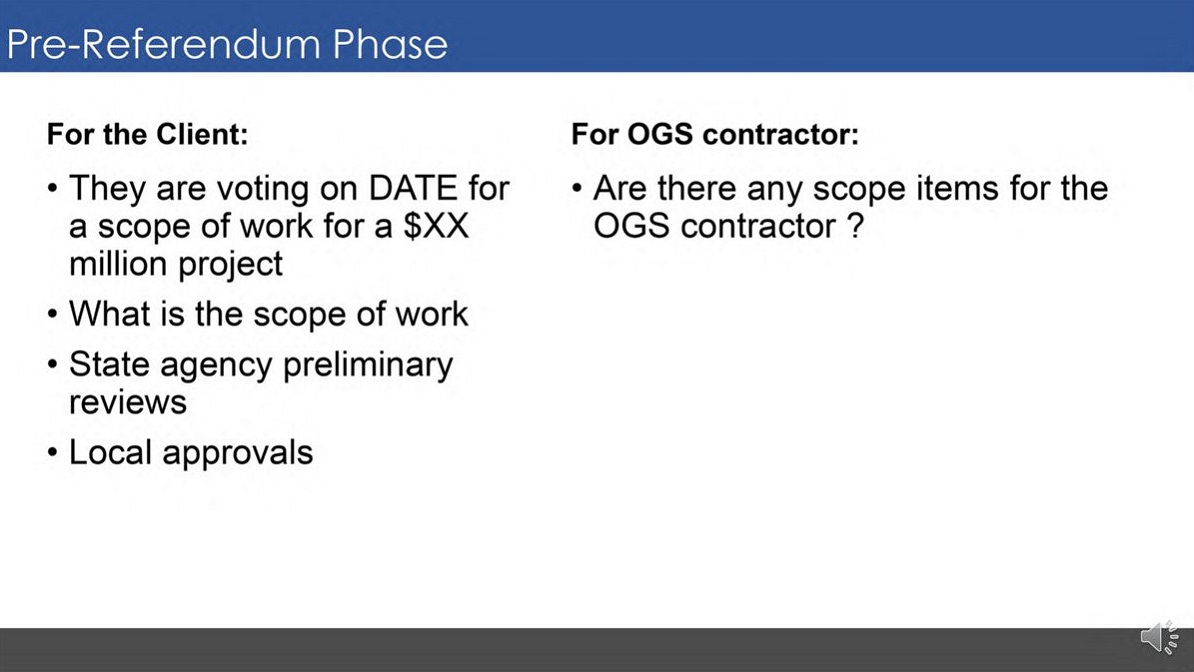
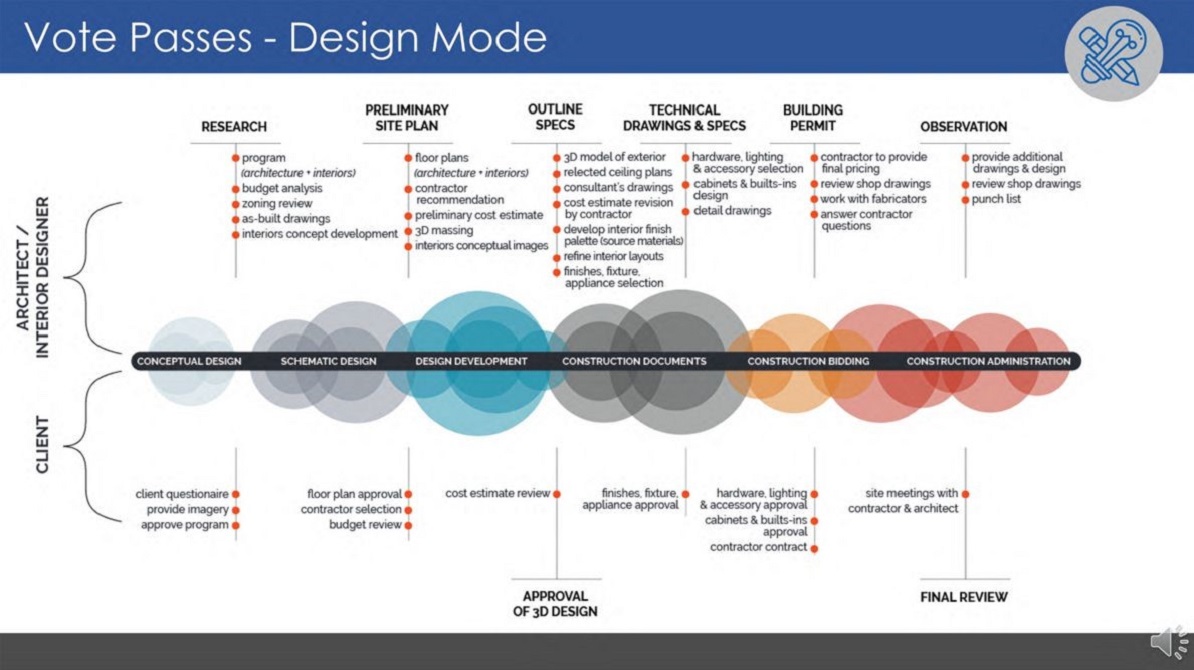
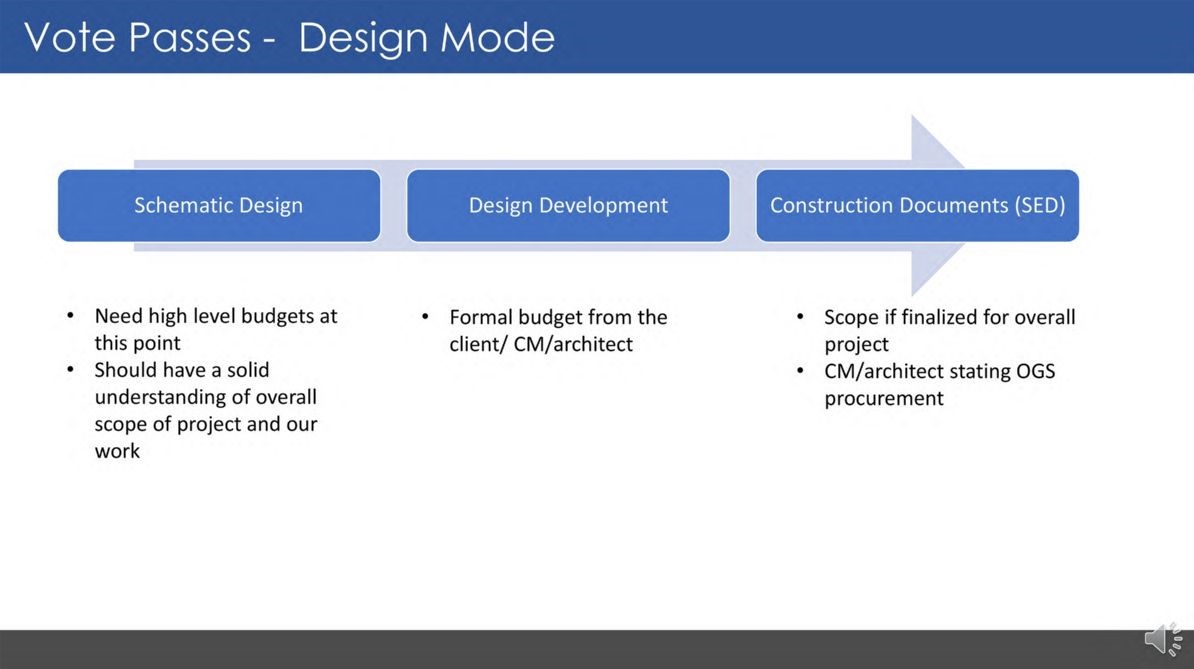
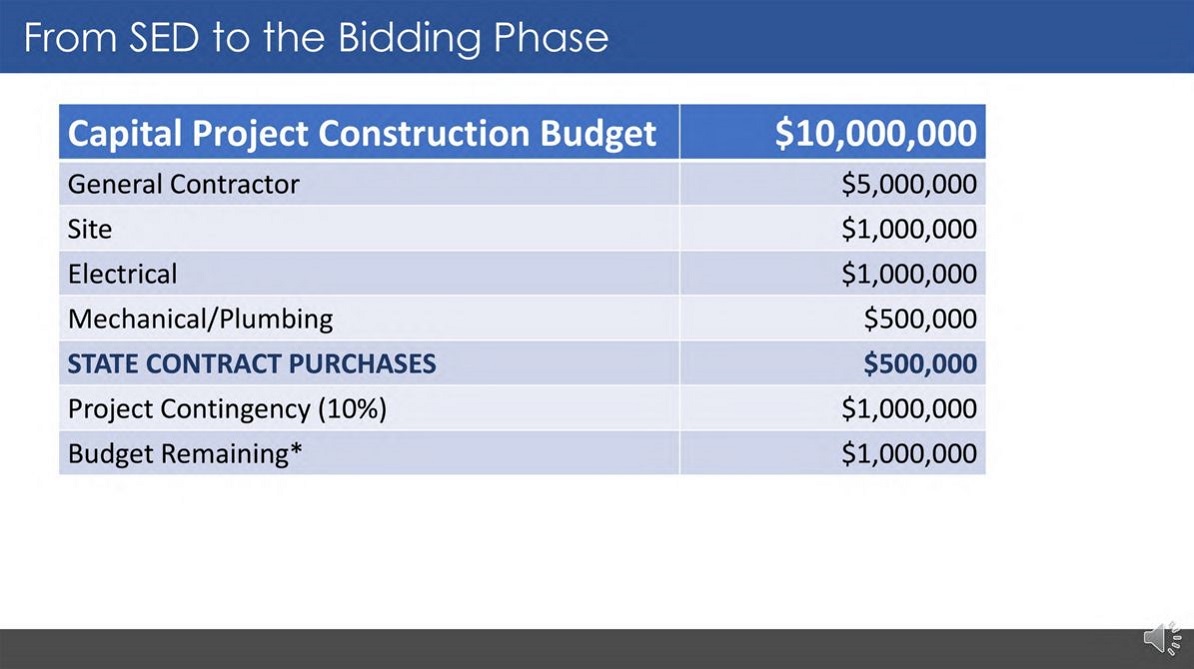

Role of the Director of Facilities (DOF) and the Architect/Engineer (A/E)
District Maintenance:
It is appropriate for the DOF to have an ongoing relationship with their A/E as it pertains to maintenance of their facilities. The DOF should utilize their A/E as a resource for appropriate maintenance improvements. An example of this may be proper safety surfacing at the districts playgrounds, or the type of salt used on new concrete. Building a relationship with the A/E spreads knowledge of district needs to the design professional ensuring future work is inclusive of deficiencies. Often times districts utilize annual Capital Outlay Funding ($100,000) to complete work associated with maintenance needs. The DOF should maintain a list of items that could be completed utilizing this funding source.
Building Condition Survey (BCS):
It is essential the DOF communicate building deficiencies during the BCS phase to confirm sufficient dollars are appropriated for building system deficiencies to be incorporated in future capital work. It is also appropriate for the DOF to be involved in discussions regarding long term district planning as it pertains to facility needs. Items may include but are not limited to facilities: HVAC, electrical systems and lighting, security, roofing/windows/doors, athletic fields, building user needs, building maintenance needs, parking lots, site circulation (both bus and community), building access controls and technology systems, kitchen and cafeteria, building notification and sound systems as well as local community facility needs, ie Is the district deemed a Emergency shelter?
Project Pre-Planning:

Project Planning and Schematic Level Design Phase:
The DOF’s role is needed to ensure the proposed capital project scope of work includes critical building deficiencies and found Health, Safety and Welfare items noted in the BCS. The DOF should review the BCS recommendations against the proposed scope of work. The DOF should also be included in project planning meetings (these may include board meetings, meetings with A/E, meetings with suppliers, etc) in order to prepare for and discuss future maintenance and user needs as it pertains to building(s) systems. The DOF should review schematic level drawings, specifications and proposed equipment cut sheets against described project scope of work. As an overall check, the DOF should review the voter approval language to ensure the authorized scope of work is consistent with that of the voter approval verbiage.
Capital Project Design Development Phase:
The DOF should confirm critical building needs will be included in the project or have a plan for future capital project work. The DOF should work with their A/E to confirm building system improvements, maintenance of proposed systems, usability of proposed systems, lead times of proposed systems, warrantees, etc. The DOF should consider how the proposed scope of work will change or effect their staff as well as other district staff. The DOF should confirm decisions made in the schematic level design phase have been incorporated or noted as part of future improvements during regular design meetings. The project team should be discussing project schedules at this point.
Capital Project Construction Document Phase:
The DOF should continue to be apart of project meetings and discussions with their A/E about system types, manufacturers, design of systems and maintenance of systems, etc. The DOF should confirm with other district users as needed (or if requested) to insure proposed systems are appropriate. Ie. A DOF may discuss the type of wall pads proposed in the gym with the basketball coach or PE teachers. Or the DOF might discuss the types of tables being proposed in the cafeteria with their staff that cleans them. The DOF should be involved with discussions surrounding the project schedule. The DOF’s insight is critical to the team when phasing projects, controlling access, etc.
Capital construction phase:
The DOF or appointed staff often times serves as the day to day client representative. If the district appoints a clerk of the works or a construction manager to the project, the DOF should meet with them often to ensure security of the building during construction, access by contractors, special event access, safety of students and the general public, etc. DOF should include themselves in construction meetings and walk with the A/E at critical times during the construction process. The DOF should help the A/E and CM coordinate turn over of spaces, both before and at the end of improvements. Work with A/E and CM to determine if there are contingency dollars available to be utilized before contractors demobilize.
Post construction:
The DOF should maintain a relationship with their A/E professional for any post construction questions, user needs, system needs, etc. The DOF should gather and maintain all construction manuals and as-built data from contractors. The DOF should do a final walkthrough with A/E of critical work prior to district acceptance. The DOF should ask their A/E to schedule a 11 month walkthrough. The DOF shall give their A/E post occupancy feedback. The DOF should develop a file of new warrantee information. The Architect will also play a role in the commissioning and testing documentation for new equipment.
The role of the Construction Manager (CM), as it relates to the Capital Improvement Project Process, is one of support and collaboration between the School District Administration, Directors of Facilities, and their Design Professionals (A/E). Through all phases of Capital Projects, the CM serves as a vital liaison (coordinator) between Prime Contractors and the School District, their A/E as well as the District’s faculty and staff. From performance of document reviews and financials, to the on-site supervision of construction activities, the CM’s duties are to be performed in the interest of providing a successful project for the School District and the community at large. As a Director of Facilities, understanding the role of the CM during the execution of a Capital Project can help to ensure proper coordination of responsibilities and accountability for all parties involved.
During the Pre-Referendum and Pre-Construction Phases of a Capital Project, the CM’s role will include the review of construction documents, drafted by the School District’s Design Professionals, for completeness and constructability. In order to facilitate an accurate review of existing conditions relative to scheduled installations, the CM should request a review of As-Built Construction Documents from previous projects, the District’s Asbestos Hazard Emergency Response Act (AHERA) documentation, as well as any other information related to the presence of hazardous materials that may be encountered during construction. Throughout this document review process, the CM should meet frequently with the Director of Facilities in order to draw on their knowledge of their facility’s history and past improvements. The CM’s document reviews should include the survey and examination of all areas where construction activities are expected to be performed. Thorough examinations and documentation of existing pre-construction conditions are to be conducted. Upon the discovery of existing conditions which deviate from project documents under review, as well as any other discrepancies or omissions, the CM will notify the District’s A/E and request a response or modification of the documents, prior to the drafting of documents to be issued for bid. In addition to document reviews performed during the Pre-referendum and Pre-Construction Phases, the CM will facilitate or perform budget estimates of project documents.
Prior to the issuance of Bid Documents for a Capital Project, the CM should seek information related to the School District’s and Facilities Department’s activities expected to take place during the Construction Phase of the Capital Project. The information that the CM should seek from appropriate channels include, but are not limited to:
- Extra-Curricular Activities such as Athletic practices, tournaments, etc.
- Planned Summer School and Summer Programs
- Planned Maintenance Activities and the Facilities Department’s expected plan for performance of Summer Cleaning, re-finishing of Gymnasium Floors, etc.
- Identification of areas to use as “Swing-Space” which will allow for the performance of early work or the relocation of School District personnel or activities.
- Identification of areas for interior and/or exterior storage and staging of construction materials and equipment.
Once furnished with this information, the CM will be responsible for the drafting and presentation of the Project Milestone Schedule and Phasing and Logistics Plans for approval by the School District, prior to these documents being included in the Project Documents. The Milestone Schedule includes dates for the expected progress and completion of construction activities. Phasing and Logistics Plans, which depict the areas to be affected by construction, may also be used to identify “Swing Space”, potential staging areas for construction materials and building access. In creating these documents, The CM is responsible for taking into consideration the School District’s scheduled activities, preferences and limitations. If the relocation of classrooms, offices or other spaces will be necessary to allow for construction activities, the CM is responsible for creating a Room Move Management Plan. In doing so, the CM should seek input from the School District regarding the storage of materials and accommodation of staff in specifically identified areas of a building(s). If desired by the School District, the CM is responsible for creating a Request for Proposal (RFP), seeking professional moving services from qualified firms. RFPs should include detailed information regarding how materials, equipment and furniture are to be moved, stored and ultimately relocated or returned. In addition to seeking professional moving services, the CM is responsible for the creation and distribution of RFPs for Special Inspection and, if necessary for the removal of Hazardous Materials, Asbestos Air Monitoring Services. Proposals received for the performance of all services, once reviewed by the CM, are to be presented to the School District Administration for review and approval as required.
During the Bidding Phase for each Capital Project, the CM’s role in support of the School District should be focused on ensuring that a favorable bid atmosphere can be attained prior to the scheduled Bid Date. The CM should work closely with the School District’s A/E to track the status of State Education Department of New York (NYSED) approval of Project Documents. Typically, all Project Documents are required to be approved by NYSED prior to bidding and award of contracts during a Capital Project. In addition, the CM is responsible for contacting potential bidders for each Contract (General, Mechanical, Electrical, etc.) in order to generate interest in the Capital Project. The CM should maintain and frequently update a database of contractors who they have worked successfully with in the past and/or contractors who are known to perform work in the general area of the Capital Project Site. Upon the release of Project Documents for review by potential bidders, the CM is responsible for arranging Pre-Bid site visits with contractors interested in viewing existing conditions and the Project Site. The CM is to serve as the primary point of contact in the scheduling of these site visits and shall meet with and escort contractors during their review. Once Bid Packages for each Contract are received, the CM is responsible for assisting the School District and their A/E in ensuring the accuracy and completeness of these bids. This process of “De-Scoping” involves the distribution of letters, which include questions related to the contractor’s inclusion of specific scope items and general requirements of each contract, to bidders for each contract. Once contracts are awarded for each contract, the CM and the School District’s A/E are responsible for the gathering of documents such as Insurance Certificates, Bonds and executed Contracts from each Prime Contractor. Prior to the beginning of scheduled construction activities, the CM’s responsibility is to maintain constant communication between the contractors, the School District and their Design Professionals. The CM, along with the District’s A/E will also be responsible for the review of Submittals (informational documents identifying materials, equipment and systems to be utilized and/or installed during a project). If approval of color or material samples by the School District is required as part of the Submittal Process, the CM will work with the School District’s A/E and contractors to facilitate the delivery of samples for review.
During the Construction Phase of a project, the CM will be responsible for daily on-site supervision and documentation of work performed by Prime Contractors and their Sub-Contractors. The CM will be responsible for directly interacting and communicating with contractors, the A/E and the School District in order to ensure that work performed meets the quality standards of the Project Documents and the Owner’s expectations. Documentation and photographing of existing conditions, construction activities and completed installations are one of the most important roles that a CM assumes as part of conducting on-site supervision. Ensuring the cleanliness and safety of project work sites is also within the CM’s responsibilities. The CM should properly communicate to all on-site superintendents for each contractor how cleaning will be performed to theirs and the School District’s expectations. In the event that deficiencies in work or deviations from the Project Documents are observed by the CM, it is their responsibility to inform the contractor performing the work, the A/E and if immediately necessary, the School District in order to ensure timely attention to these issues. Should conditions arise that would preclude a contractor from performing work or installations as described in the Project Documents, or if more information regarding the work is required, the CM is responsible for reviewing the situation with the contractor(s) to ascertain the solution. If the situation is above their qualification, experience or knowledge of the Project Documents, the CM is to encourage the contractor to submit a formal Request For Information (RFI) to the A/E for review and response by a qualified individual. Should an RFI response or other direction given by the A/E or the School District lead to a change in the manner in which installations are made or work is performed by a contractor, a Change Order, which enumerates a change in the amount of a prime contractor’s contract, will be issued by the A/E. The CM, along with the A/E and the School District are responsible for the tracking and processing of Change Orders.
In order to properly control schedule and ensure that all parties involved are coordinating their work efficiently and as provided for in the Project Documents, the CM should hold weekly progress meetings with the on-site superintendents for each contractor performing work on-site. In addition to these weekly meetings, the CM is responsible for scheduling meetings with contractors prior to the beginning of certain activities which require advanced coordination or complex installations. An example of such a meeting would be a “Pre-Abatement Meeting”, during which all parties involved (CM, Asbestos Air Monitor, Hazardous Materials Contractor, and on occasion A/E) meet to discuss the contractor’s plan and schedule for abatement, required air sampling required in work areas and the impact that these removals may have on adjacent spaces and activities. In addition to meeting with contractors, the CM should conduct regularly scheduled meetings with the School District and their A/E in order to keep them apprised of progress and any potential issues that could affect the Project Schedule or the completion of any installations. These meetings, generally held on a monthly basis unless otherwise prescribed, are referred to as Owner, Architect, and Construction Manager Meetings (“OACM”). These OACM meetings are typically conducted throughout all phases of a Capital Project and are used as a venue to discuss all aspects (financial review, Phasing and Logistics, scheduling) of a project from the design phase to closeout. The CM is responsible for providing progress reports as often as prescribed by the School District and/or their Board of Education.
Following the completion of construction activities, the CM is responsible for assisting the A/E in providing any documentation required for the closing out of all contracts. Included in these requirements, and of particular importance to the Facilities Director, are As-Built Drawings (Project Documents which depict the manner and location of installations and work performed during a Capital Project), Operation and Maintenance Manuals (O&M), wherein all information related to installed products, finishes, equipment and materials are listed. The submission of these items, as well as Warranties for equipment and products installed, to the School District are all requirements provided for in the Project Documents for closeout of all contracts. The CM is also responsible for coordinating and scheduling with contractors for training to be provided on systems and equipment installed during a project to the School District’s Facilities Staff. The CM is responsible for ensuring that training for each system or piece of equipment is performed by qualified manufacturer’s representative and that the training is thorough, informative and documented. Should the Project Documents prescribed that a certain percentage of installed materials are to be provided to the School District for their use following the completion of construction activities, the CM is responsible for coordinating the delivery of such material, documenting the quantity provided and arranging it’s storage with the Director of Facilities. Once this “Turn-Over” or “Attic Stock” requirement is satisfied, the CM is responsible for providing a transmittal from the contractor providing the materials, which includes the quantity of materials provided, to the Director of Facilities for signature. In addition to the gathering and review of closeout documentation, the CM is responsible for ensuring the completion of items listed on Punch-Lists for each contract. Punch-List items, which are typically items which are incomplete or deficient, are identified by the A/E during their review of new installations and work performed by each contractor. The CM is responsible for tracking Punch-List items and coordinating with contractors for completion and correction of these items. Following the end of the Construction and Closeout Phases of a project, the CM can serve as a liaison between the School District, Director of Facilities and contractors. Should issues arise with installations and work performed during the project, the CM is responsible for reviewing and documenting on-site conditions with the Director of Facilities and their staff. If necessary, the CM is responsible for contacting the contractor(s) whose work is found deficient and arranging for remediation by the contractor(s), their subcontractors or a product’s manufacturer as prescribed by Warranty documents.
During the various phases of a Capital Project, the CM’s role should be to act in the best interests of the School District that they are serving. Beginning in the Pre-Construction Phase, the CM is responsible for, among other duties, ensuring completeness and accuracy of Project Documents in order to assist the School District in receiving favorable bids. During Construction, the CM’s is responsible for supervising and documenting all work performed conforms to the expectations of the A/E and the School District. In the Closeout Phase of a project, one of the CM’s duties include the assurance that the School District and their Facilities Staff are provided with adequate training and information which will allow them to effectively utilize and maintain newly installed equipment and finishes. Following the end of construction and closeout phases of a project, the CM’s responsibility is to support the School District, Director of Facilities and the Facilities staff in maintaining their new and/or newly improved building, installations and equipment.
The Construction Manager also acts to coordinate the required commissioning of equipment and overseeing testing documentation.
When an "emergency" occurs and mitigation and a Capital Construction Project is needed, the district or their design professional (Architect) should contact Facilities Planning Fiscal Associate in a timely manner.
Please refer to the document Emergencies-Capital Construction.
Emergency Project Justifications
- Conditions must arise from an accident or other unforeseen occurence or condition.
- Condition must require immediate corrective action which cannot wait execution of proper bidding procedures.
- Work associated with the correction of the condition is to be limited to emergency repairs.
- Mitigation activities necessary to dispense with an emergency are needed immediately and are temporary in nature and they:
- Do not involve capital construction,
- Do not require approval of the Commissioner, and
- Are ordinary contingent expenses.
Recovery Period:
- Begins immediately after the mitigation activities
- Is capital construction and must be properly planned, developed, authorized, and advanced
- In no case does an emergency declaration empower a Board of Education to advance a capital construction project without proper authorization and prior approval of plans and specifications by the Commissioner
- If work is done without approval by the Commissioner, there is no building aid
- Facilities Planning may expedite project review and approval depending on need
Schools have been using EPCs to increase energy efficiency, improve operations, and save money for over twenty years. Large-scale energy-efficiency improvements result in energy and operational savings but can require a significant initial investment. An EPC uses those energy savings to finance the cost of new equipment and other capital improvements over several years. In addition, by bundling multiple small up-front improvements, an EPC allows schools to leverage money from quick paybacks on those improvements to finance the larger scale investments.
In a typical EPC process, the district hires a private energy services company (ESCO) to conduct an investment-grade energy audit of its assets and identify cost-saving energy improvements. If the district and ESCO agree to pursue the contract, the ESCO guarantees a level of cost savings to result from implementation of the energy improvements. An EPC can vary in scope. Some contracts are for just one building or a sample of buildings, while others are for managing an entire portfolio of buildings.
Is An EPC Right For You?
Is an EPC the right option for your district’s needs? For any district that is considering entering into an EPC, it may be helpful to evaluate the facility needs, staff capacity, and potential for energy improvements. The Massachusetts Department of Energy Resources has identified the following as factors that may make entering into an EPC the right decision for a local government
- More than 40,000 square feet of floor area
- More than $40,000 annually on energy costs
- Aging buildings or equipment
- Recurring maintenance problems or high maintenance costs
- Comfort complaints
- Scarce budget resources
- Limited energy-management expertise
- Too many demands on maintenance staff
- No recent upgrades to lighting, controls, or HVAC equipment
There are a number of benefits for schools entering into an EPC. An EPC allows energy cost savings, rather than an initial capital investment, to pay for the upgrades that achieved those savings. Project costs and savings are guaranteed through the ESCO, which serves as a single point of accountability. Energy savings are also measured and verified to provide further assurance that improvements are performing as planned. If projects fail to perform as well as planned, the ESCO is responsible for covering the energy-savings shortfall and will be responsible for replacing any failed equipment. The ESCO will also partner with districts to access low-interest financing, rebates, and incentive programs.
One advantage of doing an EPC is that unlike a Capital Project, and EPC is not required to be voter approved. An EPC is a great way to get larger project work done that will not fit into the budget numbers of a Capital Outlay Project. It is also a great way to address some low hanging fruit with respect to energy savings. Items like LED lighting, HVAC Controls, and Building Envelope are a few items that justify an EPC. However, it is recommended that you partner with an ESCO that has a strong proven track record. Ask other districts who have used the ESCO in the past. Be cautious when an ESCO pushes to expand the project size to encompass other aspects that are more fluff than good solid paybacks.
Proper Safety Data Sheet management starts with having an up-to-date list of all the potentially toxic chemicals that you have in your district and to have that list organized. A Safety Data Sheet, also referred to as an SDS, is a document that provides all the necessary information employees need to know with respect to chemicals they may contact within your district’s buildings. The Safety Data Sheet is divided into sixteen sections and these sections cover the following:
- Identification
- Hazard(s) identification
- Composition/information on ingredients
- First-aid measures
- Fire-fighting measures
- Accidental release measures
- Handling and storage
- Exposure controls/personal protection
- Physical and chemical properties
- Stability and reactivity
- Toxicological information
- Ecological information
- Disposal considerations
- Transport information
- Regulatory information
- Other information
Safety Data Sheets are required to be kept and available to all staff for every chemical you have at your district. Managing this endeavor can be quite a task. Safety Data Sheets are one of the first things an auditor/inspector may look for when checking if you are following regulations. Many of us have binders in our building main offices, but they may not always have the latest version of these documents. Many districts have gone to an electronic format for storing their SDS documents. As noted in the required training section, all new staff members are to be trained on the Right To Know within 60 days of being hired and then again annually.
If your Safety Data Sheets are stored electronically, they must be accessible without the need for a password. You also need to have an SDS Management Plan in place. There is an example of a plan attached and a link to the file so you can download and edit it for your district if you do not have one. Below is a link to the OSHA website with a document that explains how to read and understand the sixteen sections of a Safety Data Sheet. This is covering in annual training, but it is a good reference in case you are asked questions on a Safety Data Sheet.
Non-toxic chemicals do not require an SDS. Unfortunately, there are very few chemicals that we use that do not have some type of hazard associated with them. Aside from water and beverages, you will need an SDS for about everything else.
There are a few things that you must be cognizant of with respect to your SDS program.
- You must have a SDS for every potentially toxic chemical you have on site at your district.
- Safety Data Sheets must be readily accessible by all the staff at your district.
- Safety Data Sheets should be organized in such a manner that they are easy to access and locate a specific SDS.
- It is strongly recommended that you also keep a hard copy of all the Safety Data Sheets in case the electronic version becomes unavailable.
- If you are using binders and hard copies of the Safety Data Sheets, it is strongly recommended to have binders located near known hazardous chemicals, such as your custodial closets. These binders can contain just the SDS for the chemicals in that specific area.
- As part of your annual training sessions with your staff, reviewing SDS information for chemicals they use is good practice.
- Record SDS reviews by noting which chemicals were reviewed and who attended the session.
Link to the OSHA explaining each section of an SDS.
https://www.osha.gov/sites/default/files/publications/OSHA3514.pdfBelow is the link to the OSHA Hazard Communication Standard, which details all the requirements for Right To Know.
https://www.osha.gov/laws-regs/regulations/standardnumber/1910/1910.1200Click here for a sample SDS plan in Word
Click here for a sample SDS plan in PDF format
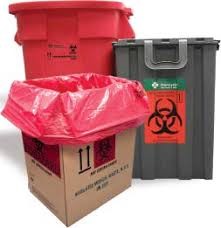
When the regulated medical waste is collected by a third-party carrier, the waste is sent to an approved transport facility or a directly approved processing facility.
Schools can generate a variety of Regulated Medical Wastes (RMW) from staff/student by the way of EpiPens, diabetes management devices, broken glass, and medication. These wastes should not be mixed with regular trash, and they must be disposed of according to federal, state, and local regulations. Not only must they be disposed of properly, but you must document their removal and keep these records on file.
Most, if not all the RMW will come from the nurse’s office. As stated, you will have sharps (needles) from insulin injections, and EpiPens, along with materials that may have been used for a bleeding student (gauze pads, bandages, tissue, etc) which all need to be disposed of properly. There are a few ways to dispose of these products, and to store them until disposal. Note that feminine hygiene products used to absorb menstrual flow are not considered RMW per OSHA.
Medical Waste Container
Many districts may place a Medical Waste Container in the nurse’s office to hold the regulated waste until it is removed from the premises. The containers for RMW are typically red in color or at least have a large red identification label on them. Most containers require a special RMW bag to be used with them, which is also red in color. The red bags and red containers are there to throw up a warning for anyone who may handle these containers.
Storage of Medical Waste
Once you remove medical waste from the area of generation (Nurse’s Office), you can store the waste for up to 60 days if you generate less than 50 pounds of RMW per month, otherwise you are permitted to store RMW for 30 days. If it is a sharps container, it should be sealed before moving it to storage. The waste in the red biohazard bags should be tied or sealed as well. You can place the sealed sharps container inside the red biohazard bag. The storage area must have restricted access and should have a Biohazard warning sign on the door. The surfaces that hold the medical waste shall be smooth and easily cleanable. The waste can not be placed on carpet or rough cement that is not sealed. The surface and the storage area should be impervious to water. If the storage area is located outside the building (storage shed), then it must be locked and must display biohazard warning symbols. It must also be watertight with no danger of any liquid penetrating into the ground.
Removal of Medical Waste
Your district is required to properly dispose of medical waste and to document this action. There are a number of contractors who perform this task, and you can check with other districts within your NYSSFA Chapter as to which vendor they use for this. Pricing to remove RMW can vary quite a bit between vendors. The company who removes your NRW must provide you with a copy of the REGULATED MEDICAL WASTE TRACKING FORM (see example form). This form will show the type of container removed, the number of containers, and the volume of waste removed in addition to other information.
Record Keeping
Per the Department of Health, the following is what is required for record keeping.
70-2.5 Record keeping.
(a) A record of regulated medical waste by quantity and categories as defined in Public Health Law 1389-aa and for disposition of treated waste on-site shall be maintained and retained on-site by the generator for three (3) years from the date of disposition of the waste, and shall be available for inspection and copying by the Department. Documentation of corrective action related to a commingling incident shall be retained three (3) years.
(b) A report of the regulated medical waste generated annually, by quantities and categories as defined in Public Health Law 1389-aa shall be submitted to the Commissioner of Environmental Conservation upon request.
Regulated Medical Waste Plan
You are to have a plan for your Regulated Medical Waste, just like you have a plan for Safety Data Sheets and AHERA. Below you will find the link to a plan that will just need to fill in the blanks. Instructions are included. There is also a link to a completed plan with some comments to assist you. Fill out the plan and then place this document in your Management Binder.
Helpful Links
Here is the link to the DEC’s guidelines on Regulated Medical Waste. NYDEC 365-1.2 Management of RMW by the Generator
Here is the link to the template to use to create your Medical Waste Plan.
Medical Waste – DEC Information
NYS Department of Environmental Conservation - 6 NYCRR Part 364
Effective Date - December 7, 1988
Under the New York Environmental Conservation Law, the Department of Environmental Conservation’s Division of Solid and Hazardous Materials (518-457-6934) / (Medical Waste 518-485-8394) regulates and requires the proper onsite and offsite handling, treatment, and disposal of medical wastes from all generators other than hospitals, clinical laboratories, and residential health care facilities. Any medical waste generated in school districts is covered under this Regulation.
COMPLIANCE ISSUES
- Medical waste generators must properly segregate, handle, store, and arrange for the transportation and disposal of medical waste.
- Medical wastes must be segregated into three classes: sharps, fluids, and other regulated medical wastes. If regulated wastes are mixed in with other waste, then it is all considered regulated medical waste.
- Sharps must be stored in leak-proof, rigid, puncture-resistant red containers; all other medical wastes must be stored in strong, moisture-impervious red bags.
- All containers must be labeled “REGULATED MEDICAL WASTE”.
- Prior to disposal, medical waste must be stored so as to prevent decay. Access to storage areas must be limited to authorized personnel.
- If a generator does not destroy waste on-site, it must arrange for transportation of waste to a treatment and disposal facility using a DEC-permitted transporter (red bag hauler).
- Small Quantity Generators (generate and dispose of less than 50 pounds of regulated medical waste per month) may ship their own waste, provided they first register with the DEC.
- Large Quantity Generators (generate and dispose of more than 50 pounds of regulated medical waste per month) must hire a “medical waste hauler” who holds a current New York State DEC permit to transport regulated medical wastes to a licensed treatment/disposal facility.
- Medical waste bound for off-site transport must be labeled on the outside with the name and address of the generator, the name, address, and permit number of the transporter, the date of shipment, and identification of the contents as regulated medical waste. Inner containers must be labeled with the generator’s name and address.
- A NYS Medical Waste Tracking Form must be used to ensure that the regulated medical waste is transported, treated, and disposed of in compliance with DEC regulations.
- Tracking forms must be signed by the generator, transporters, and the destination facility operator, and must be retained by the generator for at least three years.
TRAINING REQUIREMENTS
- Training of medical care providers and custodial and maintenance staff in the proper handling and disposal of medical waste is required by the Occupational Safety and Health Administration (OSHA). See OSHA Standard 29 CFR 1910.1030 - Occupational Exposure to Bloodborne Pathogens.
If you do not have a RMW plan in place at your district, please click on the link and edit the Regulated Medical Waste Plan Template for your district.
Roofing is not a required inspection by SED, however, we feel this is a necessary and critical task. It is one of those things that we tend to ignore until we have problems, such as a leak. Knowing what type of roof you have is the first step. Below are the roofing systems we typically see in New York on school buildings. We encourage you to watch the roofing video in the TRAINING VIDEOS section.
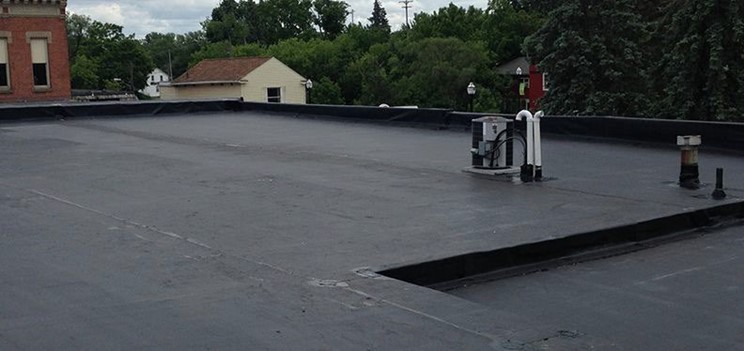
EPDM Roofing- Ethylene Propylene Diene Monomer
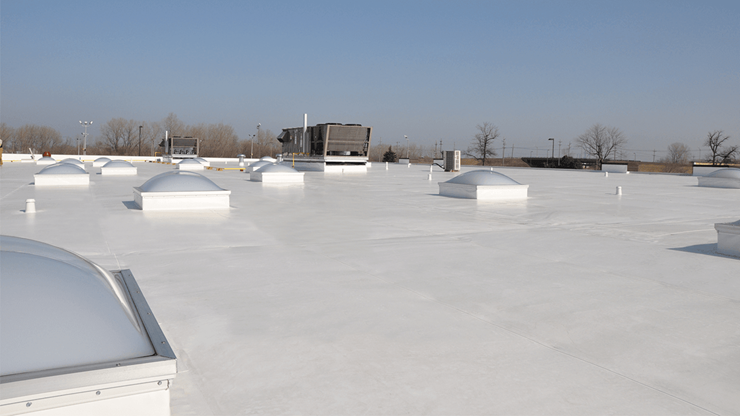
PVC Roofing - Polyvinyl Chloride
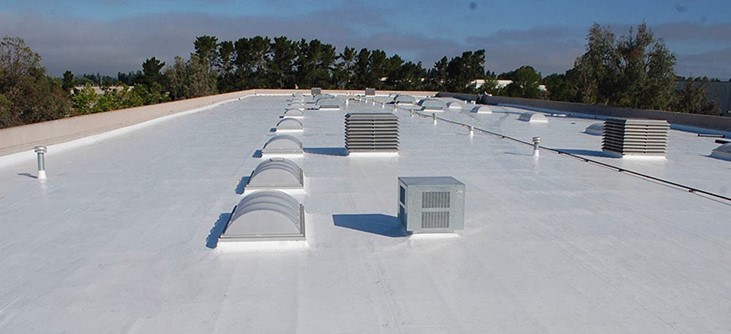
TPO Roofing - Thermoplastic Polyolefin
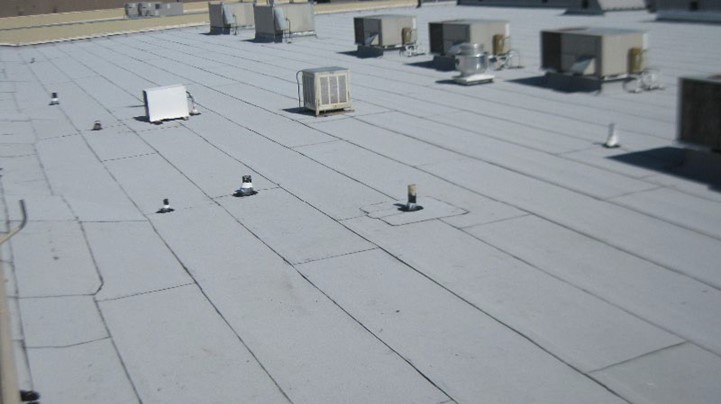
Modified Asphalt Roof - (Styrene-Butadiene-Strene)
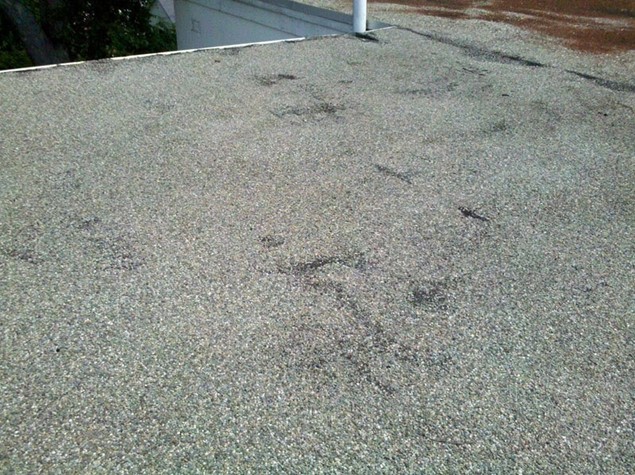
Gravel BUR Roof - Built Up Roofing
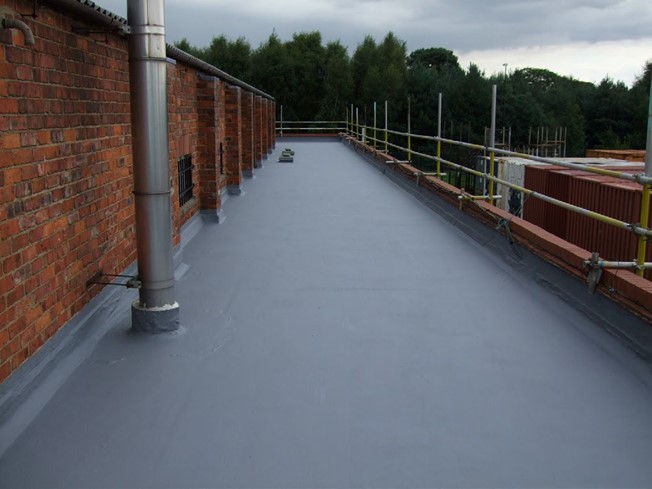
Roof Coating - Silicone, Poly-Urethane and Acrylic
MAINTENANCE ITEMS
It is recommended to walk all roof areas a minimum of every 6 months to keep up on maintenance items. A list of common maintenance items are below.
- Keep drains clear of dirt and debris. Check that all drain baskets and fasteners are secure.
- Keep tree branches trimmed back from roof edges
- Remove any unused items on the roof
- Report any loose flashings (Corners or edges pealing up)
- Report any leaks promptly
- Report and standing water or stains that are on the roof from past instances of standing water
- Report any damaged edge metal and counter flashing
- Report loose seams in membranes or loose corners on flashings.
- Avoid any petroleum products around roof membrane
- Provide and use walkway pads when walking on the roof. Exercise caution when not walking on walkway pads. Membranes are slippery when wet.
- Do not use roof cement on single ply roofing (EPDM, TPO, and PVC) or coatings as a repair.
- Check caulk on terminations and fasteners. Use an elastomeric caulk for repairs and touch ups.
- Warranty Services department at (800)-233-0551
- online at www.carlislesyntec.com; Building Owner Services link.
- https://www.sopraconnect.com/Warranty/Warranty_ClaimRequest.aspx
- https://www.firestonebpco.com/us-en/resources/warranties#
REPORTING A LEAK
CARLISLE
Soprema
Firestone
CARE AND MAINTENANCE INFORMATION
The following maintenance items are the responsibility of the building owner and are not included within the scope of the Roofing System Warranty.
| Maintenance Item | Action Step |
|---|---|
| Drainage | Keep the roof surface clean at drain areas to avoid clogging. While the presence of ponded water will not void the manufacture warranty, good roofing practice dictates that water should drain from the roof and that ponded water should evaporate within 48 to 72 hours after a rainfall. |
| Petroleum Products | Keep all petroleum products (solvents, greases, oils or any liquids containing petroleum products) off the membrane to avoid degradation. |
| Animal Fats – EPDM Membranes | Do not exhaust kitchen wastes (vegetable oils) or other animal fats directly onto the roof surface. If incidental contact is likely, contact membrane manufacture for recommendations on membrane type and usage. |
| Animal Fats - TPO & PVC Membranes | TPO and PVC membranes for restaurant rooftop use will not void the warranty. A rooftop maintenance program must be in place to ensure that accumulations of animal fats/grease are regularly removed and the rooftop surface is cleaned with a mixture of warm soap and water and/or by other approved cleaning methods. See Installation Guide for specific cleaning instructions. |
| Chemicals | Contact membrane manufacture if any chemicals come in contact with the roofing membrane. Some chemicals could degrade the membrane or cause. |
| Foot Traffic | Walkways must be provided if regular traffic is required or if rooftop equipment has a regular thirty (30) day or less maintenance schedule. Exercise caution when not walking on walkways, especially on white membranes, as ice or ® frost buildup may not be visible. All membranes are slippery when wet. |
| Roof Cement | DO NOT USE ASPHALTIC ROOF CEMENT to repair or install rubber membrane. Roof cement contains petroleum products, which may degrade the membrane. |
| Temporary Repairs | Use Lap Sealant or any good grade rubber caulk to make temporary repairs. Notify membrane manufacture of this action in writing. |
| Leaks | Locate the leak and determine if it is a roof membrane leak or a wall, curb, skylight, metal ductwork or plumbing leak. Deterioration or failure of building components that cause a leak is not covered by the warranty. A water leak may be indicated by soft or warped insulation. Physical damage to the membrane or flashing is not covered by the warranty. If the leak is determined to be membrane-related, please notify Carlisle’s Warranty Services department at (800)-233-0551 or online at www.carlislesyntec.com; Building Owner Services link. |
| Hypalon and Non-Carlisle Acrylic Coatings | These are maintenance items and are excluded from the Carlisle warranty. Recoat when necessary. |
| Rooftop Maintenance | When it is necessary for workers to be on the roof to service rooftop equipment, e.g. HVAC units, antennas, etc., workers should be cautioned to use walkways and to exercise care with their tools and equipment to avoid puncturing the roofing membrane. |
| Roof Alterations | Please refer to the Carlisle Roofing System Revision and Alteration procedures on the preceding page. |
| Cleaning | Handprints, footprints, general traffic grime, industrial pollutants and environmental dirt may be cleaned from the surface of the membrane by scrubbing with detergent and water, then rinsing with clean water. To maximize reflectivity, white membrane(s) should be cleaned once every two years. |
| Metal Work | Keep roof maintenance items, such as counterflashing, metal curbs and metal ducts sealed watertight at all time. |
The preceding care and maintenance requirements are for Sure-Seal , Sure-White , Sure-Weld , Sure-Flex and FleeceBACK Membrane Roofing Systems. The list is not meant to be exhaustive and is for illustrative purposes only. Carlisle recommends that your maintenance staff and/or maintenance contractor inspect the roof periodically or at least twice a year. The inspection should concentrate on high-risk areas such as roof hatches, drains and around all rooftop equipment as well as general inspection of the entire roof. The inspector should be looking for membrane damage (cuts and tears), oil or Freon leaks, chemical spills or water infiltration into the roofing system.
Compliance with the above-listed care and maintenance requirements will aid in ensuring a durable, watertight membrane roofing system.
Not all Risk Management (insurance companies) are alike. Some offer special programs for their subscribers and visit your district on an annual basis, while others offer limited services on an as needed basis. Insurers of public schools will generally conduct inspections of these facilities annually to ensure they are being maintained and no significant hazards are present. Some Risk Management representatives will conduct an annual inspection to help their members provide a safe environment for students, staff, and visitors, and to assist districts/BOCES in protecting their physical assets.
The following is a broad overview of the inspection of buildings and facilities:
Building and Ground Exteriors
- Sidewalks, curbs and driveways free of defects or trip/fall hazards
- Exterior bleachers are in good condition
- Athletic fields and appurtenances in good condition
- Fencing and gates in good order
- Lighting fixtures are adequate and secure
- Roof drains and gutters clear of debris/visible leaks
- Playground equipment and surface material in good order and in compliance with current standards with proper signage in place
Interior Inspection
- Entrances are properly labeled, secured and monitored
- Perimeter doors secure
- Combustible materials such as artwork, decorations, books and boxes are in compliance with NYS fire codes
- Sound housekeeping within the building and classrooms
- Cooking and heating appliances in proper locations
- Rescue windows and exits are not blocked and free from combustible materials
- Kitchen fire suppression systems inspections current and hood vents cleaned
- Technology and Shop areas are in good order with all power equipment properly secured and guarded with proper emergency shut off switches
- Science Rooms equipped with proper safety equipment
- Boiler and Electrical Rooms are well maintained and free of combustible storage with main gas shut off accessible and labeled
- Main water shut off accessible, inspected and in good order
- Auditorium/Cafetorium stage rigging in good order
- Gyms in good order
- Weight Rooms in good order with proper signage in place
- Home and Careers appliances in good order and clothes dryer vents clean
Keep in mind that this is an overview and is not meant to be a completed list of items that may be inspected and or observed during the inspection.
In addition, the Risk Management Program may be school specific – designed to address risks and loss exposures unique to school districts and BOCES. Subscribers to some Risk Management Companies may receive the following services in addition to annual inspections:
Special Inspections
Additional visits to evaluate specific areas (e.g. school security, playground equipment, gymnasiums, fire or life safety situations, athletic exposures, theater sets, etc.) are scheduled as requested by Subscribers.
Risk Management Advisory Services
Subscribers have unlimited access to Risk Management Staff to answer questions or conduct research concerning physical hazards, district activities, loss trends, procedures, school security, employment practices, transportation, etc.
Attendance at Subscriber Safety and Security Committee Meetings
Risk Management staff attends and provides technical assistance, training and resource materials for District/BOCES safety committee meetings.
Neurocognitive Testing of Student Athletes
Subscribers are able to conduct Neurocognitive Testing of their student athletes in all contact sports from modified through varsity levels. This testing includes baseline testing biannually and post-concussion testing using ImPACT Applications, Inc. program at no cost.
Risk Transfer Program
Subscribers benefit from comprehensive Risk Transfer Program which assists Subscribers reduce the cost of claims by assisting them transfer risk with insurance certificates and indemnification language. Risk Transfer Specialists handle the transactions for use of facility and transportation documents until the certificate process is completed – either in compliance with your specifications or NYSIR’s standard specifications.
Continuing Teacher and Leader Education Provider (CTLE)
Some companies are approved CTLE Providers by the NYS Education Department. Professional Certificate holders now may earn CTLE hours by attending many of our seminars and online courses. Some are also an approved provider for the School Facilities Management Institutes’ certification programs.
In-District Training
Risk Management staff conducts customized training at Subscribers’ locations. Popular sessions include playground and cafeteria monitor training, custodial training, risk management for administrators and fire and life safety.
Seminars and Webinars
Some Risk Management companies sponsor regular seminars both online and in person addressing current trends and legal issues that create potential loss exposures for public school districts and BOCES. Topics include:
- Playground Safety
- Athletic Risk Management
- School Security
- Discrimination and Harassment in the Workplace
- Social Media Liability
- Science and Lab Safety
- Risk Transfer
- Boiler and Electrical Safety
- Bullying Prevention
- Theatrical Safety
- Student Travel
- Harassment and Discrimination
Online Training
Your Risk Management company may offer online training including: Bloodborne Pathogens; Hazard Communication; Discrimination and Harassment; Playground Supervision; Playground Inspection; Dignity for All Students Act (DASA); Building Level Emergency Response Teams; Suicide Prevention and NYSIR’s Head Injury Prevention Program (HIPP). Many of these courses are eligible for CTLE credit.
Risk Management Web Site
Subscribers may have access to enhanced risk management, safety materials, presentations, sample forms (waivers and releases, permission slips and insurance requirements) and other programs.
Information Publications
Subscribers receive “Subscriber only” copies of the Risk Management companies subscriber publications, alerts and bulletins which also includes additional online training resources.
This should arguably be the first topic listed on our table of contents, becasue without our Business Partners, we would not be able to do our jobs. Business partners are a financial and educational resource that support NYSSFA at the state and/or local level. Their support is key to funding several SFA events throughout the year as well as being a professional development resource for members.
At the state level business partners financial support is a major contributor of the annual fall conference as well as Leadership Weekend, Advocacy Day, and the semi-annual Leadership Academies. At the local level business partners support annual golf tournaments, custodial trade shows/workshops and monthly professional development meetings.
The business partner program is outlined at the state level in the Investment Opportunities Prospectus. The Key Supporter Program is the highest level of support with sponsor benefits at events throughout the year. There are also additional levels of sponsorship available for the annual conference (Diamond, Gold, Silver, and Bronze). Any questions about the business partner program are coordinated by state level leaders.
Many business partners support the regional SFA chapters. Each chapter establishes its sponsorship/membership level of commitment. Typically, the fee for a local chapter Business Partner is much less and usually a small annual fee to attend most meetings. In addition, there is tiered pricing to sponsor the local events.
Please note that depending on a company’s geographic reach they may be a state and/or local level sponsor. (i.e., A state only level supporter may have a national presence vs. a chapter only supporter may a small local company with limited geographic presence). No matter the level of support, the partners are a resource that should be utilized when evaluating the needs of your district. Business partners can be a professional development resource and can provide education programs, training sessions and information webinars related to their area of expertise.
Facilities Planning Office Introduction
The Office of Facilities Planning (OFP), on behalf of the Commissioner, is the code enforcement authority for public schools, BOCES, and charter schools that were chartered after 7/31/10. In accordance with Department of State regulation Title 19, 1201.2(e), The State Education Department shall be accountable for administration and enforcement of the Uniform Code with respect to buildings, premises and equipment in the custody of, or activities related thereto undertaken by, school districts and Boards of Cooperative Educational Services.
Accordingly, all plans and specifications for the erection, repair, enlargement or remodeling of school buildings in any public-school district in the State, outside of New York City, must be reviewed and approved by the Commissioner. The OFP performs this function through the issuance of a building permit. However, the OFP offers services beyond the approval of plans and specifications. We offer advice and technical assistance to school districts, architects and engineers to help them solve their school building needs with consideration of educational and planning efficiency, conservation of natural resources, initial and life-cycle costs within the context of the most recent State and Federal laws.
Contact Facilities Planning
- OFP Main Website:
- (518) 474-3906
- emscfp@nysed.gov
Permit process:
The link below includes a document detailing the permit process. Authored in 2002 it remains significantly accurate, but please note that some parts of the instruction guide in the link below may have been superseded. It is a valuable read to get acquainted with the process. Less detailed information is also shown below.
When is a Building Permit Required?
Reference Guide #B.3
March 9, 1999 (rev. July 2015) (rev. May 2019)
The Office of Facilities Planning reviews plans and specifications and issues building permits for capital construction projects undertaken by public school districts and BOCES. Frequently, the Office is asked if a particular type of project requires such review, approval, and issuance of a building permit. This article defines which projects do and which projects do not require a building permit. There is no question that new buildings, additions, and reconstruction projects require a building permit. The question usually arises with regard to specific types of work and smaller kinds of facilities.
New York State Department of State Regulations (19 NYCRR Chapter 32 Part 1203.3) which implement the Uniform Code state that "Building permits shall be required for work which must conform to the Uniform Code." The Building Code of New York State Section 101.2 enumerates the many types of work to which the Code applies. The very broad scope work listed would imply that any capital construction project would require a building permit. However, because certain categories of work may be excluded from the requirement for a building permit as noted in 19 NYCRR Chapter 32 Part 1203.3, this is not the case. By applying these exceptions and adhering to Building Code Section 101.2 the following list of project types which require building permits is derived. Where a building permit is required, the usual procedure for a typical capital construction project submission to the Office applies, except where noted otherwise.
PROJECTS WHICH REQUIRE A BUILDING PERMIT:
- New buildings, additions, and reconstruction projects.
- Press boxes, concession stands, toilet facilities, permanent greenhouses, storage/utility buildings, dugouts which include a storage room, guard booths, and similar structures. (NOTE: For storage/utility buildings, dugouts which include a storage room, guard booths, and ticket booths not exceeding a total gross floor area of 200 square feet, a full submission will not be required. It will only be necessary to follow the procedure which applies when using Form FP-AU Request for Approval of Use of a Facility.)
- Bleacher and grandstand projects which involve footings, piers, foundations and/or concrete slabs. (NOTE: Bleacher or grandstands constructed in conjunction with a building or site project, will be reviewed and a building permit issued for the whole project.)
- Pavilions, Bandstands, Membrane Structures, and similar structures.
- Site lighting and outdoor electric, such as field lighting and scoreboards - including supports and electrical hookup.
- Small types of projects which affect health and safety (ex: means of egress; new or altered fire/safety, electrical and/or mechanical systems).
- Site development which is in conjunction with a building project, and for which plans and specifications are submitted together with those for the building project will be reviewed and a building permit issued for the whole project.
- Playground projects which involve on-site construction of various features and structures (ex: retaining walls; footings; walkways; grading/drainage).
- Irrigation projects.
- Site work which involves earth moving; utilities; or storm water systems.
- Demolition of existing buildings.
PROJECTS WHICH DO NOT REQUIRE A BUILDING PERMIT:
- Small site development - including finished grading and planting; fencing; and re-paving of existing roadways, parking lots and walkways.
- Bleacher projects which involve only the installation of pre-engineered, factory-built equipment without foundations or sitework.
- Playground projects which involve only the installation of pre-engineered factory-built equipment without sitework.
In those cases which do not require a building permit, the Board of Education is responsible to ensure conformance with the Uniform Code, the Commissioner's Regulations Part 155 and the Manual of Planning Standards.
If there are any questions as to what work does, or does not require a building permit, contact the Office of Facilities Planning -- (518) 474-3906.
Design must be compliant with:
- Current NYS Code, per DOS:NYS CODES (describes codes)
- NYS Digital Code Books
- Manual of Planning Standards, per NYSED: https://www.p12.nysed.gov/facplan/documents/MPS_2022_FINAL_Revised_01-31-2023.pdf (as of writing, current version is 2022 MPS)
- Commissioner’s regulations (Title 8, Chapter ii, Subchapter j, Part 155) https://www.p12.nysed.gov/facplan/Laws_Regs/8NYCRR155.htm Westlaw access to 155 regulations
Permit Application Submission Process:
- The majority of Districts utilize their Architect / Engineer firm to develop and submit permit applications.
- The process begins with the Letter of Intent: https://www.p12.nysed.gov/facplan/articles/UseLOI1.html (copied below)
Procedures for Letter of Intent (LOI) Requests
Due to the large number of requests for project control numbers, all school districts and BOCES should submit requests for project numbers using the Letter of Intent (LOI) Workbook which is available on our website.
The LOI Workbook contains forms for the following types of projects:
- Smart Schools Bond Act projects
- New Construction projects
- Reconstruction and/or Addition projects
- Charter School projects
- Leased Space or Discovered Building projects
- Manufactured Building projects
- District-Wide projects
The forms are designed to speed up the process of issuing project control numbers by requesting pertinent and accurate information needed to enter the project into our system. Requests that are sent without using these forms or projects submitted without proper project control numbers being issued will result in unnecessary delays.
When the LOI forms are completed correctly, they are able to be quickly processed and initial response letters can then be returned to the school district or BOCES in the most timely manner.
NOTE: Letter of Intent Forms should be submitted via email to emscfp@nysed.gov. Please DO NOT send a hard copy by mail. It is not necessary to send a cover letter, simply email the LOI form itself.
- When the design of the project is 100% complete and ‘ready to bid’, the permit application is submitted to OFP. Each drawing/ spec/ form/ paperwork must contain the Project Number that was assigned via the LOI process.
- The Paperwork / Form portion of the submission must be submitted via mailed hard copy AND electronically. The workbook of required Paperwork items, as well as a newly developed guidebook are available here: https://www.p12.nysed.gov/facplan/documents/Final_Submission_Forms_Workbook1-31-2022_006.xls (the workbook will automatically download and is an excel document) https://www.p12.nysed.gov/facplan/FinalSubmissionFormsWorkbookPP11-22-2021.pptx (the guidebook will automatically download and is a powerpoint document)
- The Drawings / Specifications portion of the submission may either be submitted via paper copy (rolls of large scale drawings) or via our electronic submission portal called Laserfiche. The electronic portal is managed by a third party vendor, Dataflow, who can be contacted via: ⦁ nysedsupport@godataflow.com
Also, always check the OFP main webpage for updated submission procedures.
Review Process:
- Once a complete submission of paperwork/drawings/specifications has been received, a 6 digit Review Number is assigned to the project.
- The OFP reviewers work in order of receipt and the length of their queue is published on the OFP website for reference.
- There are three types of OFP reviewers:
- Architect
- Engineer
- Fiscal Associate
- The scope of the work dictates if it requires both A and E reviews, but all projects receive an FA review.
- There is often a need for corrections/ revisions/ addendums and those are accomplished typically between the A/E firm and the OFP reviewers. The District contact is copied on the correspondence.
- Upon approval of the complete application permit submission, OFP will issue a building permit subject to the following qualifications:
- (i) During construction, the project shall be properly supervised by a licensed architect or engineer.
- (ii) The building permit may be revoked by the commissioner in the event of violations of the State Uniform Fire Prevention and Building Code (9 NYCRR Parts 600 through 1250), regulations 155.5 or other safety standards imposed by law or regulation.
- The permit must be posted during construction.
- OFP is not typically involved in the construction process since the responsibility for oversight during construction is granted to the A/E.
- It is essential that the District / BOCES / School understand the rules regarding health and safety during construction. So essential that the Regulations 155.5 are copied here for review and reference:
155.5 Uniform Safety Standards for School Construction and Maintenance Projects
(a) Monitoring of construction and maintenance activities.
The occupied portion of any school building shall always comply with the minimum requirements necessary to maintain a certificate of occupancy and shall be monitored during construction or maintenance activities for safety violations by school district personnel. It is the responsibility of the board of education or board of cooperative educational services to assure that these standards are continuously maintained when the building or any portion thereof is occupied.
(b) Investigation and disposition of complaints relating to health and safety received as a result of construction and maintenance activities.
Boards of education and boards of cooperative educational services shall follow procedures established under section 155.4(d)(7) of this Part.
(c) Pre-construction testing and planning for construction projects.
- Boards of education and boards of cooperative educational services shall assure that proper planning is made for safety of building occupants during construction. For all construction projects for which bids are issued on or after September 30, 1999, such boards shall assure that safety is addressed in the bid specifications and contract documents before contract documents are advertised for bid. All school areas to be disturbed during renovation or demolition shall be tested for lead and asbestos. Appropriate procedures to protect the health of building occupants shall be included in the final construction documents for bidding.
- Boards of education and boards of cooperative educational services shall establish procedures for involvement of the health and safety committee to monitor safety during school construction projects. The health and safety committees in school districts other than in cities with one million inhabitants or more shall be expanded during construction projects to include the project architect, construction manager, and the contractors. Such committee shall meet periodically to review issues and address complaints related to health and safety resulting from the construction project. In the case of a city school district in a city of one million inhabitants or more, the board of education shall submit procedures for protecting health and safety during construction to the commissioner for approval. Such procedures shall outline methods for compliance with this section.
- The district emergency management plan shall be updated to reflect any changes necessary to accommodate the construction process, including an updated emergency exit plan indicating temporary exits required due to construction. Provisions shall be made for the emergency evacuation and relocation or release of students and staff in the event of a construction incident.
- Fire drills shall be held to familiarize students and staff with temporary exits and revised emergency procedures whenever such temporary exits and revised emergency procedures are required.
(d) Pre-construction notification of construction projects.
The board of education or board of cooperative educational services shall establish procedures for notification of parents, staff and the community in advance of a construction project of $10,000 or more to be conducted in a school building while the building is occupied. Such procedures shall provide notice at least two months prior to the date on which construction is scheduled to begin, provided that in the case of emergency construction projects, such notice shall be provided as far in advance of the start of construction as is practicable. Such notice shall include information on the district's obligations under this section to provide a safe school environment during construction projects. Such notice requirement may be met by publication in district newsletters, direct mailings, or holding a public hearing on the project to inform parents, students, school personnel and community members.
(e) General safety and security standards for construction projects.
- All construction materials shall be stored in a safe and secure manner.
- Fences around construction supplies or debris shall be maintained.
- Gates shall always be locked unless a worker is in attendance to prevent unauthorized entry.
- During exterior renovation work, overhead protection shall be provided for any sidewalks or areas immediately beneath the work site or such areas shall be fenced off and provided with warning signs to prevent entry.
- Workers shall be required to wear photo identification badges at all times for identification and security purposes while working at occupied sites.
(f) Separation of construction areas from occupied spaces.
Construction areas which are under the control of a contractor and therefore not occupied by district staff or students shall be separated from occupied areas. Provisions shall be made to prevent the passage of dust and contaminants into occupied parts of the building. Periodic inspection and repairs of the containment barriers must be made to prevent exposure to dust or contaminants. Gypsum board must be used in exit ways or other areas that require fire rated separation. Heavy duty plastic sheeting may be used only for a vapor, fine dust or air infiltration barrier, and shall not be used to separate occupied spaces from construction areas.
- A specific stairwell and/or elevator should be assigned for construction worker use during work hours. In general, workers may not use corridors, stairs or elevators designated for students or school staff.
- Large amounts of debris must be removed by using enclosed chutes or a similar sealed system. There shall be no movement of debris through halls of occupied spaces of the building. No material shall be dropped or thrown outside the walls of the building.
- All occupied parts of the building affected by renovation activity shall be cleaned at the close of each workday. School buildings occupied during a construction project shall maintain required health, safety and educational capabilities at all times that classes are in session.
(g) Maintaining exiting and ventilation during school construction projects.
The following information shall be included in all plans and specifications for school building projects:
- A plan detailing how exiting required by the applicable building code will be maintained during construction. The plan shall indicate temporary construction required to isolate construction equipment, materials, people, dust, fumes, odors, and noise during the construction period. Temporary construction details shall meet code-required fire ratings for separation and corridor enclosure. At a minimum, required exits, temporary stairs, ramps, exit signs, and door hardware shall be provided at all times.
A plan detailing how adequate ventilation will be maintained during construction. The plan shall indicate ductwork which must be rerouted, disconnected, or capped in order to prevent contaminants from the construction area from entering the occupied areas of the building. The plan shall also indicate how required ventilation to occupied spaces affected by construction will be maintained during the project.
(h) Fire and hazard prevention.
Areas of buildings under construction that are to remain occupied shall maintain a certificate of occupancy. In addition, the following shall be strictly enforced:
- No smoking is allowed on public school property, including construction areas.
- During construction daily inspections of district occupied areas shall be conducted by school district personnel to assure that construction materials, equipment or debris not block fire exits or emergency egress windows.
- Proper operation of fire extinguishers, fire alarm, and smoke/fire detection systems shall be maintained throughout the project.
(i) Noise abatement during construction and maintenance activities.
Construction and maintenance operations shall not produce noise in excess of 60 dba in occupied spaces or shall be scheduled for times when the building or affected building spaces are not occupied or acoustical abatement measures shall be taken. Noise level measurements (dba) shall be taken with a type 2 sound level meter in the occupied space in a location closest to the source of the noise. Complaints regarding excessive noise shall be addressed through the health and safety committee. The district should anticipate those times when construction noise is unacceptable and incorporate “no work” periods into the bid specifications.
(j) Control of chemical fumes, gases, and other contaminants during construction and maintenance projects.
The bid specifications and construction contracts for each construction project shall indicate how and where welding, gasoline engine, roofing, paving, painting or other fumes will be exhausted. Care must be taken to assure fresh air intakes do not draw in such fumes.
- The bid specifications shall require schedules of work on construction and maintenance projects which include time for off-gassing of volatile organic compounds introduced during construction before occupancy is allowed. Specific attention is warranted for activities including glues, paint, furniture, carpeting, wall coverings, and drapery. Manufacturers shall be contacted to obtain information regarding appropriate temperatures and times needed to cure or ventilate the product during use and before safe occupancy of a space can be assured. Building materials or furnishings which off-gas chemical fumes, gases, or other contaminants shall be aired out in a well ventilated heated warehouse before it is brought to the project for installation or the manufacturer's recommended off-gassing periods must be scheduled between installation and use of the space. If the work will generate toxic gases that cannot be contained in an isolated area, the work must be done when school classes and programs are not in session. The building must be properly ventilated and the material must be given proper time to cure or off-gas before re-occupancy.
- Manufacturer's material safety data sheets (MSD) shall be maintained at the site for all products used in the project. MSDS must be provided to anyone who requests them. MSDS indicate chemicals used in the product, product toxicity, typical side effects of exposure to the product and safe procedures for use of the product.
(k) Asbestos abatement protocols.
All asbestos abatement projects shall comply with all applicable Federal and State laws including but not limited to the New York State Department of Labor industrial code rule 56 (12 NYCRR 56), and the Federal Asbestos Hazard Emergency Response Act (AHERA), 40 CFR part 763 (Code of Federal Regulations, 1998 Edition, Superintendent of Public Documents, U.S. Government Printing Office, Washington, DC 20402; 1998; available at the Office of Facilities Planning, Education Building Annex, Room 1060, State Education Department, Albany, NY 12234). Large and small asbestos projects as defined by 12 NYCRR 56 shall not be performed while the building is occupied. Minor asbestos projects defined by 12 NYCRR 56 as an asbestos project involving the removal, disturbance, repair, encapsulation, enclosure or handling of 10 square feet or less of asbestos or asbestos material, or 25 linear feet or less of asbestos or asbestos material may be performed in unoccupied areas of an occupied building in accordance with the above referenced regulations.
(l) Lead paint.
Any construction or maintenance operations which will disturb lead based paint will require abatement of those areas pursuant to protocols detailed in the “Guidelines for the Evaluation and Control of Lead-Based Paint Hazards in Housing” (June 1995; U.S. Department of Housing and Urban Development, Washington, D.C. 20410; available at the Office of Facilities Planning, Education Building Annex, Room 1060, State Education Department, Albany, NY 12234). All areas scheduled for construction as well as areas of flaking and peeling paint shall be tested for the presence of lead and abated or encapsulated in accordance with the above noted guidelines.
(m) Radon.
Districts shall take responsibility to be aware of the geological potential for high levels of radon and to test and mitigate as appropriate. This information is available from the New York State Department of Health Radon Measurement Database.
(n) Post construction inspection.
The school district or board of cooperative educational services shall provide the opportunity for a walk-through inspection by the health and safety committee members to confirm that the area is ready to be reopened for use.
8 CRR-NY 155.5
Current through May 31, 2021
Certificate of Occupancy (CO) and Fire Safety Inspections
- Please note that an active CO becomes invalid if any of the required life safety measures are altered or non-functional due to construction activities or otherwise. Occupying or using any buildings without submission for a Building Permit and a valid Certificate of Occupancy (C.O.) is illegal and potentially dangerous.
- Upon completion of a construction project, the District / BOCES / School and their A/E firm must submit the following documents to OFP in order to obtain a Certificate of Occupancy:
- Certificate of Substantial Completion (by the licensed design professional and the District/BOCES Superintendent)
- Fire Safety Inspection Report (by a certified third party)
- As of 2015, the NYSED Fire Safety Portal System accessed through the Application Business Portal is used to manage all COs.
- The Fire Safety Portal must contain all district buildings, including Sheds, Press Boxes, Storage Containers, Dug Outs, Pavilions, Storage Buildings, etc.
- Annual Fire Safety Inspections of all buildings are required by regulation. It is the responsibility of the District / BOCES / School to hire a certified third party perform the fire safety inspections. The District / BOCES / School must also enter the fire inspection data into SED’s Application Business Portal; after which school districts and BOCES can print their own annual certificates of occupancy.
- FireSafety@nysed.gov is the email for OFP’s Fire Safety unit that is predominantly responsible for assistance with COs
- This site link below should be referenced for forms and information regarding Fire Safety Inspections, the Portal, annual inspection requirements, etc. https://www.p12.nysed.gov/facplan/FireSafety.htm
- LEASES
- PRESS BOXES
- STORAGE CONTAINERS
- TENTS
- IONIZATION CLEANERS STATEMENT
- DOOR HARDWARE SECURITY
- Bonfires: In compliance with the 2020 NYS Fire Code Section 307 Open Burning, the Office of Facilities Planning requires a permit application for bonfires on district owned property. For each planned bonfire event, please use the form link below to submit to FireSafety@nysed.gov . For bonfire related questions, please contact Louis Fiorese at 518-473-8992 or ⦁ louis.fiorese@nysed.gov ⦁ Bonfire Permit Application
- Fireworks: In compliance with 2020 NYS Fire Code Section 5608 Fireworks Display, the Office of Facilities Planning requires a permit application for fireworks on district owned property. For each planned fireworks event, please use the form link below to submit to FireSafety@nysed.gov . For firework related questions, please contact Louis Fiorese at 518-473-8992 or ⦁ louis.fiorese@nysed.gov ⦁ Fireworks Permit Application
- RESTROOM AVAILABILITY REQUIREMENTS: (note that codes may have changed regarding specific quantity requirements)
There are many other project nuances and/or processes that OFP performs, and thus providing links to information on these topics seems more appropriate than including the details:
Energy Management System
Section 1
Energy Management System – Section Overview
An energy management system (EMS) provides the school district with the essential tools to ensure students have a comfortable and well-ventilated learning environment. A well-run system will help to reduce critical equipment failures that could lead to an interruption in the school day.
This section of the handbook will summarize the important terms and information surrounding energy management systems. It is intended to be a reference guide for you use.
Section 2
Important terms to know
Input
- Control point connected to a physical device that is wired to a controller that provides the system with information.
- Examples are temperature sensors, run indication for motors, pressure sensors, alarm contacts.
Output
- Control point connected to a physical device that is wired to a controller that the controller sends a signal to.
- Examples are start/stop contacts for motors, VSD speed signals, control valves, damper actuators.
DDC
- Direct Digital Control. Common modern HVAC control system that uses microprocessor-based controllers.
- May also be referred to as BMS (Building Management System) or EMS (Energy Management System).
Pneumatic Controls
- Control system or components that work on air pressure. Can be found in multiple variations most commonly today pneumatic actuators are controlled through a DDC system.
Sequence
- Operating parameters for a system or piece of equipment.
Hardwired
- Points that are wired directly to a controller residing on a control system.
Integrated
- Sharing of information between 2 or more control systems, often over IP networks.
ModBus
- Open communications protocol developed for industrial applications. Moves raw bits or words without placing many restrictions on vendors[1].
BACnet
- Open communications protocol for Building Automation and Control (BAC) networks that leverage the ASHRAE, ANSI, and ISO 16484-5 standard[1] protocol.
RS-485
- 2 wire communication protocol that is often used for BACnet, ModBus, and proprietary control system communications.
IP Network
- Communications network that uses standard Internet Protocol. Very common, most devices referred to as “network devices” reside on a network like this including personal computers, phones, and automation system front ends.
BBMD
- BACnet Broadcast Management Device. Manages communication between devices on separate network segments.
Gateway
- Device that transfers data from one system to another. Typically done by duplicating point data in 2 tables, 1 table for each system.
Section 3
What can an energy management system control (Schedules, logging)
An energy management system can control mechanical equipment and lighting in your building.
Energy management systems allow you to monitor, adjust, schedule, log data, alarm, and troubleshoot systems in your buildings.
The energy management system can be accessed through workstations in your buildings, web-browsers, mobile devices, and offsite though VPN networks (Refer to section 5 for more information).
Most often the main function of an energy management system is to control temperatures and ventilation rates in the buildings to keep the building environment safe and comfortable. The energy management system automatically controls temperature and ventilation rates based on the setpoints programmed into the system and can be adjusted as needed.
Schedules can be set for one or multiple pieces of equipment at a time for years into the future. Schedules allow you to have systems running when areas are occupied to keep occupants comfortable and off to save energy when areas are unoccupied.
Energy management systems can log data for multiple uses. Often utility meters are monitored so energy and water consumption can be tracked in real time and used to analyze changes in building occupied modes. Most points in the energy management system are logged and can be reviewed to track system performance and aid in troubleshooting mechanical system issues.
Alarms provide indication of issues in the systems controlled and can vary in severity. Alarm conditions can be as simple as a fan or pump didn’t shut off when expected or more urgent such as heating loop temperature is low. Alarms generated by the control system can be sent to operators' workstations or directly to building operators depending on the urgency of the alarm.
Often troubleshooting of mechanical systems begins at the energy management system. Often an alarm or review of building floor plans will indicate a potential mechanical issue in the building. By reviewing system graphics and logged points the potential issue can be identified or narrowed down to an area for more efficient field investigation and repairs.
Section 4
System architecture
The system architecture of energy management systems varies based on the system manufacturer. The diagrams and descriptions below are similar to most of the mainstream energy management systems.
An energy management system is divided into two main sections.
Section 1: Devices connected to the district’s network
System components directly connected to the network include:
- A system server
- Operator workstations / a browser interface
- A network level controller
- Connection to packaged equipment or end devices (Utility meters, Boilers, Chillers, Pumps, VRF systems, Lighting systems)
IMPORTANT – These devices require coordination with your IT Department
Section 2: Devices on the dedicated field controller network
System components directly connected to the network include:
- An equipment controller (typically one per piece of equipment)
- Input sensors (temperatures, equipment run sensors, humidity, CO2 level, alarm contacts, steam pressure)
- Outputs (relays to start equipment, valve positioning, damper positioning, variable speed drive setting, outside lighting)
IMPORTANT – These devices are managed by your energy management system provider. IT Department coordination is not typically required.
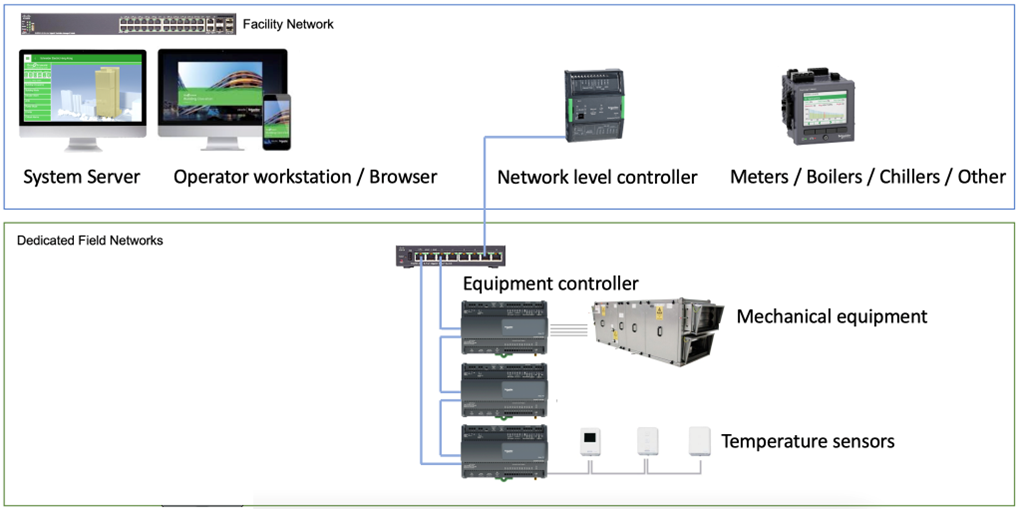
Section 5
Networks and IT terminologyBelow are key networking terms
VPN
- VPN stands for Virtual Private Network
- VPN is a piece of software on your laptop or phone that allows you to connect to the district’s network safely when you are home or off-site.
- You will be required to login to the VPN software with your district credentials
- NOTE – VPN is used to connect to your Energy Management system when you are at home
- vLan stands for Virtual Large Area Network
- A vLan allows the IT Department to create a secure network for the network level devices
- Specific ports on network switches can be assigned to a vLan
- Different vLans can be configured for different departments on the network (students, the business office, security equipment, energy management devices)
- A network address that is assigned by the IT Department
- The address is hard coded and remains the same
- DHCP stands for Dynamic Host Configuration Protocol
- DHCP defines a “pool” of IP addresses that are available to randomly select
- A device configured to use DHCP will usually receive a different IP address every time it is rebooted
- A Virtual Server is very large computer that can have multiple copies of Windows software installed and running at one time.
- The Facilities Department does not need to maintain and upgrade the Energy Management System server if it housed on the IT Department’s Virtual Server.
- Virtual Servers are automatically backed up by the IT Department.
- The IT Department can easily reconfigure the Energy Management Server to have more disk drive space or memory if needed.
- The term “Virtualized” is used to the Energy Management System Server is on the “large Virtual Server”
- Example: “The EMS server has been virtualized”
vLan
Static IP Address
DHCP IP Address
Virtual Server
Section 6
System Upgrades
We discussed earlier the different components that make up an energy management system (Refer to section 4). Periodic upgrades will be required to this technology system.
It is important to schedule upgrades regularly. We will discuss the different system components, the rationale for upgrading, and the timing when you should consider upgrades.
IMPORTANT NOTE:
Be sure to discuss suggested upgrades with your energy management system provider when you are planning a capital project or creating your building condition survey.
Computer Equipment Operating System Software Upgrades (System Server and Operator Workstations)(AKA Firmware)
- UPGRADE FREQUENCY: 3 to 5 years
- The system server and operator workstation each have two software components. They are the Operating System Version and the Energy Management System software version.
- The Operating System Version is typically a Microsoft product (Windows Server OS, Windows 10, Windows 11).
- This will be the most frequent upgraded component.
- The IT Department will often request these upgrades in an effort to maintain the network safety policies.
Computer Equipment Physical Computer (System Server and Operator Workstations)
- UPGRADE FREQUENCY: 4 to 6 years
- NOTE: if the Energy Management Server is virtualized, your department will not be responsible for upgrading the server computer hardware (see Section 5)
- The Facilities Department is typically responsible for replacing the operator workstations.
- If the district is providing new operator workstations for you, coordinate with the Energy Management System provider to confirm the new workstation will be compatible.
Energy Management System software
- UPGRADE FREQUENCY: 3 to 5 years
- These software upgrades also include important security updates. Often BMS systems are exploited as an entry point into the network.
- New versions of the Energy Management System software are typically released every 1 to 1.5 years.
- A new version typically contains the following features
- Fixes for reported software bugs
- Support for newly released equipment controllers
- Support for the latest Windows software revisions
- New user interface features
- UPGRADE FREQUENCY: 10 to 17 years
- The hardware controllers typically have a long lifespan compared to the computer components
- Manufacturers often release new hardware controller lines every 10 years
- The lifespan of a controller line depends on the availability of the manufacturer to source the components to continue manufacturing the devices.
- It is recommended to update the hardware controller each time a piece of mechanical equipment is renovated in a capital project.
Energy Management System equipment controllers
Section 7
Service (service departments, service contracts, training)
Your energy management vendor’s service department can be one of your greatest assets to maintaining the comfort, ventilation rates, and energy use of your buildings.
The service department should provide 24/7 service with field and help desk support available during business hours and technicians on call for emergency after-hours calls.
It is important for the service department to have remote access to the system. This allows for the fastest and most efficient response to your service calls. Remote access may also allow the service team to show you the issues they find so you can identify and possibly correct the issues yourself in the future.
Service agreements also help to maintain your system. Agreements are optional so you should ask your energy management system vendor if you have an agreement and what is covered.
Agreements can range from preventative maintenance only to extended parts and technical services coverage. Preventative maintenance agreements help maintain the overall health of the system and include visits from an experienced technician that does a thorough review of the control system to identify and correct potential issues in the system. Extended parts and services agreements also include replacement of parts that have failed unexpectedly.
IMPORTANT - Your energy management vendor can provide training on your system. It is recommended to get training for you and any staff that might use the energy management system.
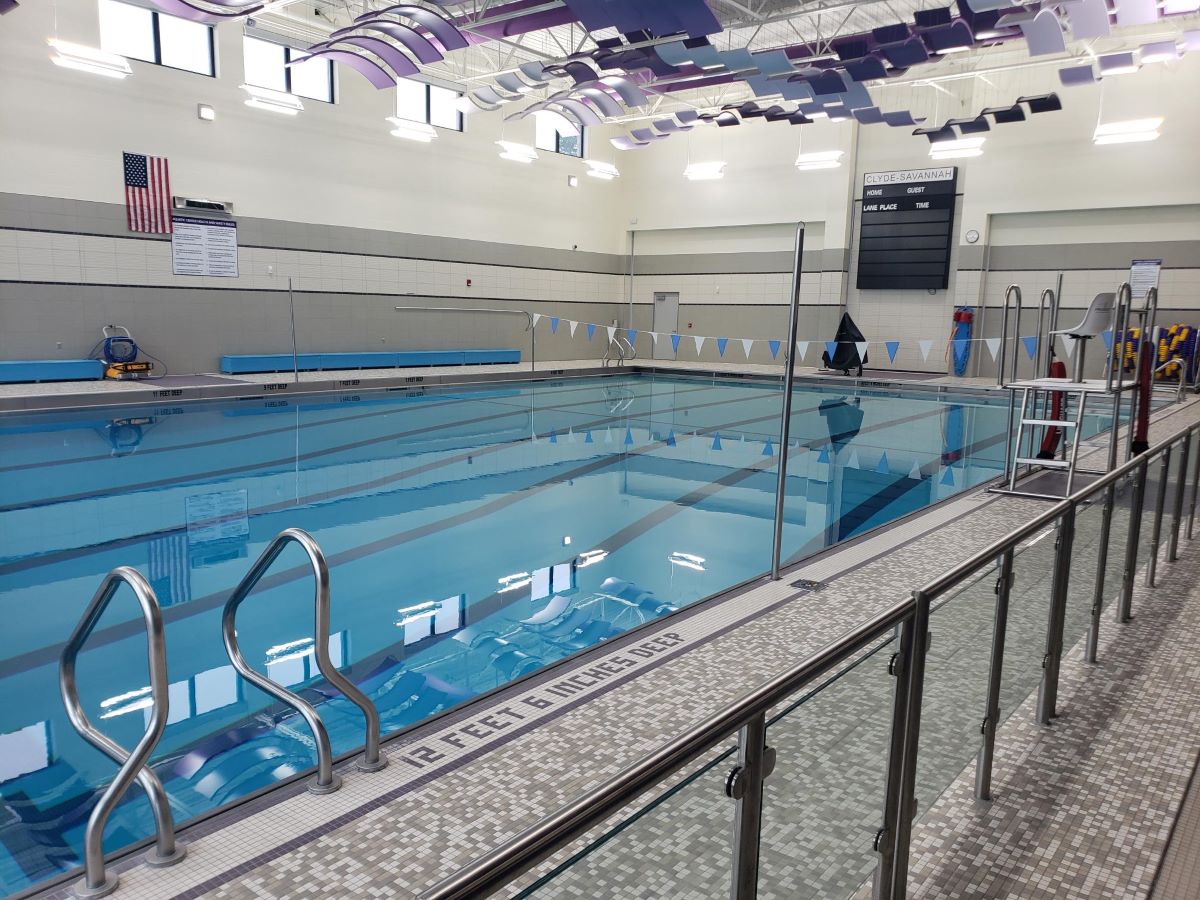
Overview of Systems
Your pool combines several different systems, each with particular considerations for the safety of occupants, including but not limited to protection from things such as waterborne illnesses and drowning hazards. The pool systems are designed by an engineer, and approved by either your Local Health Department or the NYS Health Department to meet legally mandated criteria such as turnover rates, flow rates across drain covers, and capacity to maintain disinfection. Alterations to any such system requires Department of Health approval.
Circulation
The pool water is circulated by a main circulation pump from the pool, through a heating system, chemical control system, and filtration system, and then back into the pool. In many instances there is also a surge tank which exists to balance water level changes which occur when bathers enter and exit the pool. Pump specifications are determined by the design engineer and require a ‘turnover’ of no greater than 6 hours. This means that ‘The entire volume of pool water must be recirculated and treated in six hours.’ The pump typically draws a majority of its water volume through the main drain(s) at the bottom of the pool and additionally through a skimmer or gutter system at the top of the pool. The flow from each is usually metered using butterfly valves.
Chemical control
The chemistry of pool water is regulated by the NYS Sanitary Code which establishes specific criteria for both the PH of your pool water and the disinfectant level. Additional chemistry considerations should be considered for both improved water quality and the longevity of the pool’s plumbing and mechanical systems.
- Disinfectants - Commonly used Disinfectants include Chlorine (as Sodium Hypochlorite or Calcium Hypochlorite) and Bromine. Other disinfectants exist, but their use is less common. It is important to maintain the minimum disinfectant level, while also understanding how the disinfectant your pool uses impacts the pH level of the water. Chlorine disinfectants, for example, tend to raise the water’s pH level because they themselves have a very high pH. Bromine on the other hand, lowers the pH level of the water. Since NYS Sanitary Code also places requirements on a pool’s PH, it is important to understand the impact of your disinfectant.
- pH Balance - pH is a scale used to determine how acidic or basic and aqueous solution is. The pH level of a pool must be maintained within the range as mandated by NYS Sanitary Code. For pools using a chlorine disinfectant, Muriatic Acid or Carbon Dioxide are commonly used to manage the pH level of the water. For pools using Bromine as a disinfectant, Sodium Carbonate (or Soda Ash) is commonly used to manage the PH level.
- Alkalinity - Alkalinity can be viewed as a ‘pH buffer.’ That is, maintaining an appropriate Alkalinity level of 80-120 ppm in your pool will have a limiting effect on how the pH of your pool responds to sudden and frequent changes in bather load, disinfectant residual, etc. Chemicals such as Sodium Bicarbonate exist to help raise the alkalinity of your pool. It is generally considered best practice to ensure that the pool’s pH level is correct before working to raise the alkalinity.
- Calcium Hardness - Calcium Hardness is a measure in PPM of calcium in a pool. As part of the Langlier Saturation Index calculation, calcium hardness can be manipulated, within its recommended range of 200 ppm - 400 ppm, to ensure that water quality issues do not lead to scale or calcium buildup within the pool’s plumbing and mechanical systems.
- Automatic Feed Systems - To maintain proper disinfection and pH balance, commercial pools use an automatic feed system. Feed systems typically consist of 2 probe sensors to detect which chemical dispensing system to turn on and off. One probe reads the pH level of the pool water, and the other typically reads disinfectant in ppm or the ‘oxidation reduction potential’ (ORP). The ORP reading is the most common, and it is important to note that ORP does not have a direct relationship to the amount of disinfectant in the water, as it is also highly dependent on the pH levels of the water. For this reason it is very important to ensure a correct and accurate pH reading before making adjustments.
- Chemical Testing/reagents - In order to maintain proper chemistry, a Pool Operator should have a complete set of testing reagents available at all times. Reagents expire and sight glasses become cloudy with time and use. Replace reagents and test kit components as needed.
- Dosing/Treating Manually/Including volume measurements - There will be times, such as at seasonal start-up, during a contamination event, or in response to chemical imbalances, when manual dosing of pool water will be required. In order to do so, it will be important to follow label directions and have an accurate understanding of the volume of water being treated. Measuring the volume of water in a pool is covered in detail in most Pool Operator certification courses. Label instructions will include methods for adding chemicals to pool water which may include methods such as mixing into solution, broadcasting, etc. Following specific label instructions, including using PPE as required, ensures both that the chemical works properly and that the pool operator avoids injury.
- LSI for protection of equipment/piping - The ‘Langlier Saturation Index’ is a calculation which combines metrics such as pH, Free Chlorine, Calcium Hardness, Alkalinity and temperature to determine the overall balance of metals within the water in a pool. This calculation determines whether the water is corrosive, scale-forming, or ‘balanced.’ The various inputs to the equation can be manipulated to ensure balanced water levels that will not have adverse effects on the pool’s plumbing system. There are various calculators and apps available which allow a pool operator to input readings from their pool water to determine which levels to manipulate in order to achieve balanced water. This is reviewed in detail in most Pool Operator certification courses.
Heating
Pool heating systems vary greatly depending on the design and age of the pool. It is typical to see heat exchangers utilizing a building's hot water heating system, standalone direct fired heaters, or combinations of many systems. These systems require regular maintenance in the same manner as the rest of a building’s heating system. It is also important to note that the temperature of the water can impact the overall LSI calculation of your water, and is a variable that can be manipulated within that calculation to prevent damage to the pool system components.
Filtration
The pool water passes through a filtration system in order to eliminate dirt and debris. Various filter types include sand, diatomaceous earth and cartridge. Pool filter type, size and specifications as well as pool turnover time are important considerations that the design engineer takes into account when designing a pool system in order to meet required filtration needs. Regular filter maintenance includes backwashing sand filters, and cleaning or replacing cartridges and diatomaceous earth. Regular maintenance is typically performed at frequencies based on a pressure differential at the filter. Occasional filter maintenance includes tasks such as cleaning the top layer of sand in a sand filter, replacing sand and other filter components, and changing diatomaceous earth. All maintenance tasks should be completed in accordance with the manufacturer’s prescribed maintenance schedules and procedures.
Sanitary Code
The rules and regulations surrounding the operations of a public swimming pool can be found in NYS Sanitary Code SubPart 6-1. Regulations cover items ranging from pool construction, operation, water quality and air quality to supervision and other requirements. As a Director of Facilities, you may be responsible for some or all of these regulations, so it is important to be familiar with this code and have it readily available.
Other
Common Issues
- Turbidity - Turbidity can be a common water quality issue. When your pool water is cloudy, it is a safety concern because it inhibits the ability for the lifeguard(s) to properly supervise the pool. In fact, if the pool is cloudy to the point that the main drain of the pool is not clearly visible, the pool should be closed until the issue is resolved. Further, turbidity indicates that there are suspended particles in the water, which can include soil, organic matter, and algae. Turbidity can be an indicator of inadequate filtration as a result of filter pressure, cleanliness, or flow rate, or it can be an indicator that there is a chemical imbalance. If your water is cloudy, start by checking disinfection levels, pool turnover rate, and filter condition.
- Contamination - Fecal contamination of a swimming pool can be a cause for a variety of recreational water illnesses including Cryptosporidium, Giardia, E.Coli and Hepatitis A. The unique dangers posed by fecal contamination require a unique response, which is outlined in this NYS Fact Sheet and on the NYS DOH Website. In some cases, free chlorine levels in the pool may need to be raised to between 10 and 40 ppm for periods ranging from 6.5 hours to 25.5 hours. The guidance linked above goes into great detail regarding the prescribed response and should be strictly followed in such an instance.
- Algae- Algae in swimming pools can be caused by a combination of improper filtration, disinfection and circulation. Proper treatment of algae includes a combination of several corrective actions. Filtration and circulation issues should be corrected, and the pool should be shocked. Agitation is required, sometimes multiple times, to allow the disinfectant to continue to kill the algae. Once visible algae has all been removed, use of an aglaecide, continued regular brushing, and proper chemical balance will be key to keeping it at bay. For black algae and other hard-to get rid of algaes, other considerations include cleaning filters, additional shocking of the pool, and continued scrubbing of pool walls and floor. When shocking the pool or using an algaecide, always follow label directions and utilize proper PPE.
Certification
NYS Sanitary Code SubPart 6-1 requires that a public swimming pool be operated by a qualified operator. Certified Pool Operator (CPO) courses are offered by organizations such as the Pool and Hot Tub Alliance. Becoming certified is an important step in understanding pool operations and equipment to the level required by the code. It is worthwhile to employ multiple Certified Pool Operators to ensure consistent and capable management of a school's swimming pool(s).
Chloramines
Chloramines are irritants that form as free chlorine binds to the body waste of swimmers. They can become a significant respiratory irritant to bathers as they gas off from the water and hover at its surface. In addition to respiratory distress, chloramines can cause eye and skin irritation as well as a distinct odor in the natatorium environment. Control methods include proper disinfection and limiting the amount of combined chlorine as well as air handling strategies and simple bather rules such as showering before bathing, wearing bathing caps and proper hygiene. The CDC has issued several recommendations for the management of Chloramines in Pool Operation which can be a valuable tool in the Pool Operator’s toolbox.
Preventative Maintenance
Pool systems can be complex and include equipment just like the rest of our educational facilities. Equipment such as pumps, filters, electronic controllers, heat exchangers, and boilers are just a few examples. Just like those systems throughout the rest of a school building, pool systems too require preventative maintenance as prescribed by the manufacturer. Such maintenance procedures can include regular filter backwashing and cleaning, replacement of peristaltic pump tubes, cleaning and lubing filter plungers and gaskets, greasing motors, and cleaning chemical sensing probes. Each piece of equipment in the pool mechanical room should be inventoried and added to the school’s preventative maintenance schedule as defined by the manufacturer’s specifications.
Virginia Graeme Baker Act/Drain Covers
The Virginia Graeme Baker Pool and Spa Safety Act (VGB) was established in response to a tragedy claiming the life of a 7 year old child who became entrapped in a faulty drain cover in a public swimming pool. Drain covers have since been redesigned to comply with new standards that limit their potential for entrapments. The new standards address various types of entrapments and place specific limits on water flow rates across the surface of the drain cover. All swimming pool drain covers must be VGB compliant. Drain covers with stamped expiration dates must be replaced prior to their expiration and replacement covers must meet or exceed the same standards, as approved by a licensed design professional and the Authority Having Jurisdiction.
Regulating Agencies
Depending on location, public swimming pools will be regulated by either the local office of the NYS Department of Health, or the Local Health Department, who will perform regular inspections, issue required permits, approve pool design (in addition to approval and permit requirements through NYSED office of Facilities Planning) and serve as the Authority Having Jurisdiction.
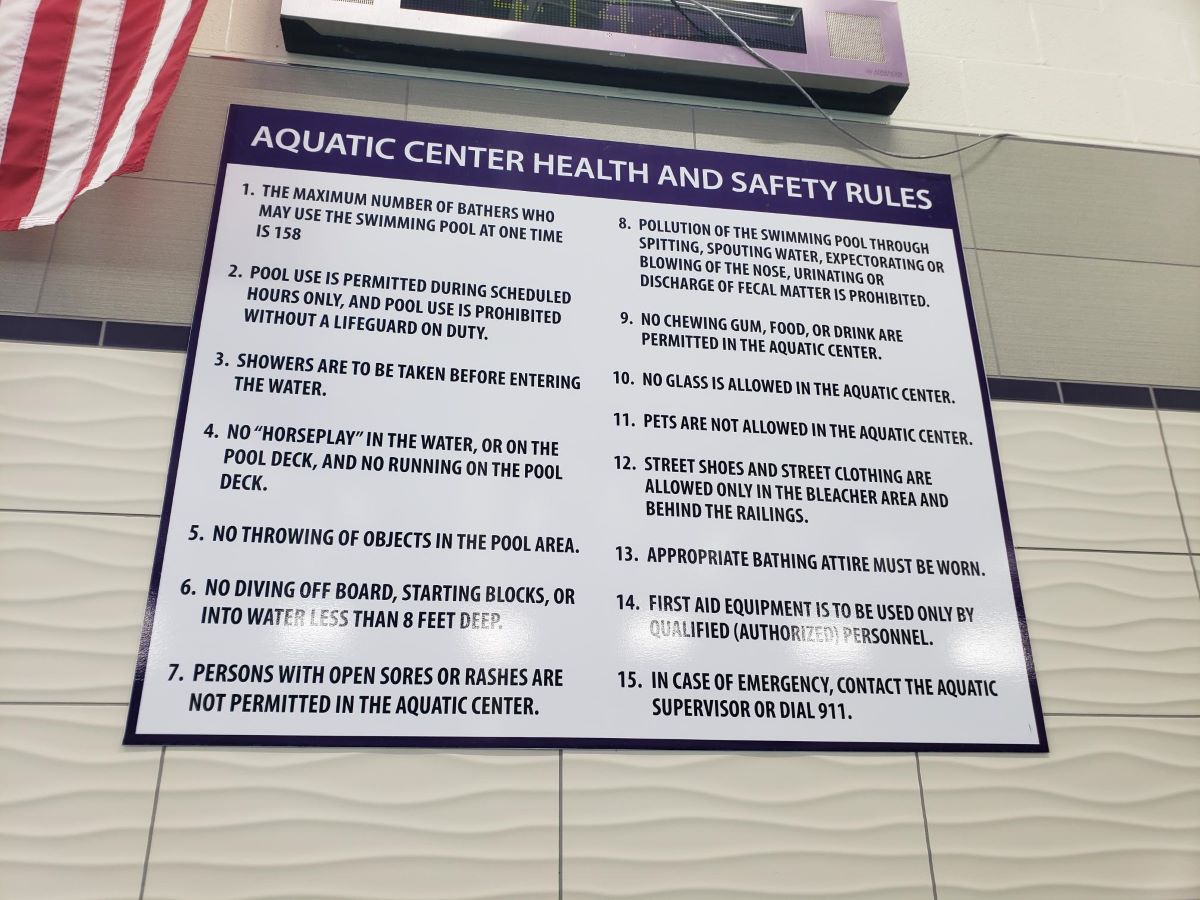
There are a few basic tools that will help you do your job and should be available for you to use. You will certainly deal with complaints about temperatures in classrooms, humidity levels, lighting levels, etc. Your district may have these and if not, here is a good place to start. For about $2,000 you can get about all the tools you will need to help you with some important diagnostic work and facility planning. Some of the tools listed below overlap in what they can do, so depending on your budget, you can buy one tool that does the job of three. These tools are not necessarily for use by your staff, but they will provide you with a few handy diagnostic tools.
Moisture Meter – This is great tool, but it does come at a higher cost and is the most expensive item we have listed in this section. If you must deal with a mold issue, this is the tool you will want. You can get an instant reading on the meter for temperature and relative humidity. The imaging camera is great for identifying wet areas, along with thermal images showing hot and cold spots. You can download images from the meter which will help you in documenting the status of an area in question. Most meters will include a moisture probe that can be used to verify wet areas in a wall or even in roof insulation. These range in costs from $600 to $1,700, depending on the features you desire. This will do what the thermal imaging gun can do, but it has the moisture capabilities.




Managing the inventory list of your district’s assets may be a part of your responsibility. There are two type of inventory that we will cover, and that is capital assets (equipment) and consumable assets (custodial supplies, pool chemicals, grass seed, etc.).
Capital Assets
Your district should determine at what value does an asset require an Asset Tag. Your Business Administrator can tell you the value of a product that requires the creation of an Asset Tag. There may also be debate on what constitutes an asset that requires an Asset Tag. One thought process is if the asset is fixed to the building, and it would not be something you would move if you were to relocate/sell your school, then it does not get an asset tag. Good examples of this would be a univent, stage lighting, or a boiler, as you would not remove these types of equipment if you were to sell the building. Vehicles, tractors, autoscrubbers, computers, welders, and fitness center equipment are examples of assets that would require a tag if their purchase price were above the value set by the district. If your threshold is $500, then a Zero Turn mower would get a tag, but a $450 vacuum cleaner may not. Asset tags also provide a way to keep track of equipment purchases and their location. Auditors may ask you how you keep track of tools such as cordless drills. For those reasons, it is a clever idea to at least add these to your equipment lists (items valued under your threshold) in your CMMS (Computerized Maintenance Management System).
If you do not track Capital Assets through your CMMS, then you should have a spreadsheet to manage them. Information typically documented for the assets would be Make, Model, Serial Number, Description, Date Purchased, Purchase Price, Purchase Order Number, Vendor, Asset Tag Number, Expected Life of the Asset, and Location of the Asset. All this information should also be placed in your CMMS for any assets that are in your department or assets that you will maintain. Assets purchased through your IT Department such as laptops, chromebooks, smartboards, televisions, and so on, should be managed by the IT Department. Depending on the size of your district, the number of Technology Assets can be quite large, and these items are frequently transferred between students and between staff members. This is not an area you want to manage assets if possible.
You can purchase pre-printed asset tags, and these Asset Tags must have unique numbers. Some CMMS programs can perform Asset Management and can create a unique bar code or QR code labels. If you are going to create your own asset tag labels, be sure the tags are weatherproof and UV fade resistant. When you place a tag on a piece of equipment, aim to put the tag in a location that is visible, but not in a location where it will be subjected to damage. Exterior asset tags should be placed on the north side of equipment to prevent fading. Asset management gets difficult when you cannot read a tag or when an asset has multiple tags because someone could not discover the original tag on the equipment. Some districts will utilize an outside company to audit and assist in the management of your assets. Ask your Business Administrator about this. Your district auditors will ask to see a list of your assets, and many will also ask you to locate specific items from the list in your buildings, which is why it is important to document where assets will be stored. If you are the keeper of the asset list, you will want to have a form for asset tag creation, asset disposal, and possibly one for asset transfer. Do not create a new asset tag for an item until that piece has been received by the purchaser, and you have all the necessary information. These forms make asset management much easier. Example forms are provided for you, and you can edit these generic sheets to adapt to the requirements of your district.
Asset Disposition or Asset Surplus is the term used to describe an asset that is no longer needed. The process to surplus an asset will also vary by district policy. The question that you must answer with respect to this is does the asset have value. The value of the asset will assist in determining how the asset will be disposed of. You simply just cannot throw things away, give them away, sell them, or auction them without going through the proper channels. The common procedure is to submit an item for disposition that will be approved by your school board. For example, you have a 12-year-old zero turn mower that still runs, but it has seen better days. The mower will have some value and should be disposed of in the proper manner. In this case, you would submit the item for approval to be deemed surplus, and when you receive approval, you would submit the item for auction, as it still has fair value.
There are several options for auctioning surplus equipment. Many use the online site Auctions International, and others will send their surplus items to a local consignment auction. You will have several choices but be sure the items are available for the public to bid on. If you do not get any bids on an item you send to auction, you can then deem that asset to have no value. In this case you would submit the surplus item for approval and note that the asset has no value and should be scrapped. A broken chair may be submitted initially as surplus to be scrapped, as it has no value. Again, speak to your Business Administrator as to how these things are handled in your district.
Consumable Assets (Inventory)
This constitutes items you purchase regularly but still need to keep track of. Audits will ask you how you manage this inventory and how you would know if products are missing. Keeping consumables stored in a secure location is one way and having one person distribute and adjust inventory levels in another. Limiting the number of storerooms for your consumables also helps to streamline the process. I have marked items out of inventory as soon as they leave the main storeroom. I don't count items in each janitor's closet, but that would be something you may do to keep tighter controls on consumables. Find a method that works best for you and your district. Using your CMMS to manage inventory seems to be the best method. Being able to produce an inventory report at a moments notice is key. Having procedures in place to account for inventory entering and being dispurse is also important.
Example of how to manage comsumable inventory with a CMMS
- All consumables are placed into the CMMS with accurate inventory figures, including supplier, costs, and minimum and maximum inventory levels.
- Items are distributed to the districts builds by way of a work order.
- Workorder requests are placed by the buildings Head Custodian/Sr. Custodian with a list of supplies needed.
- Inventory is then gathered and delivered to the building making the supply request.
- When the workorder has been completed and closed out, the inventory levels in the main storage room are automatically adjusted.
- Limit requests for supplies to once or twice per month.
- Run a report to show which products are below the minimum inventory level and are need to be replentished.
- Create Purchase Requisitions in your CMMS that you will used to create purchase orders in your districts purchasing software.
- When the orders are received, you simply update the purchase requisition in your CMMS to received.
- Run an annual report to show the amount of product consumed in past year and use that information to budget for next year's orders.
Here are some helpful forms to help manage your assets.
Asset Inventory Spreadsheet
NOTE, the Asset Inventory Spreadsheet was created as a tool for CMMS asset lists. This is an outstanding form for recording your asset inventory.
Many of us from the older generation still refer to them as blueprints from the days when they were made with blue ink, but today they are referred to as just prints. Print management is important and can be a life saver when you need information in a hurry, such as locating a water shutoff valve when a pipe has burst.



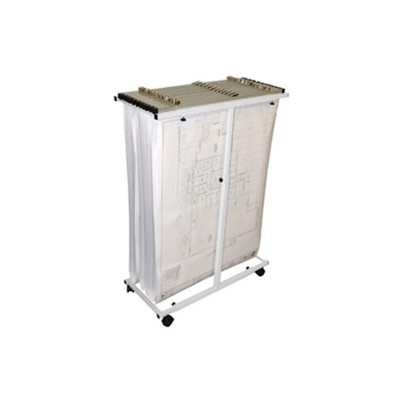
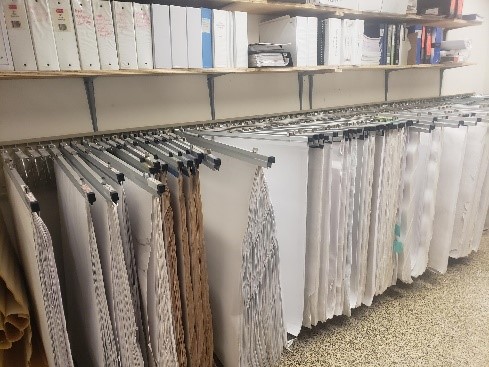
Digital Prints - Having digital copies of your contruction prints and documents is a great way to keep them safe. As part of your BCS, you can get your construction prints scanned in put into digital format. You can also include your project manuals and O &M manuals to be scanned. UNDER NO CIRCUMSTANCES should you destroy your paper copies of your prints after they are scanned. After working with construction prints, you will realize how much easier it is to read a large formatted print when compared to vieing that print on your computer monitor. The digital files do offer thers advantages:
- You can easily share a copy of a print.
- You can search the file folder for a specific keyword.
- You can access a print in a very short period of time and from multiple locations.
- Digital prints do not fade, nor are they susceptible to damage from handling.
- Be sure to request copies of digital prints and documents before beginning a capital project.
Creating a Capital Project Print list to display the Capital Project numbers available for each of your buildings. This document will assist you when you are looking for certain types of prints. This is a great piece of information to hang on your wall in your blueprint storage area. You could also add the location of these project prints to the sheet as well. You will notice in the spreadsheet that each building has a number, which is the sixth set of digits in the SED building code. In the example below the High School is building 001 and the Elementary School is 015. The three digits after the building number are the project numbers. The last project that was done at the High School was number 013. The next time this district does a project at the High School it will be project 014 and the Elementary School will be 011. Even though a capital project has work at two buildings at the same time, it does not mean they will be assigned the same number. In other words, just because the High School is doing project 014, that does not mean the other buildings will be doing project 014. When you organize your prints, you may find missing numbes in the sequence. In the list below you will notice some gaps in project numbers, which could imply that those prints were either lost or destroyed. If you can't find a set of project prints, reach out to the architect and see if they have a set they can make copies of for you. If you know who was a contractor on a specific project, you might want to try them as well for a copy.
| HIGH SCHOOL | PROJECT YEAR | PROJECT NOTES |
|---|---|---|
| 65-03-01-04-0-001-003 | 1994 | Switch from Steam to HW |
| 65-03-01-04-0-001-005 | 2001 | Window Replacement |
| 65-03-01-04-0-001-006 | 2002 | EPC | 65-03-01-04-0-001-009 | 2009 | Roofing, SidewalksEPC | 65-03-01-04-0-001-010 | 2010 | Drainage, Track, Fencing |
Each time you carry out a Capital Project, your architect generates several print sets that will be given to your district. Not every architectural firm will generate prints in the same manner, so you should ask how you can expect to receive prints. Typical print types that you may receive from your architect are SED Set, Bid Set, Construction Set, and As-Built Set. Your architectural firm will discuss the timing to receive the prints through the capital project process.
SED Prints – This set of prints are the first prints generated and are sent to SED for project approval. These prints are not always detailed but cover the gist of what project work is being proposed. For example, you may have a print showing the replacement of a drop ceiling in a classroom, but the orientation of these ceiling tiles may be different on the print set that goes out for bid. Some Architectural firms will use the same set of prints that went to SED as the bid set. If SED asked for changes to print details prior to approving the project work, those changes are updated on the prints before going out for bid. It is STRONGLY SUGGESTED that you do NOT store your SED prints with your construction and as-built prints. You should remove them as they are not a good source of reference. They will only serve a purpose to go back and look at what was initially planned for the project, but these should not be used for detailed references.
Bid Set Prints – These are the prints that contractors wishing to bid on your project will receive so they can create cost estimates and generate a bid for the project. Some architects will detail these prints so they serve as the Construction Set, while others will create a separate set of prints for Construction prints. The Bid Set has enough details to allow the prospective bidders to properly generate a cost to construct figure.
Construction Set – This set has more dimensional details than the Bid Set. The Bid Set may show doors in a new addition but not the exact location of the door along a wall. The construction set will show the door to be four feet from the east wall.
As-Built Set – This is the set that is turned over to you at the end of the project. Typically, these prints are the Construction Set with lots of notes showing deviations from the original document. If no changes were made to an area depicted on a print, the print would look exactly like the Construction Set print. As-Built prints are the most important for you to view, as they indicate the actual details as they were constructed. Some contractors will create a new print for you showing the as-built conditions, while others will make “Red Line” notes on the construction set. Before beginning a project, it is good practice to specify what you expect in your as-built drawings. NOTE: You should add this expectation to the construction specifications at the early stages of the project. When a water line or power conduit is discovered in a location that is not shown on your prints, be certain the new location is documented. If possible, take a picture of the discovered utility line and do not assume the contractor has taken time to document the location of the utility line. Experience will tell you to not assume a gas line or water line is where it is shown on the print. That is why it is important to get the As-Built prints to reflect existing conditions as close as possible.
Design or Bid Sets of prints are usually provided in multiple sets, but As-Built prints are commonly received as one set. If you have more than one set of prints from a Bid Set, you may choose to split one of the sets by building. Everyone will have a different opinion on how they want to organize their prints, but an ideal print room has a section of As-Built prints, Prints by Building and Trade (Plumbing, HVAC, Electrical, Site, Architectural, Life Safety, etc.), and Prints by Project. Sometimes As-Built prints will only contain prints that deviated from the Bid Set that was provided to the contractor. You might have an electrical As-Built print set from a capital project that contains only four pages, but the bid set has twenty-four pages of electrical prints. When you are doing a capital project, make it known up front how you would like to receive your As-Built prints. This can be a full set with changes noted, or just the pages with changes only. Most times you will get an electronic copy of the print and a paper copy. It is strongly recommended that you get a paper copy and not just an electronic copy. Being able to see the whole picture on a full-size print can be much easier than trying to trace through what is displayed on your computer screen.
You can also have your full-sized prints scanned and stored as an electronic copy. Note that older prints that are true blueprints are not always as legible as paper copies. DO NOT discard your paper prints after scanning. Once you do that, you can never get them back and printing out paper copies from the electronic version will not produce a copy that will be of the same quality as the original scanned print.
Project Manuals – This book will guide the contractor’s project work with specifics. A construction print will note that a 2” ball valve needs to be added at a specific location, but the Project Manual will detail the specification of the valve. Those specification may include the material type (brass, plastic), temperature rating, pressure rating, and so on. In addition to product specifications, the Project Manual will define testing requirements, finishes, temporary ventilation, abatement procedures and policies, along with many more details. Every project has a Project Manual. You should organize your manuals in a similar manner to your prints, so they are easy to locate.
O&M Manuals – These books contain the operation and maintenance instructions for devices installed during your capital project. Manuals are typically groups of products, so you might have an O&M Manual for HVAC, Plumbing, and Electrical and each of these manuals are provide to you by the prime contractor for each of these trades. O&M Manuals will be useful for your Maintenance Technicians and should be identified and kept in an accessible location. These should be organized by projects as well. You may want to put the project year or project number along with the manual title on the binder so they can be located quickly. These manuals can also be linked to asset records in your CMMS for easy recall/reference.
Cross Connection Control(Backflow Preventer Testing)
NYCRR Title 10 Part 5 -1 Section 5-1.20 – 5-1.33
A backflow of water due to cross-connections is a serious plumbing problem. Cross connections can cause sickness and even death. However, they can be avoided by the use of proper protection devices.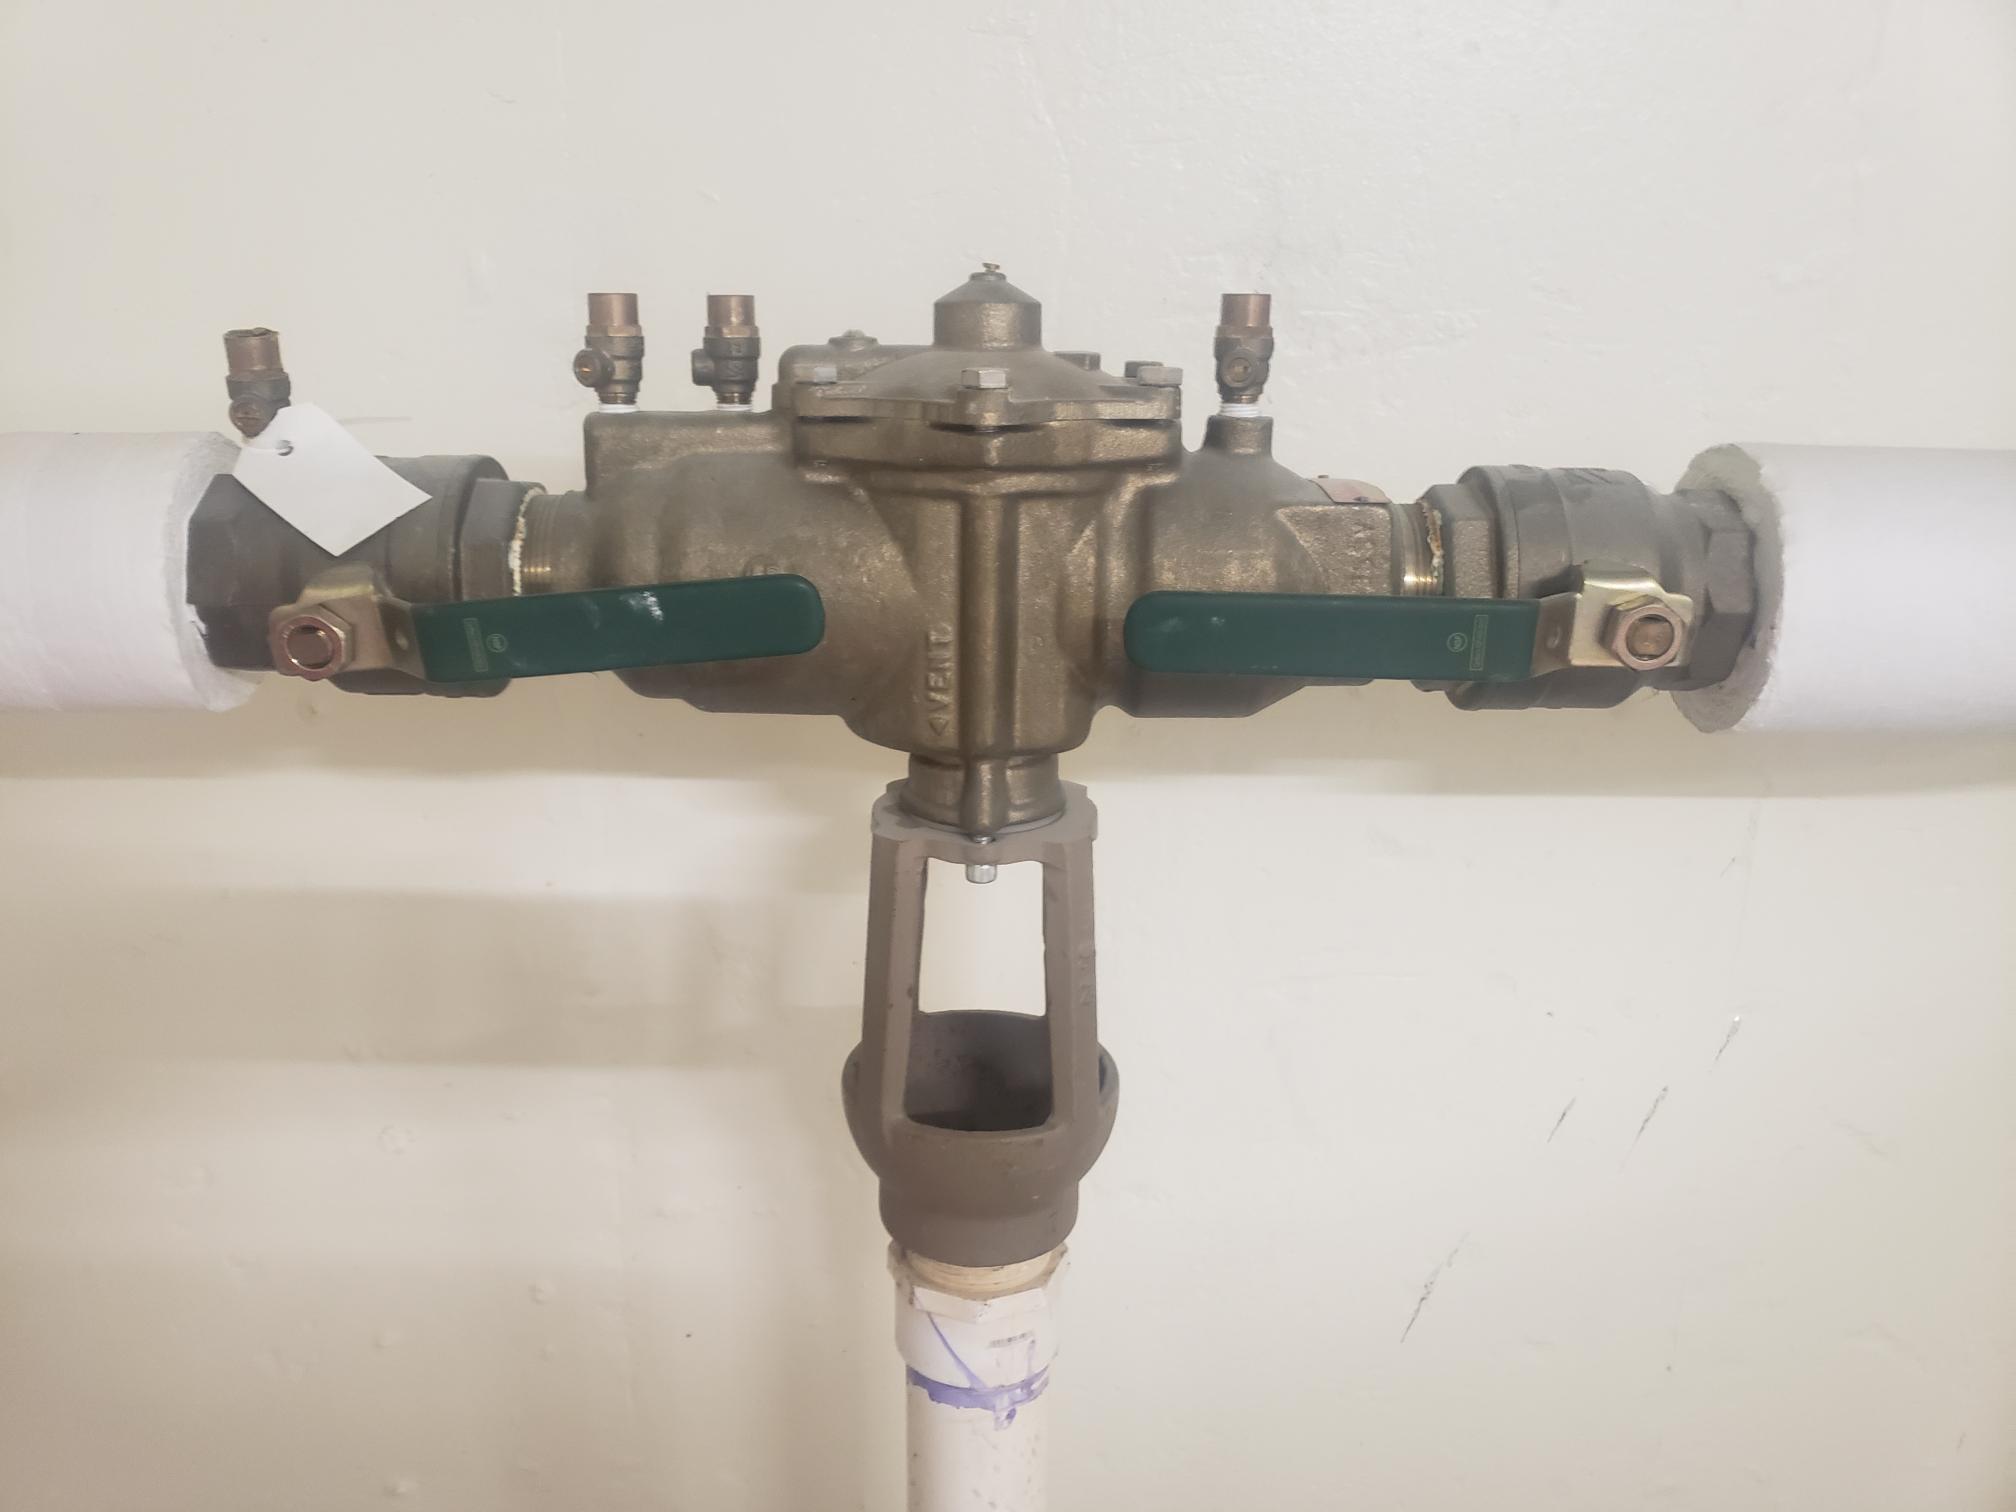
To prevent backflow conditions from developing an inspection of the facility will evaluate the hazards to the community from the equipment connected to the building’s water supply. For example, in a bus garage the evaluation may require that a backflow preventer must be installed on the main water line where it enters the building, on the water supply line to the bus wash system and a backflow preventer on the boiler system. There may also be a requirement for sillcocks to be of the anti-siphon type.
Before you run out and buy a backflow, The New York State Department of Health (DOH), Bureau of Water Supply Protection, will only accept those backflow prevention devices/assemblies which appear on the current edition of the List of Approved Backflow Prevention Assemblies generated by the University of Southern California Foundation for Cross- Connection Control and Hydraulic Research (FCCCHR). Please note that along with double check, double check detector, reduced pressure and reduced pressure detector assemblies, the FCCCHR list includes atmospheric and pressure vacuum breakers which do not satisfy Section 5-1.31 of the State Sanitary Code.
When your backflow tests have been completed and you have been issued copies of the test reports, you must send a copy of these reports to your local water authority.
Title: Section 5-1.31 - Cross Connection Control
Effective Date: 01/17/2018
5-1.31 Cross Connection Control
- The supplier of water shall implement a service protection program (also known as containment) which includes the following:
- requiring a protective device commensurate with the degree of hazard posed by any service connection;
- requiring the user of such connections to submit plans for the installation of protective devices to the supplier of water and/or the State for approval; and
- assuring all protective devices are inspected and tested by a certified backflow prevention device tester, as prescribed in subdivision (b) of this section, at the time of initial installation, after each repair, and annually thereafter. Records of such tests shall be made available to, reviewed by, and maintained by the supplier of water. All protective device tests and inspections shall be conducted by a certified backflow prevention device tester (“tester”).
- A certified backflow prevention device tester shall meet the following requirements:
- Initial certification and renewal requirements. Initial and/or renewal certifications for a certified backflow prevention device tester will be issued by a department-approved entity, when the applicant provides proof of satisfactory completion of a department-approved certified backflow prevention training course. The certification shall be valid for a period of three years.
- Conditions of certification.
- Upon issuance of a certification by a department-approved entity, the tester shall inform the department and the department-approved entity, within 30 days, of any changes in address or employment.
- The department has the authority to require any individual applying for certification or renewal certification as a certified backflow prevention device tester or any certified backflow prevention device tester to take a written, oral and/or practical skills validated examination, if the department deems such examination to be reasonably necessary to determine the applicant’s qualifications or to determine the certified tester’s knowledge, skills, ability and judgment. The results of the examination may be the sole basis for approval, disapproval or suspension of such certification or the basis for additional requirements, deemed appropriate by the department, before certification will be issued or reinstated.
- Recertification requirements.
- An individual that allows his or her certification renewal to lapse after the expiration date is no longer certified to test applicable protective devices as outlined in this Subpart. If the individual meets the requirements outlined in this subdivision, within one year of the expiration date, the certification will be reinstated with a renewal period starting upon the date of expiration of the original certification and ending three years later.
- An individual that allows his or her certification renewal to lapse for more than one year after the expiration date will be required to repeat the initial certification requirements set forth in subdivision (b)(1) of this section.
- Enforcement.
- making false statements or notations on legal or official records required by the department; or
- providing misleading statements to government officials or agents of the government regarding protective device testing/certification.
- The supplier of water may not allow a user to establish a separate source of water. However, if a user justifies the need for a separate source of water, the supplier of water shall protect the public water system from such separate source of water by ensuring that such source does not pose a hazard in the following manner:
- by requiring the user to regularly examine the quality of the separate water source;
- by approving the use of only those separate water sources which are properly developed, constructed, protected and found to meet the requirements of sections 5-1.51 and 5-1.52 of this Subpart; and
- by filing such approvals with the State annually.
- All users of a public water system shall prevent cross-connections between the potable water piping system and any other piping system within the premises by installing internal protection in accordance with the New York State Uniform Fire Prevention and Building Code and/or the local plumbing and building codes.
- Any installation, service, maintenance, testing, repair or modification of a protective device shall be performed in accordance with the provisions of any relevant county, city, town or village plumbing code. All individuals who perform testing of protective devices shall be certified in accordance with subdivision (b) of this section.
Upon notice and opportunity for a hearing, a tester’s certification may be suspended or revoked. Revocation or suspension may be based on, but not limited to, fraud or misrepresentation by the certified tester; gross incompetence or gross negligence on a particular occasion; or negligence or incompetence on more than one occasion. Examples of such conduct include, but are not limited to:

Each district is required to conduct safety drills each school year and these details are listed below. Note that below it states that drills shall be conducted at different times of the day. This statement does not mean you can conduct more than one fire drill on any given day. You are not to conduct more than one of the same drill on the same day. The statement of conducting drills at different times means that drills should be conducted at various times of the school day. In other words, do not have fire drills always at 10am. The times must be varied so students are practiced at evacuating from different locations in the school building.
The minimum quantity and types of drills required are as follows:
- Drills shall be held at least twelve times in each school year.
- Eight of the drills, whether evacuation or lockdown, shall be held between September first and December thirty-first of each year.
- Eight of the twelve drills shall be evacuation drills.
- Four of all such drills shall be lockdown drills.
- Drills shall be conducted at different times of the school day.
- Pupils shall be instructed in the procedure to be followed if a fire occurs during a lunch period or assembly.
- Four additional drills shall be held in each school year during the hours after sunset and before sunrise in school buildings in which students are provided with sleeping accommodations.
- At least two additional drills shall be held during summer school where summer school is conducted.
MEMO FROM NYSED REGARDING SAFETY PLANS
As recent tragedies in schools have demonstrated, the importance of having a plan in place for how the school and community will respond in an emergency cannot be over-emphasized. Education Law §2801-a and Commissioner’s Regulation §155.17 require that each public school and BOCES develop and annually update a confidential building-level Emergency Response Plan (ERP) that includes details about how school personnel and students would respond to different types of emergency situations that may occur in their school. In addition, each public school district, BOCES and charter school must also develop and annually update a district-wide school safety plan that provides critical information to parents, educators and the school community about the policies and procedures that are in place related to school safety.
Important information about training opportunities and resources are provided below to assist administrators with developing and submitting these plans for the 2022-23 school year.1 If you have questions, please contact the office of Student Support Services at SafetyPlans@nysed.gov.
Resources
- Upcoming Emergency Response Planning Training Opportunities
- Plan Development Resource Packet for Districts and Schools
- District-Wide School Safety Plan Self-Assessment Checklist NOTE: Charter schools will receive separate notification regarding how to submit their plans.
- Building-Level Emergency Response Plan Self-Assessment Checklist
- Quick Guide to Emergency Response Planning Requirements
- Emergency Response Terms and Descriptions
- New York State Center for School Safety
- NYSED’s Office of Student Support Services
Recent Changes to Requirements
- On June 23, 2022, Governor Hochul signed Alyssa’s Law, Chapter 227 of the Laws of 2022, which amends Education Law 2801-a to require schools to consider silent panic alarm systems when reviewing and amending district and school safety plans. The requirement is effective immediately; proposed amendments to Commissioner’s Regulation 155.17 will be presented at the September 2022 meeting of the Board of Regents.
- At the April 2022 meeting of the Board of Regents, proposed amendments to Commissioner’s Regulation 155.17 related to district-wide school safety plans were put forth. If adopted at the July 2022 meeting of the Board of Regents the amendments will become effective on July 27, 2022, and will require that public schools, boards of cooperative educational services (BOCES) and county vocational education and extension boards amend their district-wide school safety plans to include plans for remote instruction beginning with the 2023-2024 school year. Such plans must include the methods by which public schools, BOCES and county vocational education and extension boards will ensure the availability of devices, internet access, provision of special education and related services for students with disabilities, and the expectations for time spent in different remote modalities. Additionally, such plans require that each chief executive officer of each educational agency located within a public school district report information on student access to computing devices and access to internet connectivity each year. Additional information and the proposed regulations are available in the April 6, 2022 memo to the Board of Regents.
- In July 2021, amendments to Commissioner’s Regulation 155.17 were permanently adopted that require district-wide school safety plans include protocols for responding to a declared state disaster emergency involving a communicable disease that are substantially consistent with the provisions of section 27-c of the Labor Law. The required components are outlined in a sample template that is posted on our website.
Building-Level Emergency Response Plans
As noted above, each public school, charter school and BOCES school building is required to develop and annually update a confidential building-level ERP that includes information about the school, key staff, floor plans, maps, and detailed response procedures for different types of emergency situations. The plan must be in place by September 1 each year and must be submitted to both the state police and local law enforcement within 30 days of adoption, but no later than October 1. Schools fulfill the requirement to submit building-level ERPs to the state police by submitting their plan electronically via the SED Monitoring application accessed through the New York State Education Department (NYSED) Business Portal.
At this time, school officials must contact local law enforcement directly to comply with the requirement to submit the building-level ERP to local law enforcement. In addition, local law enforcement must be a part of the required Building-Level Emergency Response Team.
Important reminders regarding developing and submitting the plan:
- The plan must include all minimum required elements, as outlined in the Building-Level Emergency Plans Self-Assessment Checklist.
- In circumstances when a single physical building contains multiple “schools” or “programs,” the safety team(s) should be inclusive of all grades, schools, and programs located in the building and the team should develop one emergency plan per physical building that is inclusive of all grades and programs located in the building.
- School administrators must include information about each local law enforcement agency the plan was submitted to and the date the ERP was submitted; 10-digit phone numbers, including area code, must be provided.
- Every school ERP must include functional annexes for how the school will implement their plan of action in response to an emergency (including: Shelter-in Place, Hold-in-Place, Lockout, Lockdown, Evacuation, Crime Scene Management, Communications, Public Health, Medical and Mental Health, Accounting for All Persons, Family Reunification, Security, and Cybersecurity). Required functional annexes must be complete and should not include the use of codes, colors or cards.
- It is required that each school submit a pdf document containing building floor plans, and a pdf document containing a map of the school grounds and surrounding area. You may utilize an application like Google Maps to generate a pdf document that contains an area/satellite map. The documents must be readable and clear with entrances and exits clearly marked. Do not submit electronic copies of hand-drawn plans.
- When identifying personnel to fulfill Incident Command System (ICS) roles, it is recommended that your team identify staff to fulfill key roles who are on-site daily, and that your team does not designate the same staff person to fulfill multiple roles. Please consider designating an alternate for each role.
- When entering contact information, be certain that area codes are included with telephone numbers; if possible, include cell numbers for contacts.
District-Wide School Safety Plans,
Each year, every school district, BOCES and charter school must develop/update and, after appropriate board review and public comment period, adopt a comprehensive district-wide school safety plan.2 To comply with the requirement that the plan be filed with the Commissioner, each school district, charter school and BOCES is directed to post their district-wide school safety plan, including the school code of conduct, on the district website and submit the web address/URL to the Department annually via the Safe Schools collection in SED monitoring.
Important reminders to consider:
- The plan must include all minimum required elements as outlined in the District-Wide School Safety Plan Self-Assessment Checklist, including a copy of the board-adopted written contract or Memorandum of Understanding (MOU) that defines the roles and areas of responsibility of school personnel, security personnel and law enforcement in response to student misconduct that violates the code of conduct for school districts and charter schools that employ, contract with, or otherwise retain law enforcement or public or private security personnel, including school resource officers. For additional information, see the September 5, 2019 memo regarding this requirement.
- Safety teams include all required members as described in the in the District-Wide School Safety Plan Self-Assessment Checklist.
- Required procedures regarding public hearings, board adoption, and/or public comment periods must be in place. LEAs should consult with their school attorneys regarding meeting these requirements. In addition, information about public meetings law is available in a publication from the Department of State.
- The district-wide school safety plan must be posted on the LEA website in a location that is readily accessible to parents and the public (such as on a page describing school safety procedures).
- Report the following to NYSED via the Safe Schools collection in SED Monitoring:
- contact information for the chief emergency officer;
- the URL for the district-wide school safety plan;
- dates of public board meeting, public comment period, and board adoption; and
- certification that by September 15, all district and school staff have undergone annual training in the emergency response plan, school violence prevention and mental health.
Thank you for all you do to keep students and staff safe every day. If you have questions about these requirements, or suggestions for how NYSED may better support schools in this area, please contact the office of Student Support Services at SafetyPlans@nysed.gov.
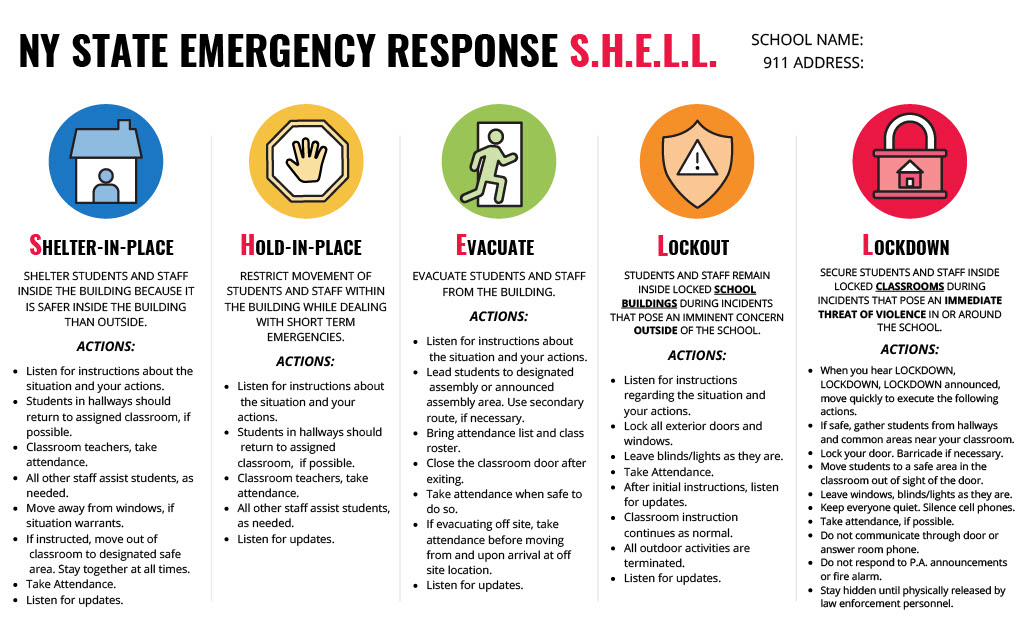
CLICK HERE for the link to the PDF version of the Shell Diagram.
CLICK HERE for the link to NYSED memo on Safety Drills
CLICK HERE for the link to the NYSED District-Wide School Safety Plan Self-Assessment and Planning Tool .
Civil Service Titles and Job Descriptions
Of all the sections in this handbook, the topic of staffing and job descriptions might be the most difficult to provide clean and concise guidance. The available Civil Service job descriptions can be unique between counties in the state, and with 62 counties in NY, that would be plenty of descriptions to list in this handbook.
Below are job descriptions for a Custodian in Nassau County and in Seneca County. You will see some differences in what staff can perform under the same title in two different parts of the state. Many of the duties are the same, but there are enough differences that these are not the same job description. Duties 1, 3, 9, and 10 in Nassau County stick out the most as what differs from Seneca County.
Nassau County Custodian
TYPICAL DUTIES
- Cleans and makes minor repairs to heating system.
- Repairs furniture, replaces locks, and makes minor plumbing and electrical repairs.
- Paints rooms and equipment.
- Sweeps, mops, washes walls, dusts, and performs other cleaning duties.
- Supervises operation of school building during school events.
- Replaces light bulbs, towels, soap, and other supplies.
- Empties wastebaskets and disposes of rubbish.
- May cut grass, trim shrubbery, rake leaves, etc.
- May operate a heating system - low pressure steam boiler, hot air furnaces, or hot water boilers.
- May direct traffic for protection of school children.
FULL PERFORMANCE KNOWLEDGES, SKILLS, AND ABILITIES
- Considerable knowledge of building and cleaning practices, supplies, and equipment; and ability to use them economically and efficiently.
- Knowledge of the operation and maintenance of a heating system.
- Ability to make semi-skilled plumbing, electrical, carpentry, and mechanical repairs.
- Ability to understand and follow oral and written directions.
- Sufficient physical strength to perform strenuous custodial activities.
MINIMUM QUALIFICATIONS
Training and Experience
- One year of satisfactory experience in building cleaning and maintenance work; or
- Six months of satisfactory experience as a carpenter, plumber, electrician, painter, mechanic, steam firer, or other related maintenance work; or
- One year of satisfactory experience as a Cleaner in a Nassau County school district.
Seneca County Custodian
Responsibilities of the Custodian
- Sweeps, mops, waxes floors, washes walls, windows, dusts, & other cleaning duties
- Cleans, mops, replaces supplies in locker rooms & lavatories
- Minor repairs to furniture, electrical fixtures, windows, window shades, locks, faucets, etc
- Empties wash baskets, collects & disposes of rubbish
- May mow lawns, landscape, remove snow, & grounds keep as needed.
Qualifications of the Custodian
- 1 year of experience in building cleaning & minor maintenance activities
- Any equivalent combination of experience & training
Staffing levels can be influenced by the expectations set in your district. I believe it is much easier to determine the staffing for your Custodial Department than it is for Maintenance. If the leadership at your district expects immaculate grounds, then you might be staffed heavier on the grounds side than a district with the same size grounds but lower expectations. When working on the size and responsibility of your staff, it is a good idea to meet with your Superintendent and Business Administrator to determine what the expectations are for your facilities and grounds. This information will help to create a plan for adequate staffing levels and responsibilities. If the expectations are high, then be sure to explain the additional time to achieve such details and that extra staffing will be required.
Custodial
Whether your Cleaners are assigned classrooms to clean on their own or if they work as a team to clean each room, the staffing level will be the same. If you do a search on the internet, you will find a range of numbers (20,000 to 25,000) estimating the number of square feet a Custodian can clean in an 8-hour period. Based on those numbers, selecting the midpoint of 22,500 square feet for estimating purposes would be suitable. Determining staff levels based on this number is a common question on the DOF exam. So, by dividing the square footage of our school by 22,500, we get a good idea of the number of cleaners we need. Depending on the setup of your school building, some rooms will take more time than others. A Custodian in a kindergarten room will need more time to clean the same amount of space as compared to a Custodian cleaning a high school math classroom. Kindergartners will basically make quite the mess and there are usually a lot more pieces of furniture and such to clean in these early childhood classrooms. That is something you will want to take into consideration when staffing. Other areas like art rooms, careers rooms, and many of the foreign language rooms can require additional attention. When you assign your staff to classrooms, be sure to properly balance room assignments between staff members that need more time to be properly cleaned. Performing a time study to observe the required schedule to properly clean a room is truly the best method to discover the amount of time needed to perform all the tasks you demand.
Building Cleaning Standard Type
Definition
The standard for cleanliness, and benchmarks for how much space can be assigned to one properly supplied custodian to meet these standards.
| Description | Definition | Code |
|---|---|---|
| Level 1 Cleaning | Spotless cleaning, such as might be found in a hospital or corporate suite. One custodian, properly supplied and equipped, should be able to clean 10,000 square feet in an 8-hour period, depending upon the condition and level of utilization of the facility. | 02831 |
| Level 2 Cleaning | Intensive cleaning, reserved for areas such as restrooms, special education areas, kindergarten areas, or food service areas. One custodian, properly supplied and equipped, can clean approximately 11,000-18,000 square feet in an 8-hour period, depending upon the condition and level of utilization of the facility. | 02832 |
| Level 3 Cleaning | Cleaning required to ensure the health and comfort of building users. One custodian, properly supplied and equipped, should be able to clean 19,000-25,000 square feet of space in 8 hours to this standard, depending upon the condition and utilization of the facility. | 02833 |
| Level 4 Cleaning | Not generally acceptable for a school environment. One custodian cleans 26,000-46,000 square feet in an 8-hour period. | 02834 |
| Level 5 Cleaning | Not considered healthy. One custodian, even properly supplied and equipped, will not be able to clean 47,000-80,000 square feet in an 8-hour period, to a healthy standard, whatever the underlying condition or utilization of the facility. | 02835 |
Cleaning Titles
This is another area where the answer will vary by Civil Service Office. Most common titles for your Custodial Staff are the following: Cleaner, Custodian, Janitor, Custodial Aide, Senior Custodian, Assistant Head Custodian, and Head Custodian. Larger districts will have more titles than smaller districts and if your county Civil Service office covers smaller school districts, then you will not have as many titles available to you as in other parts of the state. You can contract your local Civil Service office and request a list of job titles and job descriptions that would pertain to your department. Some districts appoint only Custodians and do not hire from the Cleaner title just because the Custodian job title allows them to perform more duties than the Cleaner title does.
Tested Positions
Multiple Civil Service job titles require a test to decide if the applicant is qualified to work in that title. They may also have conditions that must be met to be permitted to take the test. For example, a Senior Custodian position may require 2 years of experience as a Custodian before you can take the Senior Custodian exam. At this point, we could start an entirely new handbook on working with Civil Service, but we will keep marching forward and stay on topic. When hiring to fill a vacancy, you will need to contact your local Civil Service. They can provide you with a list of candidates that are qualified for the position you have available.
Maintenance Staffing
Figures for staffing quotas are available for Maintenance departments just like Custodial, however there are many more factors to consider. You could go with a generic number of one Maintenance Technician per 40,000 square feet of building space and this would include the required staffing to perform grounds work. Use of your maintenance software is probably the best indicator to use for staffing levels. Depending on the types of reports that your software will generate, you should have a pretty good idea on how long it is taking to complete requests and the backlog of work orders you have. If you are not tracking the number of calls you are making for service contractors to make repairs, you need to do that. This is covered in the section on Computerized Maintenance Management Software, but this is where you can use the data to either add staff or change the skill levels of your staff. Lets look at a few areas of your maintenance staff.
Maintenance Titles
Much like the Custodial job titles, there are several for Maintenance and they will vary by Civil Service jurisdictions. Common titles are Laborer, Maintenance Technician, Assistant Maintenance Technician, Senior Maintenance Technician, Electrician, Plumber, Groundskeeper, Head Groundskeeper, Energy Manager, HVAC Technician, and many more. Many of these titles also require a Civil Service test.
Grounds Staff
Some districts will have a grounds staff who spend most, if not all of their time, working on school grounds. The common question with respect to staffing levels for grounds is “I have X number of acres, how many staff members do I need to maintain that acreage?” The reason that is difficult to answer is that there are so many factors involved that will affect staff levels. Equipment, sports fields, weather, flower beds, trees, fence lines, and other hurdles impact the time it takes to maintain your grounds. Are you mowing fields with 11’ wide mowers or 6’ wide mowers? Do you have mow strips under your fences, or are you required to trim the fence lines with string trimmers? How much snow do you get and how big is the area you need to plow? What is the number of fields you have to line for sports and the number of sports teams that you have? If district A only has varsity football, and JV football in the fall, it will take much less time to maintain their fields than similar sized district B with varsity football, JV football, modified football, boys’ and girls’ varsity and JV soccer. Even though districts A and B have the same amount of acreage, the grounds staff will be much busier in the fall at district B. The best way to determine your staffing level is to create a spreadsheet and breakdown the tasks to maintain the grounds:
| HIGH SCHOOL - Spring/Summer | Hours/Week |
|---|---|
| Mow The Front Lawn | |
| Daily Watering of Flowers | |
| Weeding of Flower Beds | |
| Mow The Rear of The HS | |
| Mow the Baseball Field | |
| Trim The Fence Lines | |
| Mow The South Lawn |
A spreadsheet like this will help to give you a rough idea on the time you need to properly maintain your grounds. You’ll need to build in additional hours for sports field preparation, but this gets you in a decent area for estimating grounds staffing levels.
Maintenance Staff
As noted in the CMMS section, determining your workload is best done with your maintenance software. If your staff is properly logging hours into your Maintenance Management Software, this will provide critical information. You can use the data in your workorder trends to determine if you require a specific trade skill on your staff. What the district’s expectations are for work turnaround is also critical. If your district expects routine work requests to be completed in 48 hours, that will help you determine if you need additional staff or not. The demands of your Athletic Director also play a role in staffing levels. How those demands are viewed by your Superintendent and Business Administrator, as far as prioritization is concerned, will impact how you schedule tasks.
Production Rates - From Cleaning and Maintenance Management
The most common production rates for public schools are 1,500 to 2,500 square feet per hour; in private schools the market is more competitive, with production rates topping out around 3,000 to 4,000 square feet per hour.
There is a difference in cleaning grade levels: Elementary schools will be easier and more productive to clean than a junior high or middle school. High schools, although larger in size, will be more difficult and less productive to clean than grade schools, because there are more students and they are hard on the facilities. Private schools are generally easier and more productive to clean than public schools, as discipline is tighter and parents pay tuition.
Production rates are continuing to increase due to new technology, surfaces, better engineering of the cleaning process, and competition. Schools typically do most of the heavy cleaning—such as floors, carpet care, and periodic tasks—during holidays and summer breaks.
Below is a list of production rates by standard room types and sizes (assuming standardized rooms even exist). Times may vary, depending on the size and orientation of the room:
- Classroom: 8–20 minutes
- Restroom: 10–25 minutes
- Shop or art room:15–30 minutes
- Locker room and shower area: 20–40 minutes
** Visit Cleaning and Maintenance Management for more informaton
Visit Cleaning and Maintenance Management for more detailed information on K-12 production and costs for cleaning.Visit the APPA site for great information on Cleaning Operations
A Board Resolution is used to put into writing information voted on so it is documented in the school records. With respect to the Director of Facilities, some Board Resolutions can be very helpful to you. If you are going to use purchasing networks such as OMNIA, Sourcewell, KPN, and others, you will need a Board Resolution that allows you to use these networks for procurement. You may also have a board resolution for pesticide applications. In the event that you need to have an emergency treatment done with a pesticide, for something like poison ivy, then your board will need to approve this action.
Another way Board Resolutions are utilized it to name a source or product that is standardized for the district. One of these can be your keying system. You would want a resolution to specify a brand of key for your district so you do not have brands of keys in the same building. This creates a security concern as you will need to distribute multiple master keys to first responders. Each time you do a capital project that involves door hardware, you want to be sure the cylinders for your locks are the same brand you are already using. Similarly, you want to standardize your Access Control, Security System, and Building Management Systems. Before you do a project, be certain these systems have been identified in a Board Resolution so you don't end up with more than one system. No one wants to manage multiple systems in a building to control climate or security.
When you are starting a Capital Project, work with your architects and engineers to see what products you may be able to create a Board Resolution for. Having one brand of electrical panels cuts down on the number of circuit breakers you need to keep in inventory. It also helps your electrician who only needs to be familiar with one type of panel.
Examples of Board Resolutions to Standardize Items
- Door Hardware, including closers, crash bars, and door locks
- HVAC Pumps
- Emergency Exit Signs
- Variable Frequency Drives
- Electrical Distribution Panels
- Building Management Systems
- Faucets
- Electrically Controlled Flow Valves
- Access Control Systems
- A Specific Vendor for things such as Fire Alarms, Security, and HVAC Controls
Here is a link to an example Board Resolution in PDF format
Here is a link to an example Board Resolution in MS Word format
You are required to have your fire alarm systems tested annually. This inspection includes the testing and inspection of the following:
- Smoke Detectors
- Heat Detectors
- Horns
- Strobes
- Magnetic Door Releases
- Pull Stations
- Carbon Monoxide Detectors (if they are tied to your fire alarm system)
- Fire Alarm Panel
When you have your annual fire inspection for your Certificate of Occupancy, your fire alarm panel must be clear of any trouble messages. Your fire inspector will also ask to see a copy of your annual fire alarm system inspection. Because the alarm system needs to be activated to check the proper operation of the devices, you will want to be sure and do this work either during the summer or during a break.
If you fire alarm system is not functioning during a school day, you must implement a fire watch protocol during school.
3304.5.2 Fire Watch Personnel
Trained personnel shall be provided to serve as an on-site fire watch. Fire watch personnel shall be provided with not fewer than one approved means for notification of the fire department, and the sole duty of such personnel shall be to perform constant patrols and watch for the occurrence of fire. The combination of fire watch duties and site security duties is acceptable. Fire watch personnel shall be trained in the use of portable fire extinguishers.
3304.5.3 Fire Watch Location and Records
The fire watch shall include areas specified by the prefire plan established in accordance with Section 3308.3. The fire watch personnel shall keep a record of all time periods of duty, including a log entry each time the site was patrolled and each time a structure under construction was entered and inspected. The records and log entries shall be made available for review by the fire code official upon request.
According to the NFPA code, a fire watch is required if any of the following are true:
- One of your core fire detection systems is offline for more than 4 hours in any 24-hour period.
- Your fire sprinklers (or other water-based protection system) is offline for more than 10 hours in any 24-hour period.
- Another regulation established by your local authority having jurisdiction (AHJ) applies to your situation.
CLICK HERE for the Public Fire Safety Inspection Manual.
NFPA Two-Way Emergency Communication System
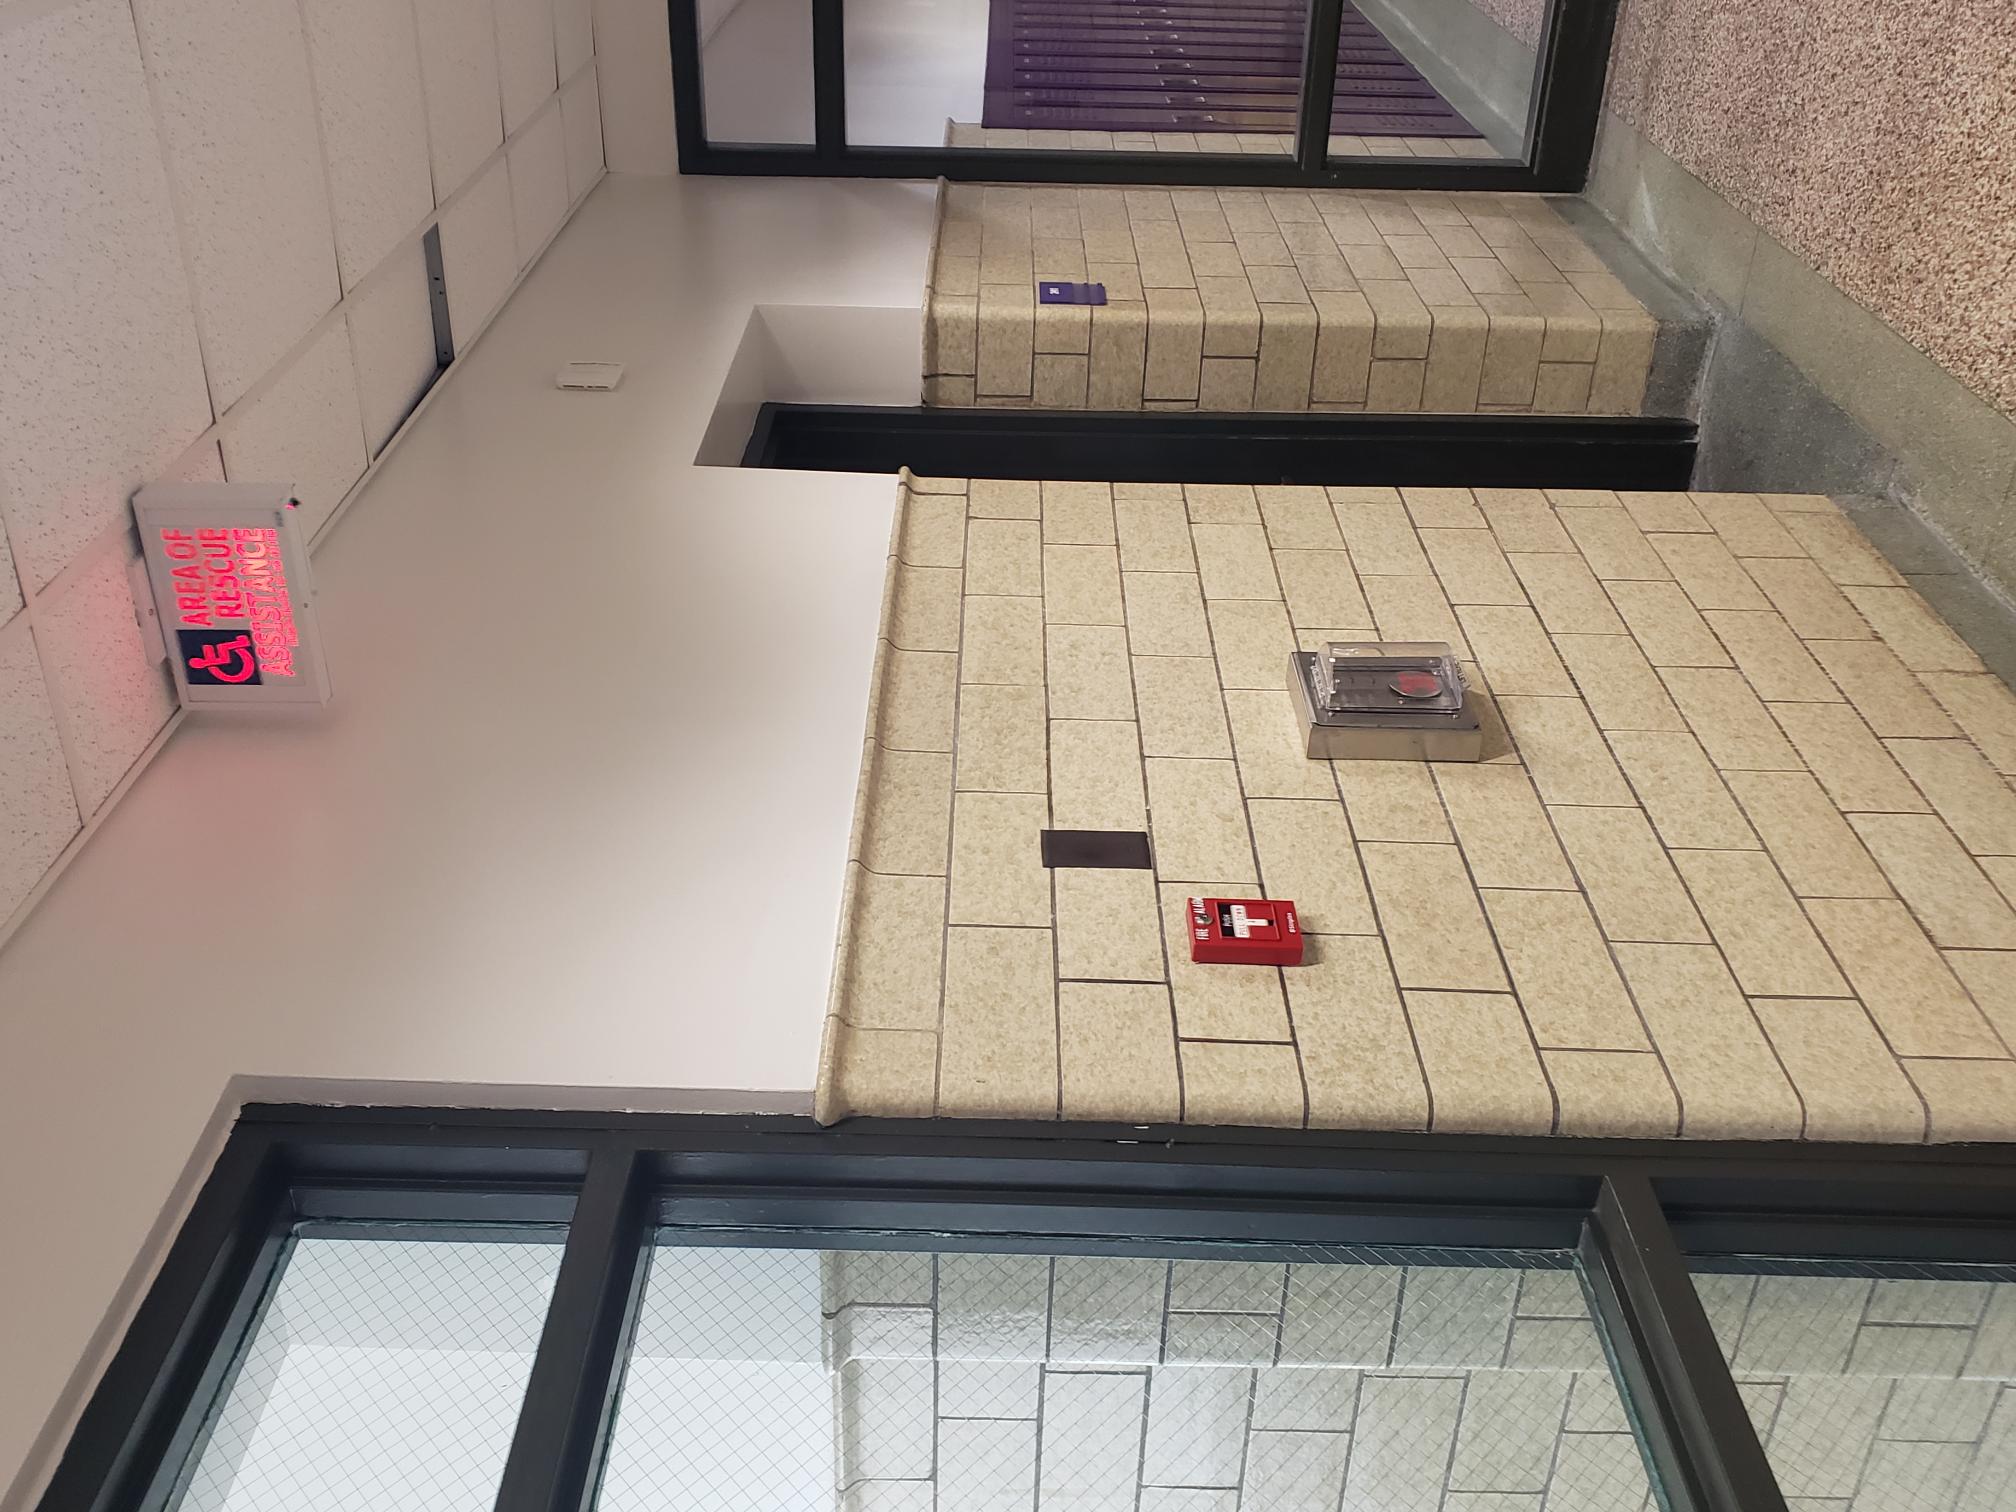
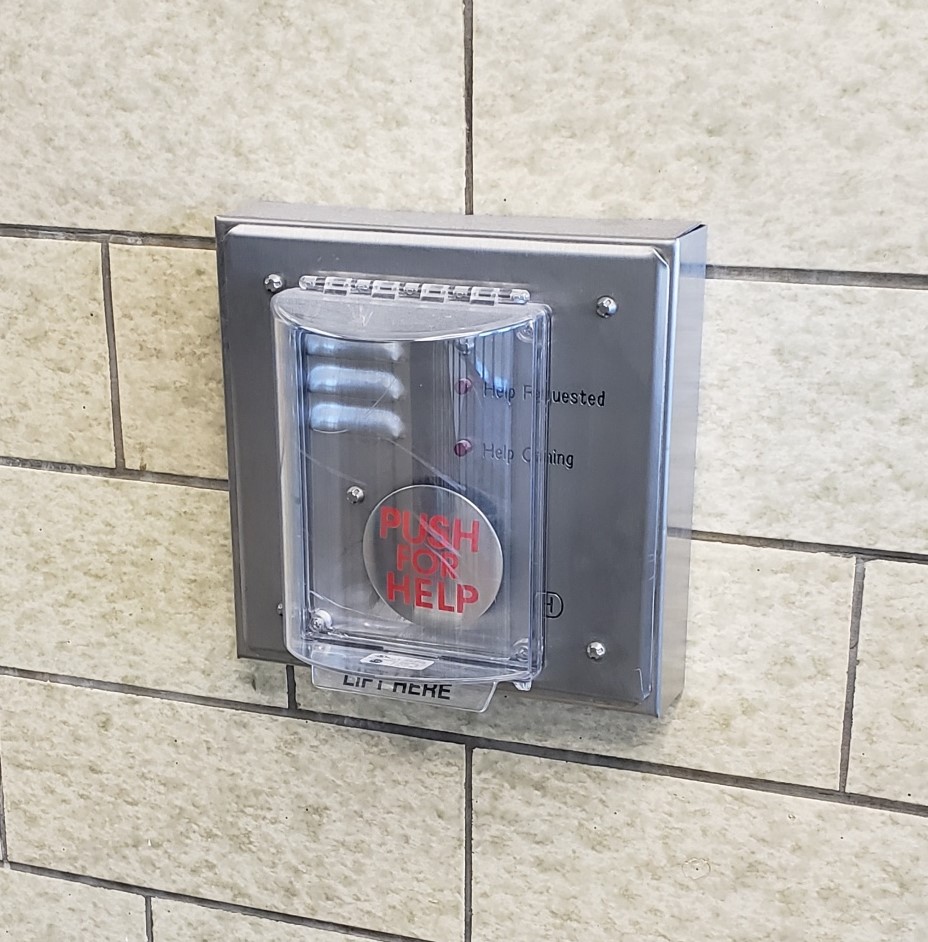
To ensure a timely response to a call for assistance, the call is to be forwarded to a constantly attended approved location, such as a supervising station, 911 communications center, or other monitoring location.
According to ADA Section 207, accessible means of egress require an area of refuge. Areas of refuge are required in all multi-story commercial buildings. The exception is where means of egress are permitted by local building or life safety codes to share a common path of egress travel, accessible means of egress shall be permitted to share a common path of egress travel.
The state of New York requires all areas of refuge that are one or more stories above or below the level of exit discharge to be equipped with a two-way communication system.
A two-way communication system is not required in areas with ramps, near freight elevators or near service elevators that are not designated as part of the accessible means of egress.
New York building code requires areas of refuge are clearly marked with appropriate signage. IBC 1011.1 states:
- Each door providing access to an area of refuge from an adjacent floor area shall be identified by a sign stating: AREA OF REFUGE
- Each door providing access to an exterior area for assisted rescue shall be identified by a sign stating: EXTERIOR AREA FOR ASSISTED RESCUE
- Signage must comply with ICC A117.1 requirements
- Signage must be illuminated where exit sign illumination is required by IBC 1011.2
In addition to the testing of the system and being sure these areas have the proper signage to correctly identify them, they should also be in your building safety plans. Your building safety plans should specify how a person in need of assistance will be attended to during an emergency. There are only two options for this.
- You can have staff who will assist the person(s) in need to safely exit the building.
- You can have the person(s) wait for the first responders to arrive and remove them safely from the area.
It will be a decision your district will need to make and there are many factors that will go into how the person(s) in need of assistance will be attended to. You may want to ask other districts how they address this matter. Some districts have a special chair that is kept in this area, and they use that to safely take the person down the stairs to the exit. Again, many things need to be considered, such as who will be the two people carrying the individual and are those who will be carrying the person not leaving other students behind to exit the building on their own.
6-Month Periodic Surveillance
The Local Education Agency (LEA) must conduct periodic surveillance in each building under its authority at least once every six months after a management plan is in effect. Asbestos materials must be inspected bi-annually (typically in July and December) to determine if there is a change in their condition. Are the materials delaminating, are the floor tiles getting cracked, is the pipe insulation damaged, etc. All records must be retained for the life of the building. The periodic surveillance inspection report must be kept in the management plan. A periodic surveillance cannot take the place of a 3-year re-inspection. However, the 3- year re-inspection can take the place of a periodic surveillance.
The periodic surveillance is an inspection of all known asbestos containing materials in all school facilities that contain asbestos. Inspections can be made by anyone as they do not need to be licensed. However, AHERA requires that the Designated Person be adequately trained to carry out his or her responsibilities. Because of the differing needs of school districts based on the size of the district and the amount and condition of the Asbestos containing building material (ACBM), AHERA does not list a specific training course or specific number of hours of training for the designated person. Further, AHERA does not require the designated person to be accredited. Specifically, the regulations note the training must include the following topics:
- health effects of asbestos;
- detection, identification and assessment of asbestos-containing building materials (ACBM);
- options for controlling asbestos-containing building materials; and
- asbestos management programs. (relevant Federal and State regulations concerning asbestos, including AHERA and its implementing regulations and the regulations of the Occupational Safety and Health Administration, the U.S. Department of Transportation, and the U.S. Environmental Protection Agency).
AHERA 3 Year Re-Inspection
On October 30, 1987, EPA promulgated the Asbestos-Containing Materials in Schools Rule (hereinafter referred to as the AHERA Rule), 40 CFR Part 763, Subpart E. This rule requires that all of the nation's nonprofit elementary and secondary schools, both public and private, inspect their school buildings for asbestos-containing building materials (ACBM), develop a plan to manage the asbestos for each school building, notify parents and staff regarding management plan availability, provide asbestos awareness training to school maintenance and custodial workers.
The governing authority responsible for AHERA compliance is the Local Education Agency (LEA). "Local Education Agency" means either any local educational agency as defined in Section 198 of the Elementary and Secondary Education Act of 1965 (often called school district), the owner of any private, non-profit elementary or secondary school building, or the governing authority of any school operated under the Defense Department's education system.
Responsibilities of the AHERA Designated Person
The responsibilities of the AHERA Designated Person include:
- ensure that all activities of anyone who conducts the following are carried out in accordance with the AHERA requirements: conduct inspections, re-inspections, periodic surveillance; develops, implements and updates management plans; and plans and implements asbestos related activities (such as maintenance or removal);
- ensure that all custodial and maintenance employees are properly trained;
- ensure that all workers, building occupants, students, and their parents are notified annually about management plan availability and recent and upcoming asbestos-related activities;
- ensure that short-term workers who may come into contact with asbestos are provided information regarding the location of this asbestos;
- ensure that all warning labels are posted; and
- consider any conflicts of interest that may arise when selecting accredited personnel to conduct asbestos-related activities.
AHERA Designated Person (DP) Required Training
AHERA requires that the DP be adequately trained to carry out his or her responsibilities. Due to the differing needs of school districts based on the size of the district and the amount and condition of the ACBM, AHERA does not list a specific training course or specific number of hours of training for the DP. Further, AHERA does not require the DP to be accredited. Specifically, the regulations note the training must include the following topics:
- health effects of asbestos;
- detection, identification and assessment of asbestos-containing building materials (ACBM);
- options for controlling asbestos-containing building materials; and
- asbestos management programs.
- relevant Federal and State regulations concerning asbestos, including AHERA and its implementing regulations and the regulations of the Occupational Safety and Health Administration, the U.S. Department of Transportation, and the U.S. Environmental Protection Agency
All facilities which contain asbestos must be inspected every three years in accordance with AHERA. Materials are inspected to see if they have been damaged (become friable), assess the damage, and make recommendations for future remediation. This work must be completed by a licensed New York State Department of Labor asbestos inspector and management planner. It can either be two people with the licenses or one individual that carries both licenses. All records must be retained for the life of the building.
Link to “How to Manage Asbestos in School Buildings: The AHERA Designated Person's Self Study Guide
All staff (custodial, cleaners, maintenance, etc.) that work around or may come into contact with materials that contain asbestos are required to have 2-hour asbestos awareness training. This training is required Annually and at new hire. The training covers uses and forms of asbestos, how to identify asbestos, hazards of asbestos exposure, what to do if there is an asbestos release, and location of asbestos in the building you work in. (AHERA TSCA Title II and General Industry Standard 1910.1001(j)(7)(iv)
COMPLIANCE ISSUES
- Local education agencies must prepare and keep current an Asbestos Management Plan for each school site. Original Management Plans were to be submitted to SED by October 1988 and be in effect by July 1989. Re-inspections are required on a triennial basis. New York State triennial reporting requirements can be satisfied by answering the AHERA question on the annual visual inspection report (required under RESCUE) beginning with the 2004-05 report. Asbestos Management Plans must show that:
- An accredited Inspector has inspected any building used as a school building at least every three years to identify friable and non-friable asbestos.
- Adjustments to the Plan have been conducted by an accredited Management Planner.
- ACM has been sampled and tested by an accredited laboratory.
- Ongoing operations and maintenance that involve ACM are documented.
- Warning labels are attached to any actual or suspected ACM located in routine maintenance areas.
- Response actions including removal, encapsulation, enclosure, repair, and operations and maintenance are appropriate and utilize accredited personnel.
- Six-month surveillances are conducted.
- A designated person with appropriate training has been assigned to oversee asbestos management.
- Required training is documented.
- Annual notifications and abatement notifications are issued.
- The OSHA General Industry Standard or Construction Standard may apply depending on the specific nature of the asbestos-related task.
- Asbestos Containing Material (ACM) is defined as any material containing greater than (1%) of asbestos.
- No employee should be exposed to an airborne concentration of asbestos in excess of the permissible exposure limit (PEL) of 0.01 fibers per cubic centimeter of air (.01f/cc) as an eight-hour time-weighted average (TWA).
- Contractors (including schools engaged in asbestos projects) must possess an asbestos handling license and display it at all asbestos work sites. Licenses are issued by the NYS Department of Labor with an initial and annual fee of $500.
- Large Asbestos Project – An asbestos project involving the removal, disturbance, enclosure, encapsulation, repair or handling of 160 square feet or more of ACM, PACM or asbestos material, or 260 linear feet or more of ACM, PACM or asbestos material.
- Small Asbestos Project – More than 10 and less than 160 square feet, or more than 25 and less than 260 linear feet.
- Minor Asbestos Project – 10 square feet or less or 25 linear feet or less.
- Asbestos projects of more than 260 lineal feet or 160 square feet require notification of the Department of Labor 10 days before the start of work. Notification of emergency projects must be given as soon as possible, but written notification must be given within 2 days of the start of the project. Project notification fees vary based on the size of the project.
- Notification to building occupants must be given at least 3 days (usually 10 days) prior to the start of the project, and as soon as possible in an emergency situation. Notification must include exact areas undergoing abatement; amount and type of asbestos; start and completion dates of project; contractor’s name and license number; and the air monitor and laboratory’s name and address.
- Contractors must monitor the air at asbestos project sites through independent sources and according to specific Department of Labor regulations. Generally not required for minor projects (less than 25 lineal or 10 square feet).
- The National Emissions Standard for Hazardous Air Pollutants (NESHAP) regulates demolition and renovation of facilities containing ACM. Also requires generators and transporters of ACM to maintain waste shipment records.
TRAINING REQUIREMENTS
- Employees working on asbestos projects must possess a valid asbestos-handling certificate which must be renewed annually with the appropriate fee. The nine categories including the length of initial training are:
- Asbestos Handler (Worker) - any worker who removes, encapsulates, or disturbs friable asbestos (4 days).
- Restricted Asbestos Handler (Allied Trades) - any worker who may incidentally disturb asbestos (2 days).
- Air Sampling Technician - performs air sampling to comply with regulations (2 days).
- Inspector - conducts the survey, identification, and assessment of ACM (3 days).
- Operation and Maintenance Worker - performs small-scale maintenance and repair that may disturb ACM (2 days).
- Supervisor - supervises other asbestos workers (5 days).
- Project Designer - plans the scope and remediation of an asbestos project (3 days).
Here are additional links for more information on asbestos
Asbestos and School BuildingsResources for Schools and Parents
Asbestos Whistleblower Protection
- State
- County
- Town
- Village governments
- Public Authorities
- School Districts
- Paid and Volunteer Fire Departments
The Public Employee Safety and Health Bureau responds to:
- Deaths related to occupational safety and health
- Accidents that send two or more public employees to the hospital
- Complaints from public employees or their representatives
The Public Employee Safety and Health Bureau also:
- Inspects public employer work sites
- Gives technical assistance during statewide emergencies
Services - PESH Can Help
The Enforcement branch conducts unannounced inspections. The staff will issue a “Notice of Violation and Order to Comply” for any safety and health hazards they find. They set an abatement period for the employers to come into compliance, which they will discuss at a closing conference. If the employer does not comply during the abatement period, a penalty can be imposed. The penalty (not to exceed $200 per calendar day) accumulates until compliance is achieved.
The Consultation branch provides free consultation surveys at the request of a public employer. The employer sets the scope of these surveys. The consultant provides a written report that identifies the hazards and recommends ways to correct each hazard. Consultants can also help to train employees and correct violations cited as a result of an enforcement inspection. All consultation activities are completely separate and kept confidential from the Enforcement Branch.
P206 Consultation Assistance Fact Sheet https://dol.ny.gov/consultation-assistance-fact-sheet-p-206
The Public Employee Safety and Health Bureau also has created strategic workgroups for identified high-hazard jobs. These groups work with employers to lower the incidence of injuries and illnesses to public employees. Workgroups include:
- Fire Service
- County Police Departments
- Long-Term Health Care
PESH can help:
- Show employers how to remove workplace hazards, which decrease work time lost by employees and cuts insurance and manpower costs.
- Provide training and tech tips for employers, help them comply with regulations and make employees safer.
- Offer safety and health expertise to answer employer questions about safety and health issues or potential hazards of current/proposed equipment or procedures.
- Help employers develop written programs required under an OSHA standard.
- Provide the Public Employee Safety and Health Bureau speakers and presentations, give employers details on new or existing standards and help educate public sector employers on ways to reduce workplace injuries and illnesses.
File a complaint
https://dol.ny.gov/system/files/documents/2021/03/pesh7.pdfReference Materials for Inspections
https://dol.ny.gov/reference-material-public-employee-safety-and-health-inspectionsEmployee Illness and Injury Recordkeeping
SH 900
https://dol.ny.gov/system/files/documents/2021/03/sh-900.pdfAnnual Summary SH-900
https://dol.ny.gov/system/files/documents/2021/03/sh900_1a.pdfRecordkeeping Rule Part 801
https://govt.westlaw.com/nycrr/Browse/Home/NewYork/NewYorkCodesRulesandRegulations?guid=I1810b0b0ad0d11dda763b337bd8cd8ca&originationContext=documenttoc&transitionType=Default&contextData=(sc.Default)SH 901 Instructions
https://dol.ny.gov/system/files/documents/2021/03/901instruction.pdfInjury/Illness Report SH-900.2
https://dol.ny.gov/system/files/documents/2021/03/sh900_2.pdfIn your District or BOCES, you may be asked to monitor your Aboveground Storage Tanks, or AST for short. These would be your above-ground fuel tanks which are mainly referred to as Petroleum Bulk Storage Containers. These are subject to the EPA’s spill prevention, control, and countermeasure (SPCC) regulation.
If this fails under your care the first thing you need to do is locate your Petroleum Bulk Storage Certificate. This certificate should be posted near your Transportation or O&M site office. The certificate will list each tank individually by tank number, tank subpart and category, date installed, tank type, product stored, and capacity. Your PBS number will be listed in the upper left-hand corner. This is the most important identifying number on the certificate. As well as the facility name and address, the tank owner, and who is the emergency contact.
If you assumed responsibilities from the last person to be listed as the emergency contact, you will need to update that ASAP. In the upper right-hand corner, the DEC Regional Location that granted the certificate will be listed along with their phone number. I suggest you call the number and ask to speak with your Environmental Program Specialist. They can help guide you in the right direction to update the certificate. Starting May 23, 2022, the NYS DEC now offers online registration for all PBS facilities. If your District has a PBS number they would have received a PIN number for each PBS number that they have. You will need both the PBS and the PIN number to access the portal.
If for some strange reason, you cannot locate the Petroleum Bulk Storage Certificate speak with your Business Official and ask for help. They should be able to determine the last time they paid an invoice to the DEC for the certificate. PBS Certificates are good for 5 years. If for some unknown reason, they never filed for a certificate, and you have fuel tanks, you must contact the DEC and fill out an application.
If you located the certificate that means you have a PBS number. Therefore, your tanks are in a database which really means your tanks will be inspected by the NYS DEC. It's just a matter of time before they arrive for the inspection process. During my 13 years, I have been through two different inspections. The first one was a “random inspection.” The second inspection was due to the fact that we removed two old tanks and replaced them in kind. You will get inspected, so please be certaint that you are properly prepared.
The links below are a great resource - PBS regulations (6 NYCRR Part 613) at
http://www.dec.ny.gov/docs/remediation_hudson_pdf/part613text.pdf Bulk storage program information: http://www.dec.ny.gov/chemical/287.html https://www.dec.ny.gov/chemical/4767.html
In addition to the links, as I stated earlier the DEC office is listed in the upper right-hand corner of the certificate. Call and ask to speak with Environmental Program Specialist. They are willing to help you just have to ask. When I removed the two old tanks my local Environmental Program Specialist was so helpful in guiding me through the process.
The next set of pictures will display what your tanks need to pass an inspection.
Each tank needs to have an identification number, product, design capacity, pictogram, and working capacity.
See pictures below
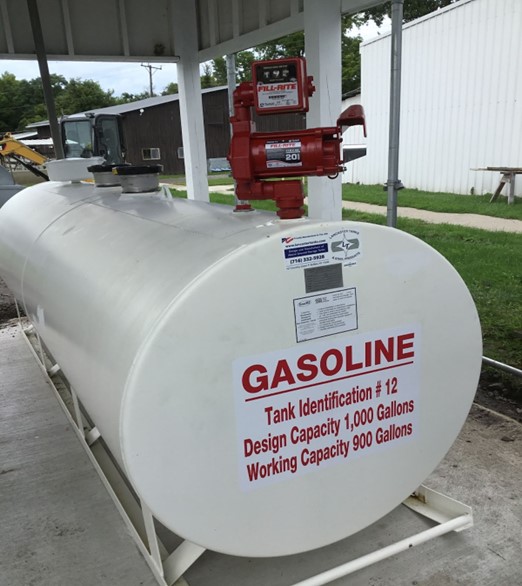
In addition to the in-house tank information noted above it is important to keep the manufacturer's information clearly visible. This picture was taken before we lettered up the tank. But note how our in-house lettering does not infer with the manufacturer’s information.
In the next two pictures look at the fill ports. These sit above the tank and are white and look like a stock pot with a hinged lid. Newly installed tanks need to have spill prevention built into the fill port. Ours are 3.5 gallon AST spill containers. Just below the fill port look at the gasoline symbol. You can not just have the word gasoline on your tank near the fill port you have to have the international symbol for gasoline and diesel.
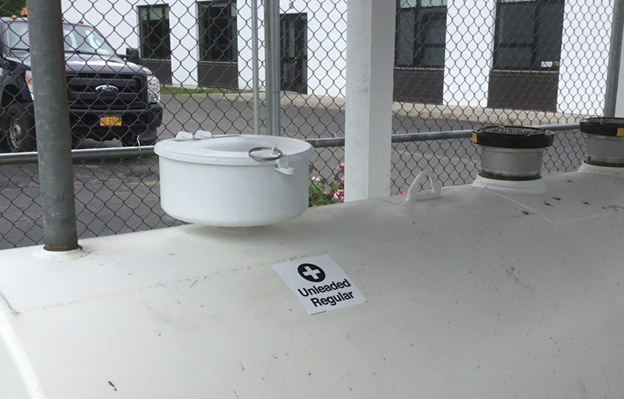
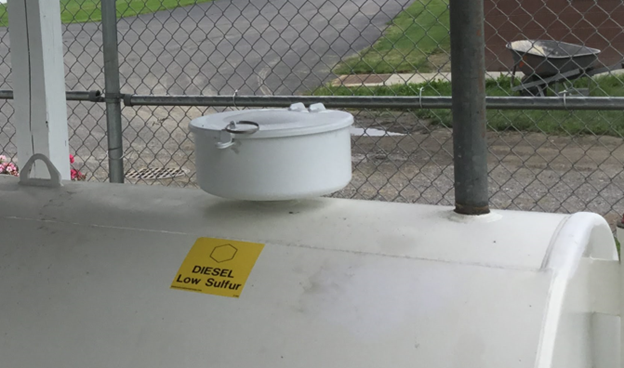
The next two pictures point out the emergency vent and the interstitial manual monitoring gauge. All tanks need to have a vent, in addition, new tanks need to be double-walled. Which basically means you have a tank with an extra tank built around it. The reason is very simple, NYS does not want any petroleum leaking out. If you are in the market for new tanks talk with your local DEC Program Specialist. They will let you know what type of tank you need. Getting this information ahead of time will save headaches down the road.
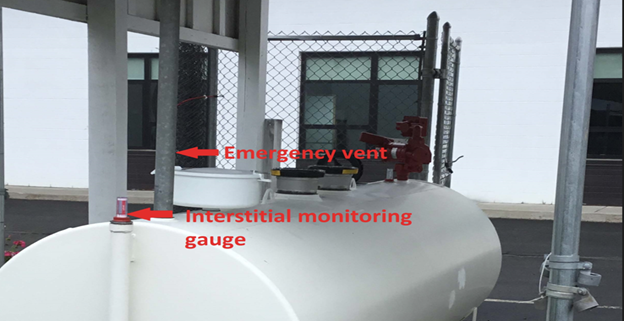
You have to monitor the interstitial space, that way you will know if your tank has a leak. There are two ways to monitor this space: manually with a gauge or electronically with a sensor. As you can see in the picture we went with the gauge. The second picture displays the tank product level gauge. One very important item to remember is that any tank that you have can only be filled to 90%. That way you have room for the product to expand and contract with the weather. Never overfill a tank!
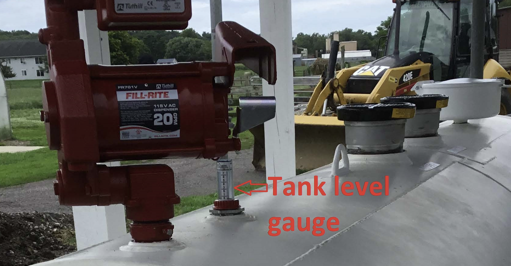
The last page is our Petroleum Tank Inspection form. We fill ours out weekly. At the bottom, you will see the safety inspection process. These are the items that DEC wants you to keep an eye on. Remember at some point you will get inspected, so keep good records. When the DEC shows up you will look like a professional if you can produce paperwork outlining your inspection process. Make sure you have trained all staff members on what to look for during the inspection process. Keep the tank and the tank pad clean, power wash it once a year to keep it looking good. Nothing points out a tank spill like a dirty tank that has diesel fuel or gasoline running down the side of the tank onto the concrete. It's hard to talk your way out of that one. Have your staff member sign the inspection form, I had a couple of weeks on the inspection form that a staff member used their initials instead of signing. The Inspector let me know that was not acceptable.
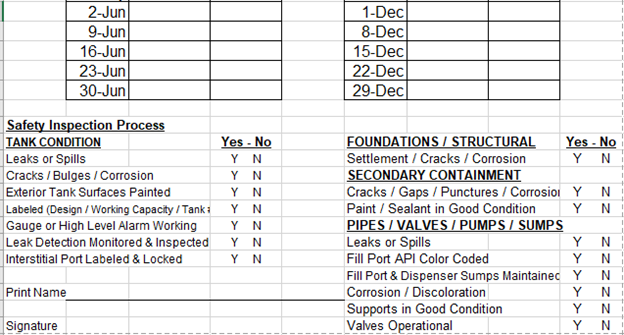
This is some basic information on what to look for on your AST tanks. Get to know your Local DEC Program Specialists, they will help you ask questions.
BULK STORAGE TANKS
Federal Underground Storage Tank (UST) Law
40 CFR Parts 280-281
Effective Date - September 23, 1988
New York Petroleum Bulk Storage Act
New York Oil Spill Prevention, Control, and Compensation Act
6 NYCRR Parts 610-614; 17 NYCRR Parts 30, 31
Article XI - Nassau County Public Health Ordinance
Toxic & Hazardous Materials Storage, Handling and Control
Effective Date - August 1, 1986
Bulk storage tanks for petroleum products have the potential to create environmental hazards due to spills and leaks. This has resulted in Federal, State, and local laws on bulk storage tank construction, monitoring, and corrective action when necessary. The Environmental Protection Agency (EPA) regulates underground storage tanks (USTs) storing petroleum. The New York Department of Environmental Conservation (DEC) (Central Office: 518-402-8044) enforces two State laws governing USTs and above-ground storage tanks (ASTs): The New York Petroleum Bulk Storage Act establishes registration requirements and technical standards for tank facilities storing between 1,100 and 400,000 gallons of petroleum products in ASTs and USTs. The New York Oil Spill Prevention, Control and Compensation Act establishes licensing and technical requirements for ASTs and USTs storing 400,000 gallons or more.
COMPLIANCE ISSUES
- Technical requirements for registration, installation, monitoring and leak detection, release reporting and corrective action, record keeping, closure, and financial responsibility.
- Tanks installed on or after December 22, 1988 must meet all Federal and State new tank requirements. Tanks installed prior to that date, existing tanks, must be retrofitted to meet new tank requirements according to varying deadlines.
- A tank is regulated as a UST if 10% of the entire capacity of the UST system is below grade and is greater than 1,100 but less than 400,000 gallons of petroleum.
- Registration of tanks with the appropriate fee every 5 years (NYS DEC & Nassau County Board of Health).
- All new USTs must meet the following requirements: tanks and piping must be corrosion-resistant; tanks must have spill and overflow protection; tanks must have leak-detection provisions; tanks must have secondary containment; fill ports must be labeled; underground piping must have access ports for testing without extensive excavation.
- All new ASTs must meet the following: tanks must be made of steel; tank bottoms and underground piping must have corrosion protection; tanks must have secondary containment and dikes; tanks must have leak-detection and spill/overflow prevention; tanks must be labeled at the gauge and on the tank itself.
- New tanks must be installed according to accepted industry standards and manufacturers’ directions. The installer must certify that the tank was installed correctly through varying certification processes.
- EPA and DEC require routine testing and monitoring of USTs and piping to ensure system integrity and detection of leaks when they do occur.
- Tanks should be leak-tested monthly, which can be done by various methods. Leak-detection methods must have a 95% detection probability. Pressurized piping has similar requirements.
- Existing tanks without corrosion protection and spill/overflow protection may use monthly inventory control and annual tank-tightness protection to meet leak-detection requirements until December 22, 1998, at which time tanks must be retrofitted or closed. Upgraded tanks must have overfill/overspill protection and automatic gauging.
- DEC requires periodic tightness testing of USTs and their piping systems when they are 10 years old for tanks with no corrosion protection, and 15 years old for corrosion-resistant tanks, and then every 5 years thereafter.
- Releases or spills associated with USTs should be reported to DEC (1-800-457-7362). General information on tank and bulk storage programs is available by contacting the DEC’s Bulk Storage Help Line at 518-402-9543.
- When tanks are taken out of service they must be closed according to specific procedures.
- Federal law requires owners of USTs to demonstrate financial responsibility sufficient to cover cleanup costs in the event of a leak.
CLICK HERE for the DEC Operator Training Information.
Training – Required of all staff that will be digging with mechanical equipment. 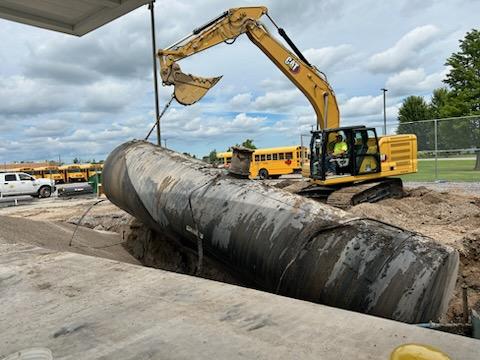
Click or Call Before You Dig
- Submit a location request with UDig NY online or by phone at 811. It is free and easy.
- You will receive a Location Request number and a list of member utility companies that will be notified of your planned digging project.
- UDig NY member utility companies do not locate and mark private facilities on your property.
Capital Outlay Projects are a good way to get smaller scale work done in a shorter period without having to wait for the next Capital Project. 
- Door Replacement
- Small Roof Replacement
- Flooring
- Ceilings
- Access Control
- HVAC Equipment and Controls
- Sidewalk Replacement
School districts are currently authorized to spend $100,000 on capital outlay projects and receive Building Aid on this spending the following year. This provides them with faster reimbursement than under regular Building Aid for costs they will incur at some point and reduces the chance that delaying small projects will grow into big problems. School districts are presently limited to using the outlays funds on just one building. This causes significant constraints as some projects require work in multiple buildings, such as security system overhauls. Schools spend approximately 15% to 20% of the capital outlay limit on design fees and other expenses. The total project cost must not exceed $100,000.
- SED Facilities Planning tracks $100K Capital Outlay Projects submitted for review.
- Confirm that the $100K Capital Outlay Project is briefly mentioned in the annual budget brochure for the greatest flexibility.
- Confirm that the Popular Budget Page contains the $100K Transfer to Capital line.
- Allow for adequate review, approval, completion, and payment prior to June 30th of the school year.
- Budget Year $100K Capital Outlay Project:
- May be submitted in advance of May budget vote and approval.
- Project approval is held pending the budget approval and voter tally sent to the Office of Facilities Planning.
Effective Date - February 6, 1995
Falls continue to be a leading cause of injuries and fatalities on construction sites every year. A fall is a sudden, unanticipated descent in space to a lower surface, driven by gravity. The Fall Protection Standard sets forth the requirements for fall protection systems and procedures to prevent employees from falling off, onto or through working levels and to protect employees from falling objects. Fall protection systems can either be designed to restrain a worker, preventing him from falling; or arrest a worker, safely stopping a fall. Enforced by New York State Department of Labor (PESH Unit).
COMPLIANCE ISSUES
- Determine that surfaces have the strength and structural integrity to work on safely.
- Identify and evaluate worksites for fall hazards.
- Fall protection is required where employees are working six feet or more above a lower level: with an unprotected side or edge; at the construction of the leading edge; at hoist areas; at holes; on the face of formwork and reinforcing steel; on ramps, walkways, and other runways; at excavations; on dangerous equipment; when overhand bricklaying and doing related work; during roofing work on low-slope roofs and steep roofs; when doing pre-cast concrete erection.
- Fall protection is not required for inspections, investigations, assessments before a construction job begins or after the entire job has been completed.
- Hard hats must be worn and other measures taken where an employee is exposed to falling objects.
- Select fall protection systems and methods appropriate for given situations: guardrail systems; safety net systems; personal fall arrest systems; positioning device systems; warning line systems; controlled access zones; safety monitoring systems; covers; and protection from falling objects.
- If none of these protection systems is feasible, employers must develop and implement an alternative written Fall Protection Plan.
- Effective January 1, 1998, the use of body belts for fall arrest are prohibited, body harness systems must be used instead. The use of non locking snap hooks on personal fall arrest systems are prohibited as of January 1, 1998.
- Train workers in the proper selection, use, and maintenance of fall protection systems.
TRAINING REQUIREMENTS
- Training is required for every employee that might be exposed to fall hazards.
- Employees must be trained to recognize the hazards of falling and the procedures to be followed in order to minimize these hazards.
- Training must be conducted by a competent person qualified in the following areas: the nature of the fall hazards in the work area; the correct procedures for erecting, maintaining, disassembling, and inspecting the fall protection systems used; the use and operation of guardrail systems, personal fall arrest systems, safety net systems, warning line systems, safety monitoring systems, controlled access zones, and other protection to be used; the role of each employee in the safety monitoring system and when this system is used, and their role in fall protection plans; the limitations on the use of mechanical equipment during work on low-sloped roofs; the correct procedures for the handling and storing of equipment, and the erection of overhead protection; and the standards contained in Subpart M.
- Written certification record including the employee name, date of training, and the signature of either the person who conducted the training or the employer.
- Retraining is required if any changes occur in the workplace, or if the employee has not retained the information necessary to properly use fall protection equipment.
Occupational Noise Exposure
Occupational Safety & Health Administration
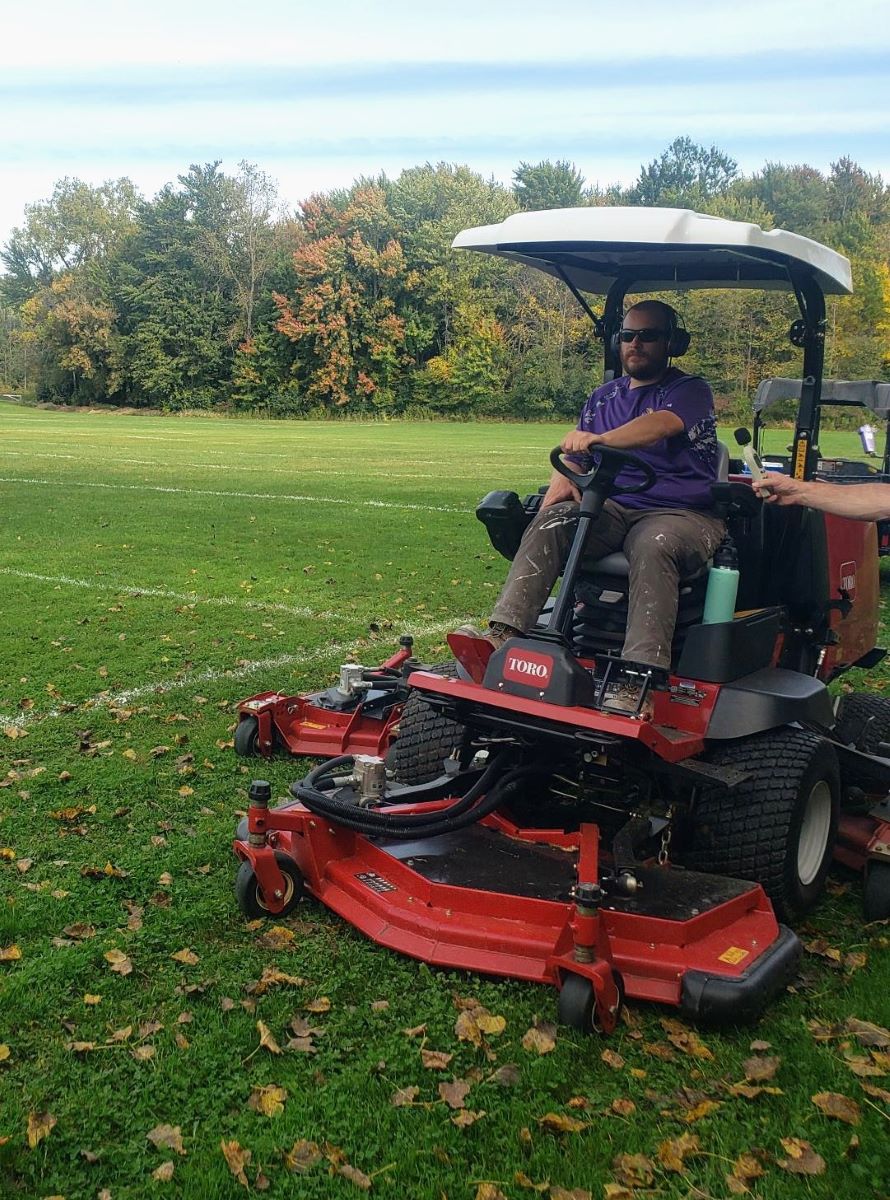
COMPLIANCE ISSUES
Table G-16 – Permissible Noise Exposures
| Duration Per Day – Hours | Sound Level (dBA) |
|---|---|
| 8 | 90 |
| 6 | 92 |
| 4 | 95 |
| 3 | 97 |
| 2 | 100 |
| 1.5 | 102 |
| 1 | 105 |
| 0.5 | 110 |
| .25 or less | 115 |
- When employees are subjected to sound levels exceeding those listed in Table G-16, feasible administrative or engineering controls shall be utilized. If such controls fail to reduce sound levels within the levels of Table G-16, personal protective equipment shall be provided and used to reduce sound levels within the levels of the table.
- Hearing Conservation Program – The employer shall administer a continuing, effective hearing conservation program whenever employee noise exposures equal or exceed an 8-hour time-weighted average sound level (TWA) of 85 decibels (action level). For the purposes of the Hearing Conservation Program, employee noise exposures shall be computed without regard to any attenuation provided by the use of personal protective equipment.
- Monitoring – When information indicates that any employee’s exposure may equal or exceed an 8-hour time-weighted average of 85 decibels, the employer shall develop and implement a monitoring program. The sampling strategy shall be designed to identify employees in the Hearing Conservation Program and to enable the proper selection of hearing protectors. Where circumstances such as high worker mobility, significant variations in sound level, or a significant component of impulse noise make area monitoring generally inappropriate, the employer shall use representative personal sampling to comply with the monitoring requirements. All continuous, intermittent and impulsive sound levels from 80-130 decibels shall be integrated into the noise measurements. Measurement instruments shall be calibrated to ensure accuracy. Monitoring shall be repeated whenever a change in production, process, equipment or controls increases noise exposure to the extent that:
- additional employees may be exposed at or above the action level; and
- the attenuation provided by hearing protectors are inadequate.
- Employee Notification – The employer shall notify each employee exposed at or above an 8-hour time-weighted average of 85 decibels of the results of monitoring. The employer shall provide affected employees or their representatives with an opportunity to observe any noise measurements.
- Audiometric Testing Program – The employer shall establish and maintain an audiometric testing program by making audiometric testing available to all employees whose exposures equal or exceed a TWA of 85 decibels. The program shall be provided at no cost to the employees. Audiometric tests shall be performed by a licensed or certified audiologist, otolaryngologist, or other physician (who are responsible for supervising the program), or by a technician (who is responsible to those previously noted) certified by the Council of
- Accreditation in Occupational Hearing Conservation - The employee needs a referral for further testing when test results are questionable or when problems of a medical nature are suspected.
- Baseline Audiogram – Within 6 months of an employee’s first exposure at or above the action level, the employer shall establish a valid baseline audiogram against which subsequent audiograms can be compared.
- Annual Audiogram – At least annually, after obtaining the baseline audiogram, the employer shall obtain a new audiogram for each employee exposed at or above the TWA of 85 decibels. The annual audiogram shall be compared to the employee’s baseline audiogram to determine if the audiogram is valid and if a standard threshold shift has occurred. If such a threshold shift has occurred, the employee shall be informed of this fact in writing, within 21 days of the determination. The employer shall then ensure the following:
- Employees not using hearing protectors shall be fitted with hearing protectors, trained in their use and care, and required to use them; and
- Employees already using hearing protectors shall be refitted and retrained and provided with hearing protectors providing greater attenuation.
- Standard Threshold Shift – The change in hearing threshold relative to the baseline audiogram of an average of 10 dB or more at 2000, 3000, and 4000 Hz in either ear.
- Hearing Protectors – Employers shall make hearing protectors available (and replace as necessary) to all employees exposed to an 8-hour TWA of 85 decibels or greater at no cost to the employees. Employers shall ensure that hearing protectors are worn by:
- Employees who are required to wear personal protective equipment;
- Any employee who is exposed to an 8-hour TWA of 85 decibels or greater;
- Employees who have not yet had a baseline audiogram;
- Employees who have experienced a standard threshold shift; and
- Employees exposed over the permissible exposure limit (PEL) of 90 decibels over an 8-hour TWA. Employees shall be given the opportunity to select their hearing protectors from a variety of suitable hearing protectors provided by the employer. The employer shall provide training in the use and care of hearing protectors and ensure proper initial fitting. Most employers use the Noise Reduction Rating (NRR) that represents the protector’s ability to reduce noise under ideal laboratory conditions. The employer then adjusts the NRR to reflect noise reduction in the actual working environment.
- Hearing Protection Attenuation – The employer shall evaluate hearing protection attenuation for the specific noise environments in which the protector will be used. Hearing protectors must attenuate employee exposure at least to an 8-hour TWA of 90 decibels. For employees who have experienced a standard threshold shift, hearing protectors must attenuate employee exposure to an 8-hour TWA of 85 decibels or below.
- Training Program – The employer shall institute a training program for all employees who are exposed to noise at above an 8-hour TWA of 85 decibels. The training program shall be repeated annually for each employee included in the Hearing Conservation Program. The employer shall inform employees of the following: (1) The effects of noise on hearing; (2) The purpose of hearing protectors, the advantages, disadvantages, and attenuation of various types, and instruction on selection, fitting, use, and care; and (3) The purpose of audiometric testing, and an explanation of the test procedures. The employer shall make available to affected employees or their representatives copies of the standard, which should also be posted in the workplace.
- Recordkeeping – The employer shall maintain an accurate record of all employee exposure measurements and audiometric test records. These records shall include: (1) Employee name and job classification; (2) Date of audiogram; (3) Examiner’s name; (4) Date of the last acoustic calibration of the audiometer; and (5) Employee’s most recent noise exposure assessment. The employer shall maintain records of the measurements of the background sound pressure levels in audiometric test rooms. Noise exposure measurement records shall be retained for 2 years. Audiometric test records shall be retained for the duration of the affected employee’s employment.
Effective Date - 1987
Toxic Substances Control Act (TSCA) - 40 CFR Parts 745, 763 - Revised 8/29/96
Occupational Safety and Health Act (OSHA) - 29 CFR 1910.1001; 1915.1001; 1926.1101
Effective Date - 1978
Clean Air Act - 40 CFR 61.140-157
New York Air Pollution Control Law - NYCRR Parts 220-250, 482
New York Lead Poisoning Prevention Act - 10 NYCRR Part 67
The hazards of lead have been recognized as toxic to human health and the environment for many years. However, it was not until the early 1970s that the United States enacted lead-based paint laws. The Lead-Based Paint Poisoning Prevention Act of 1971 called for various Federal agencies to ban lead usage: Health and Human Services (HHS) - cooking, drinking, and eating utensils; Housing and Urban Development (HUD) - residential structures constructed or rehabilitated by the Federal Government; Consumer Product Safety Commission (CPSC) - toys, furniture, and paint with more than 0.06% lead. Although lead has been banned for use in paints and the concern for worker protection has increased, lead still persists in the environment due to its previous widespread use. Both the Environmental Protection Agency (EPA) (Region II - 908-321-6671) and HUD (202-260-1866) have been given extensive responsibility to prevent harmful lead exposure. HUD has developed extensive technical guidelines on testing, abatement, worker protection, cleanup and disposal of lead-based paint. In 1992, Congress added Title IV to TSCA (Lead-Based Paint Exposure Reduction Act) to reduce ongoing childhood lead exposure. EPA has not finalized many of these requirements but generally follows the same recommendations as HUD. The Occupational Safety and Health Administration (OSHA) provides protection to workers under the General Industry Standard and the Construction Industry Standard. In New York State, childhood lead poisoning is regulated by the NYS Department of Health (518-473-4602). The National Safety Council runs the National Lead Information Center Clearinghouse (1-800-424-LEAD).
COMPLIANCE ISSUES
- Lead-based paint defined as paint or other surface coating containing lead ≥ 1.0 milligrams per centimeter squared or 0.5% by weight.
- OSHA permissible exposure limit (PEL) = 50 micrograms of lead per cubic meter (50 μg/m3). The Construction Industry Standard has an action level of 30 μg/m3.
- Numerous worker protection requirements in OSHA Standards.
- The New York Lead Poisoning Prevention Act establishes a program requiring the screening of blood lead levels in children and pregnant women (enforcement is through the NYS Department of Health). Any clinic or hospital must report to the Department of Health elevated blood lead levels which are:
- 10 micrograms per deciliter (10 μg/dl) in children under six years of age.
- 25 μg/dl in workers exposed to lead on the job.
All State licensed nursery schools, kindergartens and child-care facilities must require proof of a blood lead screening for each child under the age of six enrolled at the school or facility. Parents must provide proof of a screening within six months after enrolling a child.
- “Child occupied facilities” are included in the revised TSCA Standard (Sections 402, 404) which defines such facilities as rooms in which children six years of age or under spend time (not the entire school).
- Important dates include:
- 8/31/98 – Training programs that want to offer lead-training courses may first apply to EPA for certification.
- 3/1/99 – All training programs that provide lead training must be accredited, and individuals or firms that perform lead-based paint activities may first apply to EPA for certification.
- 8/30/99 – No individual or firm can perform lead-based paint activities without EPA certification. All lead-based activities as defined in the rule must be performed according to applicable work practice standards.
- The EPA Regulation focuses on abatement activities and is defined as those projects designed by the building owner and contractor to permanently eliminate lead-based paint hazards.
- Renovation and remodeling activities are not covered by the rule. Special regulations for these activities have been developed (see page 42).
TRAINING REQUIREMENTS
- EPA Regulations for lead-based paint professionals include a training and certification system which addresses:
- Accreditation of training providers.
- Training curricula.
- Hands-on training.
- Trainee competency and proficiency.
- Training program quality control.
- Separate training programs are to be provided for the following job titles:
- Inspector.
- Risk Assessor.
- Supervisor.
- Abatement Worker.
- Project Designer.
Minimum Work Standards for the Conduct of Licensed Persons
NYS Labor Law, Article 32,
Title 1, Sections 930-940, Title 2, Sections 945-948
Effective Date - January 1, 2016
The Labor Law is amended in relation to requiring the licensure of mold assessment and remediation specialists and setting minimum work standards for mold assessment and remediation specialists.
Definitions
- Mold: Means indoor mold growth capable of creating toxins that can cause pulmonary, respiratory, neurological, or other major illnesses after minimal exposure, as such exposure is defined by the Environmental Protection Agency, Centers for Disease Control and Prevention, National Institute of Health or other federal, state, or local agency organized to study and/or protect human health.
- Mold Remediation: Means conducting the business of removal, cleaning, sanitizing, or surface disinfection of mold, mold containment, and waste hauling of mold and materials used to remove mold from surfaces by a business enterprise, including but not limited to, sole proprietorships. Mold remediation shall not include remediation of the underlying sources of moisture that may be the cause of mold that requires expertise not specific to this legislation.
- Mold Assessment: Means an inspection or assessment of real property that is designed to discover indoor mold growth, toxic mold growth, conditions that facilitate indoor mold growth and/or indicia of conditions that are likely to facilitate indoor mold growth.
- Mold Abatement: Means the act of removal, cleaning, sanitizing, or surface disinfection of mold, mold containment, and waste handling of mold and materials used to remove mold from surfaces by an individual.
- Commissioner: Means the Commissioner of the Department of Labor.
Licensing Requirements
- It shall be unlawful for any contractor to engage in mold assessment, or to advertise or hold themselves out as a mold assessment contractor unless such contractor has a valid mold assessment license issued by the commissioner.
- It shall be unlawful for any contractor to engage in mold remediation, or to advertise or hold themselves out as a mold remediation contractor unless such contractor has a valid mold remediation license issued by the commissioner.
- It shall be unlawful for any individual to engage in mold abatement or to advertise or hold themselves out as a mold abatement worker unless such individual has a valid mold abater’s license issued by the commissioner.
- A copy of a valid mold assessment or mold remediation license must be conspicuously displayed at the work site on a mold project.
- Nothing in this article shall prohibit any design professional licensed pursuant to title eight of the education law from performing mold inspection, assessment, remediation and/or abatement tasks or functions if the person is acting within the scope of his or her practice, or require the design professional to obtain a license under this article for such mold inspection, assessment remediation and/or abatement tasks or functions.
License Procedure – Minimum Qualifications for Licensing
- Applications for licenses and renewal licenses shall be submitted to the department in writing on forms furnished by the commissioner and shall contain the information set forth in this section as well as any additional information that the commissioner may require.
- An applicant for a license to perform mold assessment shall meet the following minimum requirements:
- be eighteen years of age or older;
- have satisfactorily completed department approved course work, including training on the appropriate use and care of personal protection equipment as approved by the commissioner of the department of health; and
- paid the appropriate fees.
- An applicant for a license to perform mold remediation shall meet the following minimum requirements:
- be eighteen years of age or older;
- have satisfactorily completed department approved course work, including training on the appropriate use and care of personal protection equipment as approved by the commissioner of the department of health;
- paid the appropriate fees; and
- submitted insurance certificates evidencing workers' compensation coverage, if required, and liability insurance of at least fifty thousand dollars. An applicant for a license to perform mold remediation shall furnish the department with a financial statement, prepared by an independent auditor or accountant and signed by the applicant and auditor before a notary public, stating the assets of the applicant, to be used by the department to determine the financial responsibility of the applicant to perform mold remediation services.
- An applicant for a license to perform mold abatement shall meet the following minimum requirements:
- be eighteen years of age or older;
- have satisfactorily completed department approved course work, including training on the appropriate use and care of personal protection equipment as approved by the commissioner of the department of health; and
- paid the appropriate fees.
- The department shall charge and collect the following fees which shall accompany each application:
- a fee for an initial application for a license, not to exceed one hundred dollars; and
- a fee for renewal of a license, not to exceed one hundred dollars.
Exemptions
- The following persons shall not be required to obtain a license as provided in this title in order to perform mold assessment or remediation:
- a residential property owner who performs mold inspection, assessment or remediation on his or her own property;
- a non-residential property owner, or the employee of such owner, who performs mold assessment or remediation on an apartment building owned by that person that has not more than four dwelling units; and
- an owner or a managing agent or a full-time employee of an owner who performs mold assessment or remediation on commercial property owned by the owner provided, however, that this subdivision shall not apply if the managing agent or employee engages in the business of performing mold assessment or remediation for the public.
License Issuance and Renewal
- Licenses issued pursuant to the provisions of this title shall be valid for a period of two years from the date of issuance and may be renewed in accordance with the conditions set forth in this article and established by the commissioner.
- Within thirty days of the receipt of the application and fee for any license issued under this section, the commissioner shall either issue the license or deny the license setting forth the reason for such denial in writing.
- Licenses shall be in a form prescribed by the department.
- The renewal of all licenses granted under the provisions of this article shall be conditioned upon the submission of a certificate of completion of a department-approved course designed to ensure the continuing education of licensees on new and existing mold assessment and mold remediation standards.
Practice by License Holder
- A mold assessment license holder who intends to perform mold assessment on a mold remediation project shall prepare a work analysis for the project. The mold assessment license holder shall provide the analysis to the client before the mold remediation begins and such plan must include the analysis as defined in section nine hundred forty-five of the standard.
- A mold remediation license holder who intends to perform mold remediation shall prepare a work plan providing instructions for the remediation efforts to be performed for the mold remediation project. The mold remediation license holder shall provide the work plan to the client before the mold remediation begins. The mold remediation license holder shall maintain a copy of the work plan at the job site where the remediation is being performed.
Licensee Duties – Prohibited Activities
- A mold assessment licensee who performs mold assessment services shall provide a written report to each person for whom such licensee performs mold assessment services for compensation.
- No licensee shall perform both mold assessment and mold remediation on the same property.
- No person shall own an interest in both the entity which performs mold assessment services and the entity which performs mold remediation services on the same property.
Minimum Work Standards for the Conduct of Mold Assessments by Licensed Persons (Section 945)
- A mold assessment licensee shall prepare a mold remediation plan that is specific to each remediation project and provide the plan to the client before the remediation begins. The mold remediation plan must specify:
- the rooms or areas where the work will be performed;
- the estimated quantities of materials to be cleaned or removed;
- the methods to be used for each type of remediation in each type of area;
- the personal protection equipment (PPE) to be supplied by licensed remediators for use by licensed abaters;
- the proposed clearance procedures and criteria for each type of remediation in each type of area;
- when the project is a building that is currently occupied, how to properly notify such occupants of such projects taking into consideration proper health concerns; the plan must also provide recommendations for notice and posting requirements that are appropriate for the project size, duration and points of entry;
- an estimate of cost and an estimated time frame for completion; and
- when possible, the underlying sources of moisture that may be causing the mold and a recommendation as to the type of contractor who would remedy the source of such moisture.
- The containment specified in the remediation plan must prevent the spread of mold to areas of the building outside the containment under normal conditions of use.
- A mold assessment licensee who indicates in a remediation plan that a disinfectant, biocide, or antimicrobial coating will be used on a mold remediation project shall indicate a specific product or brand only if it is registered by the United States Environmental Protection Agency for the intended use and if the use is consistent with the manufacturer's labeling instructions. A decision by a mold assessment licensee to use such products must take into account the potential for occupant sensitivities.
Minimum Work Standards for the Conduct of Mold Remediation by Licensed Persons (Section 946)
- A mold remediation licensee shall prepare a mold remediation work plan that is specific to each project, fulfills all the requirements of the mold remediation plan developed by the mold assessment licensee as provided to the client and provides specific instructions and/or standard operating procedures for how a mold remediation project will be performed. The mold remediation licensee shall provide the mold remediation work plan to the client before site preparation work begins.
- If a mold assessment licensee specifies in the mold remediation plan that personal protection equipment (PPE) is required for the project, the mold remediation licensee shall provide the specified PPE to all employees who engage in remediation activities and who will, or are anticipated to, disturb or remove mold contamination. The containment, when constructed as described in the remediation work plan and under normal conditions of use, must prevent the spread of mold to areas outside the containment.
- Signs advising that a mold remediation project is in progress shall be displayed at all accessible entrances to remediation areas.
- No person shall remove or dismantle any containment structures or materials from a project site prior to receipt by the mold remediation licensee overseeing the project of a notice from a mold assessment licensee that the project has achieved clearance as described in section nine hundred forty-seven of the law.
- Disinfectants, biocides and antimicrobial coatings may be used only if their use is specified in a mold remediation plan, if they are registered by the United States Environmental Protection Agency for the intended use and if the use is consistent with the manufacturer's labeling instructions. If a plan specifies the use of such a product but does not specify the brand or type of product, a mold remediation licensee may select the brand or type of product to be used. A decision by a mold assessment or remediation licensee to use such a product must take into account the potential for occupant sensitivities and possible adverse reactions to chemicals that have the potential to be off-gassed from surfaces coated with the product.
Post Remediation and Clearance (Section 947)
- For a remediated project to achieve clearance, a mold assessment licensee shall conduct a post-remediation assessment. The post-remediation assessment shall determine whether:
- the work area is free from all visible mold; and
- all work has been completed in compliance with the remediation plan and remediation work plan and meets clearance criteria specified in the plan.
- Post-remediation assessment shall, to the extent feasible, determine that the underlying cause of the mold has been remediated so that it is reasonably certain that the mold will not return from that remediated area. If it has been determined that the underlying cause of the mold has not been remediated, the mold assessment licensee shall make a recommendation to the client as to the type of contractor who could remedy the source of the mold or the moisture causing the mold.
- A mold assessment licensee who determines that remediation has been successful shall issue a written passed clearance report to the client at the conclusion of each mold remediation project.
- If the mold assessment licensee determines that remediation has not been successful, the licensee shall issue a written final status report to the client and to the remediation licensee and recommend to the client that either a new assessment be conducted, that the remediation plan as originally developed be completed, or the underlying causes of mold be addressed, as appropriate.
CLICK HERE for the EPA Guide on Mold in Schools.
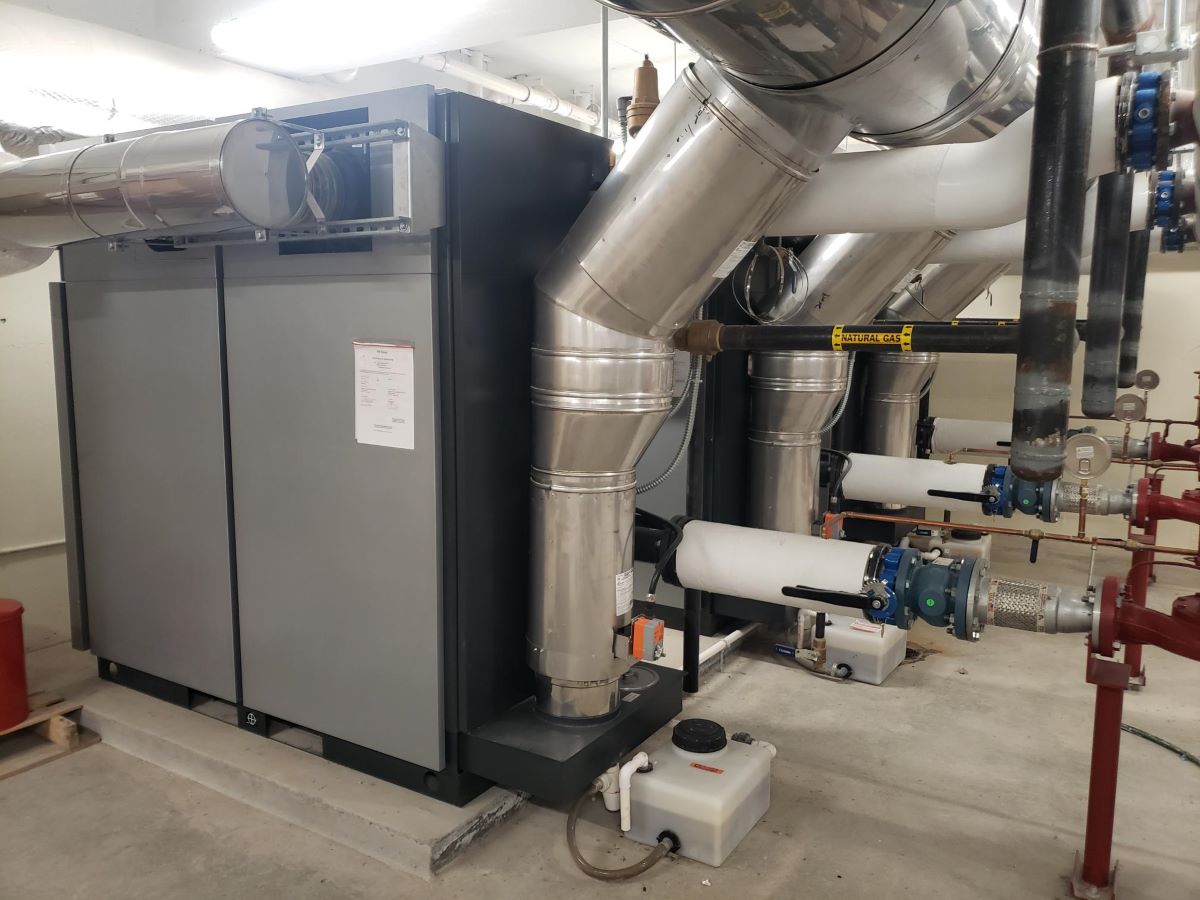
- Inspection: The commissioner shall cause to be inspected at least once every two years all boilers as defined in this section, except for high pressure power boilers, antique boilers and miniature boilers, which the commissioner shall cause to be inspected at least once each year, and except for boilers inspected and insured by a duly authorized insurance company in accordance with the provisions of subdivision eight of this section and with the rules of the commissioner.
- Enforcement: If upon inspection of a boiler the commissioner finds a violation of the provisions of this section or of the rules of the board or if the commissioner receives notice from a duly authorized insurance company that the owner or lessee of a boiler has failed, after notice from the insurance company, to comply with the provisions of this section and rules of the board, the commissioner shall issue an order to the owner or lessee directing compliance therewith. If in the judgment of the commissioner the boiler is in an unsafe or dangerous condition the commissioner shall order the use of the boiler discontinued until such dangerous and unsafe condition has been remedied. Such order shall be served upon the owner or lessee of the boiler, personally or by mail.
- Fees: A fee of two hundred dollars shall be charged to the owner or lessee of each boiler internally inspected and seventy-five dollars for each boiler externally inspected by the commissioner, provided however, that the external inspection of multiple boilers connected to a common header or of separate systems owned or leased by the same party and located in the same building, with a combined input which is 300,000 BTU/hour or less, shall be charged a single inspection fee, and further provided that, not more than two hundred seventy-five dollars shall be charged for the inspection of any one boiler for any year; except that no fee shall be charged for internal or external inspections by the commissioner of an antique steam engine maintained as a hobby and displayed at agricultural fairs and other gatherings or of a miniature boiler.
- Identification of boilers; unfired pressure vessels:
- Owners and lessees of boilers shall attach to such boilers the numbers assigned by the commissioner under a penalty of five dollars for each day's failure so to do after such numbers have been assigned.
- Owners and lessees of unfired pressure vessels shall ensure that such vessels are constructed in accordance with regulations promulgated by the commissioner.
- Exceptions: The provisions of this section shall not apply:
- to a boiler subject to inspection by inspectors of steam vessels under the department of transportation;
- to a boiler located on a farm and used solely for agricultural purposes;
- to a steam or vapor boiler operating at a gauge pressure of not more than fifteen pounds per square inch, and which is located in a dwelling occupied by less than six families;
- to a hot water boiler which is located in a dwelling occupied by less than six families;
- to a boiler subject to inspection or control by a federal agency;
- to the boiler of a miniature model locomotive, boat, tractor or stationary engine constructed and maintained as a hobby and not for commercial use, and having a volume of less than two cubic feet and a grate area not in excess of two square feet; and
- to any low pressure boiler with a capacity of one hundred thousand British Thermal Units or less.
- Definitions:
- For purposes of this section, the term "boiler" shall mean a closed vessel in which water is heated, steam is generated, steam is superheated, or any combination thereof, under pressure or vacuum for use externally to itself by the application of heat from combustible fuels, electricity, or any other source, but shall not include a device or apparatus used solely to heat water for a hot water supply system. The term "boiler" shall include the apparatus used by which heat is generated, and all controls and devices related to such apparatus or to the closed vessel. The term "boiler" also shall include fired units for heating or vaporizing liquids other than water where these units are separate from processing systems and are complete within themselves.
- The term "miniature boiler" shall mean a nonelectric fired pressure vessel which does not exceed inside shell diameter of sixteen inches, forty-two inches over-all length of outside to outside of heads at center, water heating surface of twenty square feet, and maximum allowable working pressure of one hundred pounds per square inch.
- For the purposes of this section, the term "unfired pressure vessel" shall include containers for the containment of internal or external pressure which may be obtained from an external source or by the application of heat from a direct or indirect source, or any combination thereof, provided however, that the term "unfired pressure vessel" shall not include:
- pressure vessels meeting the requirements of the United States department of transportation for the shipment of liquids or gases under pressure;
- air tanks used on vehicles used for carrying passengers or freight or used directly in the operation of trains;
- pressure vessels having a volume of five cubic feet or less or having an inside diameter not exceeding six inches;
- pressure vessels designed for pressures of less than fifteen pounds per square inch;
- hot water supply storage tanks, provided none of the following
limitations is exceeded:
- heat input of two hundred thousand BTU's per hour;
- a water temperature of two hundred ten degrees fahrenheit;
- a nominal water containing capacity of one hundred twenty gallons;
- Pressure vessels under federal control or regulation;
- Pressure vessels containing water under pressure: including those
containing air, the compression of which serves only as a cushion, when
none of the following limitations are exceeded:
- a design pressure of thirty pounds per square inch;
- a design temperature of two hundred ten degrees fahrenheit; and
- pressure vessels used for agricultural purposes.
- Cities:
- A city which qualifies under the provisions of this subdivision shall enforce the provisions of this section and the rules of the board promulgated hereunder and for such purpose shall have the powers of the commissioner prescribed in subdivision two of this section. In order to so qualify, a city shall have enacted a local law or ordinance requiring an inspection of all boilers required to be inspected by the provisions of this section located in such city, which inspection shall be conducted with at least the same frequency as is required by this section, but in no case more often than once a year. Such boilers shall be inspected by competent inspectors employed by the city except boilers inspected and insured by a duly authorized insurance company in accordance with the provisions of subdivision eight of this section and with the rules of the commissioner.
- The fee schedule contained in subdivision three of this section shall not apply within a city which qualifies under the provisions of this subdivision. Such a city may, by local law or ordinance, impose reasonable fees for the inspection of boilers by the inspecting agency of such city.
- Inspection by insurance companies:
a. All boilers which are
inspected by a duly authorized insurance company shall be exempt from
inspection by the commissioner and by cities which qualify under the
provisions of subdivision seven of this section, under the following
conditions:
- that inspections by the insurance company are made with the same frequency as is required by this section except that, for all such boilers located within a city which qualifies under the provisions of subdivision seven of this section, inspections are made with the same frequency as is required by such city;
- that the insurance company complies with the rules of the commissioner;
- that the inspectors of the insurance company hold certificates of competency;
- that the insurance company gives notice to the owner or lessee of each boiler inspected listing all violations of any provision of the rules of the commissioner;
- that a certified copy of the report of each inspection is filed with the commissioner or the inspecting agency of such city, as the case may be, within twenty-one days of the inspection, on such forms and in such manner as required by the commissioner or the inspecting agency of such city, as the case may be. A copy filed with the commissioner shall be accompanied by a non-refundable fee of one hundred dollars paid for each boiler inspected. If insurance is refused, cancelled or discontinued for the boiler inspected the report shall so state, together with the reasons therefor; the report shall also list any instances of the failure of an owner or lessee of the boiler to comply with the rules of the commissioner.
- In order to satisfy the inspection requirements of this section, all inspections which are made by duly authorized insurance companies shall be made by inspectors whose competency has been certified by the commissioner in accordance with the rules of the board. The commissioner may, after a hearing upon notice, suspend or revoke a certificate of competency in accordance with the rules of the board. The commissioner may require reasonable cooperation from a city which qualifies under the provisions of subdivision seven of this section in the course of his or her investigation into the competency of a certified inspector.
- Members of boards. Any member of a boiler inspection examining board or other board created pursuant to rules and regulations of the commissioner to implement this section shall serve without salary or other compensation.
The School Facilities Management Conference and Expo is held annually in Saratoga Springs in the early part of the school year. The Conference is a great opportunity for Professional Development and networking with fellow directors. A must to take advantage of. The more that you participate in learning opportunities, the greater benefit you’ll be for your district and career. Also, by getting to know the other DOF’s, the answers to your questions are just an email or phone call away. If your district is unable to pay for you to attend the conference, there are plenty of scholarship opportunities available for you to apply, such as the NYSIR, Utica National, and the Richard Mills Scholarship. These have been available to applicants each year. The conference is a four-day event and the breakdown of each day is as follows:
(Please Note that conference activities have changed over the years. This event is continually improving and adjusting to the needs of our membership.)
Saturday – This is the day we hold the Fred Hack Memorial Golf Tournament. This golf outing is the sole source of fund raising for the Fred Hack Scholarships that are given out each year. These scholarships are awarded to dependent children of the active and affiliate members of the NYS School Facilities Association. Applicants must be a student enrolled in or planning to enroll in a full-time program of study leading to an Associate's or Bachelor's Degree at an accredited post-secondary school. Applicants must not have received two previous awards and must not have received an award the previous year.
Each year applications are received for these scholarships, and then if the criteria for eligibility is met, they are forwarded to an independent reviewer to choose the recipients of the scholarships. The number of scholarships awarded is dependent on the amount of funds raised during the golf tournament. A day on the golf course at this time of year in Saratoga Springs is just amazing.
Sunday- This is the day when the conference really kicks off. The first event is the SFA Board Meeting, which is comprised of each chapter’s President and State Director, along with Executive Board Officers.
Following the board meeting, there is a gathering for first-time attendees. This is a great way for you to meet the leaders of the association, along with other first-time attendees. You will get a better understanding of what is offered during the conference, and also be able to ask any questions you may have concerning events and activities.
Early in the afternoon, the Expo Hall is opened for everyone to attend. With exhibitors totaling around 130 or more, there should be a representative present for just about anything you will need. Over the years, we have moved from the term vendor and now use the phrase business partner. You cannot be successful at this job without having a lot of people behind you to provide needed support. Making connections at the Expo is very important and please know that if it were not for the generosity and support of these exhibitors, the conference would not be the successful event that it has become. You never know when you will need the help of one of our business partners, so please take a minute to thank them for their support and be sure to get a business card for your future reference.
Sunday evening is open for you to socialize and explore beautiful Saratoga Springs. If you are new to the conference, other attendees from your chapter can help you to find a location to socialize with other directors.
Monday – This is the day that starts off the educational sessions. The day starts off with breakfast in the ballroom. From there, you will be able to choose from multiple educational sessions in the morning and afternoon. Most sessions are offered more than once so you won’t miss out on a class if the two that you wish to attend are offered at the same time. Monday’s luncheon features a speaker with a topic of interest to all. After lunch, it is back to the expo to spend time with our business partners. Following the closing of the expo, additional professional development sessions are offered. After these classes have finished, you are on your own for dinner. By this I mean that there is no set agenda for dinner and as an attendee, you will get many invites ahead of time from some of our business partners to join them for dinner and socializing. Monday evening is always a great time to make connections and ask questions of your peers and our business partners. Use this time to get to know people from outside your chapter’s region.
Tuesday – With the expo now closed, Tuesday is loaded with professional development opportunities. Once again, the day starts with breakfast and lunch with have a featured speaker. Tuesday is also the day when association elections are held for the Third Vice-President positions, and in varying years, the Treasurer position. Tuesday traditionally has been the day when the Coordinator of NYSED Facilities Planning provides an update on what is, what changes we may see, and an overall update of the Facilities Planning Department. This session is always filled with attendees and one you will not want to miss. Tuesday concludes with an evening banquet where the new President is sworn into office.
Wednesday – This is usually the day everyone is leaving Saratoga to head back to their districts. We have had some offerings on Wednesday mornings for members, but not always. You’ll need to keep an eye on the schedule of events.
A couple of pages of text really does not do justice to the offerings and importance of the Annual Conference. Please take the time to attend and further increase your knowledge and skill set for the Director of Facilities position.
Building Operator Certification (BOC®) helps building engineers, maintenance supervisors and others in the skilled trades advance their skills and careers in energy efficient operation of commercial buildings. Since 1996, BOC has equipped building operators with the know-how to reduce building-related energy consumption and occupant comfort complaints.
BOC Level I is designed for operators with two or more years of experience in building operation and maintenance who wish to broaden their knowledge of the total building system. Completion of Level I requires a time commitment of 74 hours which includes seven classes, work-site projects, and open-book tests.
BOC LEVEL I SCHEDULE:
- BOC 1001-A / Energy Efficient Operation of Building HVAC Systems
- 1001-B / Energy Efficient Operation of Building HVAC Systems
- BOC 1002 / Measuring and Benchmarking Energy Performance
- BOC 1003 / Efficient Lighting Fundamentals
- 1004 / HVAC Controls Fundamentals
- BOC 1005 / Indoor Environmental Quality
- BOC 1006 / Common Opportunities for Low-Cost Operational Improvement
- BOC 1008 / Operation and Maintenance Practices for Sustainable Buildings
LOCATION: This course offers participants the opportunity to interact during each class with fellow students and the instructor online via Zoom. Students must have access to a computer or tablet, and internet service that supports high-speed audio/video streaming.
You can register or get more information on this Professional Development opportunity by CLICKING HERE
There are 18 chapters of the NYSSFA across the state. Participation in your local chapter is critical to your continued professional development. Each chapter has officers just like the state association, and your State Director represent your chapter at the state level, as does your chapter President to a lesser degree. Your local chapter operates in a manner that is chosen by the members of each chapter. Some chapters have their local business partners as active members who participate in the chapter meetings, while other chapters may restrict who may attend their chapter meetings.
Chapters are encouraged to offer training, speakers, and group activities. Chapter attendance at meetings will be a direct result of the content that will be presented at the meeting. We all have busy days and leaving the district for hours for some is difficult and to do so is usually based on what will be gained by attending the chapter meeting. Be an active chapter member and be sure you push your membership to offer fresh interesting content at each meeting.
If you are a new chapter member, your chapter should assign a member to act as a mentor for you in your new role as a Director of Facilities. The mentor can offer you advice based on their experience and can be done so in a manner that is private in nature. New Directors can be reluctant to ask questions in fear that the question may seem trivial to other members. None of us has all the answers and we all have started a job at one time or another with no prior experience in that job title. Lean on your chapter mentor and don’t be afraid to ask any questions. If you are a veteran Director of Facilities, you are encouraged to act as a mentor and help the new generation of Directors.
Many chapters host golf tournaments or trade shows, which act as fund raising sources for the chapter. These funds are used for professional development opportunities for the chapter members and in many chapters, the funds will be used for student scholarships.
Local Chapters for NYSSFA
Capital District
Central NY
Central Western
Chautauqua County
Genessee Valley
Mid-Hudson
Mid-State
Nassau County
Niagara Frontier
North Country
Northern Catskill
Oswego County
Rockland County
Southeastern Chapter
Southern Finger Lakes
Southern Tier
Suffolk County
Wayne Finger Lakes
Each year SFI/SFMI offers an exceptional Professional Development (PD) opportunity to its’ members. This training is instructional for the new and the incoming member, as well as those members with experience. The association offers these academies twice a year; a spring session and a winter session.
It is a venue where new members have the opportunity to gain knowledge from industry experts or to ask questions of relevance to their current work. Experienced members have, in many cases, the best of both worlds as they can gain better understanding of personnel or health and safety issues they face daily. For those with many years as standing DOF’s, they can share the best practices or means of resolve that they have used to mitigate their situations they faced prior.
Each year there are two “tracks” offered. They are the Management Track which is designed for members working toward becoming DOF’s, for DOF’s who are less experienced seeking to gain professional development in their daily work and/or those who are just looking for a refresher or have special questions.
The second track includes professional development regarding Personnel Matters one year and the following year offers Health and Safety and Security.
The Academy is rotated to different venues across the state but all members can and are encouraged to attend. Typically, each tract is capped for attendance based on the training venue’s site capacity. So….register early!!
Benefits in attending can include, but not limited to, the following:
- You will experience professional development from industry and peer leaders.
- You will have the opportunity to network with your peers.
- You can ask questions and receive answers to issues you are dealing with.
- You will improve your situational awareness and outcomes towards your daily responsibilities.
- You will Increase your list of contacts for future resources.
Academy content is scheduled based on membership feedback. No one has more knowledge than everybody.
Further information on the School Facilities Managers’ Academy can be found at http://nyssfa.com Go to the Education tab and click on Academy.
CDF - Certified Director of Facilities
The CDF program is offered through NYSSFA and it is a program to certify your experience as a Director of Facilities. There has been much discussion about the program and to increase the offerings and requirements to become a CDF. You can get all the information by visting this section on the NYSSFA website.
ADC - Affiliate Development Certification
Just like the CDF program, the ADC program is offered through NYSSFA. This program is geared towards those who work under a DOF in a supporting role. This program is a great first step towards becoming a DOF. You can get additional details by visiting the NYSSFA page for the ADC program.
Click Here to view the ADC program brochure.
The NYSSFA has offered a training course which explains the Capital Project Process. Here is a LINK to read the information shared during this course. This information is from the first offering of this course and this is just an overview and is certainly not a substitute for attending this training course.
Stage curtains are required to be treated and will fall under either Flame Retardant or Permanently Flame Retardant. All schools must meet NFPA 701 Class “A” Fire Rating for stage curtains. All NYS buildings have adopted the International Building Code IBC200 as their model, which gives helpful details on stage and stage curtain requirements.
Some vendors will clean and treat your stage curtains on site and others will remove the curtains and return them after treatment. Ask about the details of service before choosing a service company. Also, ask your local NYSSFA Chapter member who they use for service. There are a multitude of companies offering these services, so do a little homework on the costs and services provided.
It is important that you keep records of the treatment when it has been completed. You should have a recurring PM procedure in your CMMS for the treatment of the stage curtains. Typically you would want to get these done over the summer. In addition to stage curtains, you may also be required to treat window draperies and other similar items that would fall under this category. Take a walk around your school and see what else you may have on hand in addition to the curtains. Remind those in your buildings that bringing in curtains and cloth covers from home is not permitted for use in classrooms.
FLAME RETARDANT CURTAINS
Flame Retardant Curtains are treated with a chemical fire retardant. These chemicals that protect the curtain will wear out over time. Cleaning of the curtain will also have an affect on the treatment that was applied for fire resistance. When you have your curtains cleaned, you will probably need to get the curtains treated again to insure they meet the flame retardant specifications. It is recommended to get the curtains cleaned and treated at the same time. If you are going to clean curtains annually, you will probably need to get the curtains treated with a flame retardant as well. Be sure you get documentation on this from the company who is treating your curtains. The company treating the curtains should apply a tag to the curtains noting the due date for the next treatment. NYSED has stage curtains being treated every three years.
PERMANENTLY FIRE RETARDANT CURTAINS
Permanently Fire Retardant Curtains are made with noncombustible fabric and they are guaranteed to be noncombustible for the life of the curtain. These curtains do not require any additional treatment after cleaning. You should have a document stating these curtains are guaranteed for life and they also should have a tag on the curtain noting they are noncombustible.
IBC pages 54, 55, 56
410.3.5 Proscenium curtain. The proscenium (this is the part of the theater stage that is just in front of the curtain) opening of every stage with a height greater than 50 feet (15 240 mm) shall be provided with a curtain of approved material or an approved water curtain complying with Section 903.3.1.1. The curtain shall be designed and installed to intercept hot gases, flames and smoke, and to prevent a glow from a severe fire on the stage from showing on the auditorium side for a period of 20 minutes. The closing of the curtain from the full open position shall be effected in less than 30 seconds, but the last 8 feet (2438 mm) of travel shall require not less than 5 seconds.
410.3.5.1 Activation. The curtain shall be activated by rate-of-rise heat detection installed in accordance with Section 907.10 operating at a rate of temperature rise of 15 to 20°F per minute (8 to 11°C per minute), and by an auxiliary manual control.
410.3.5.2 Fire test. A sample curtain with a minimum of two vertical seams shall be subjected to the standard fire test specified in ASTM E 119 for a period of 30 minutes. The curtain shall overlap the furnace edges by an amount that is appropriate to seal the top and sides. The curtain shall have a bottom pocket containing a minimum of 4 pounds per linear foot (58 N/m) of batten. The exposed surface of the curtain shall not glow, and flame or smoke shall n(j>t penetrate the curtain during the test period. Unexposed surface temperature and hose stream test requireme~ts are not applicable to the proscenium fire safety curtain test. 410.3.5.3 Smoke test. Curtain fabrics shall have a . smoke-developed rating ofi 25 or less when tested in accordance with ASTM E 84. 410.3.5.4 Tests. The completed proscenium curtain shall be subjected to ophating tests prior to the issuance of a certificate of occupancy.
CLICK HERE an example of a Stage Curtain Treatment Certification.The fume hoods in your science labs are to be inspected every 3 months. This is a rather straightforward test to measure the face velocity of the air entering the fume hood. To perform the test, you will need an Anemometer. If you don’t have one, they are relatively inexpensive, and they are an essential. This is listed in our Tools for the Job section.
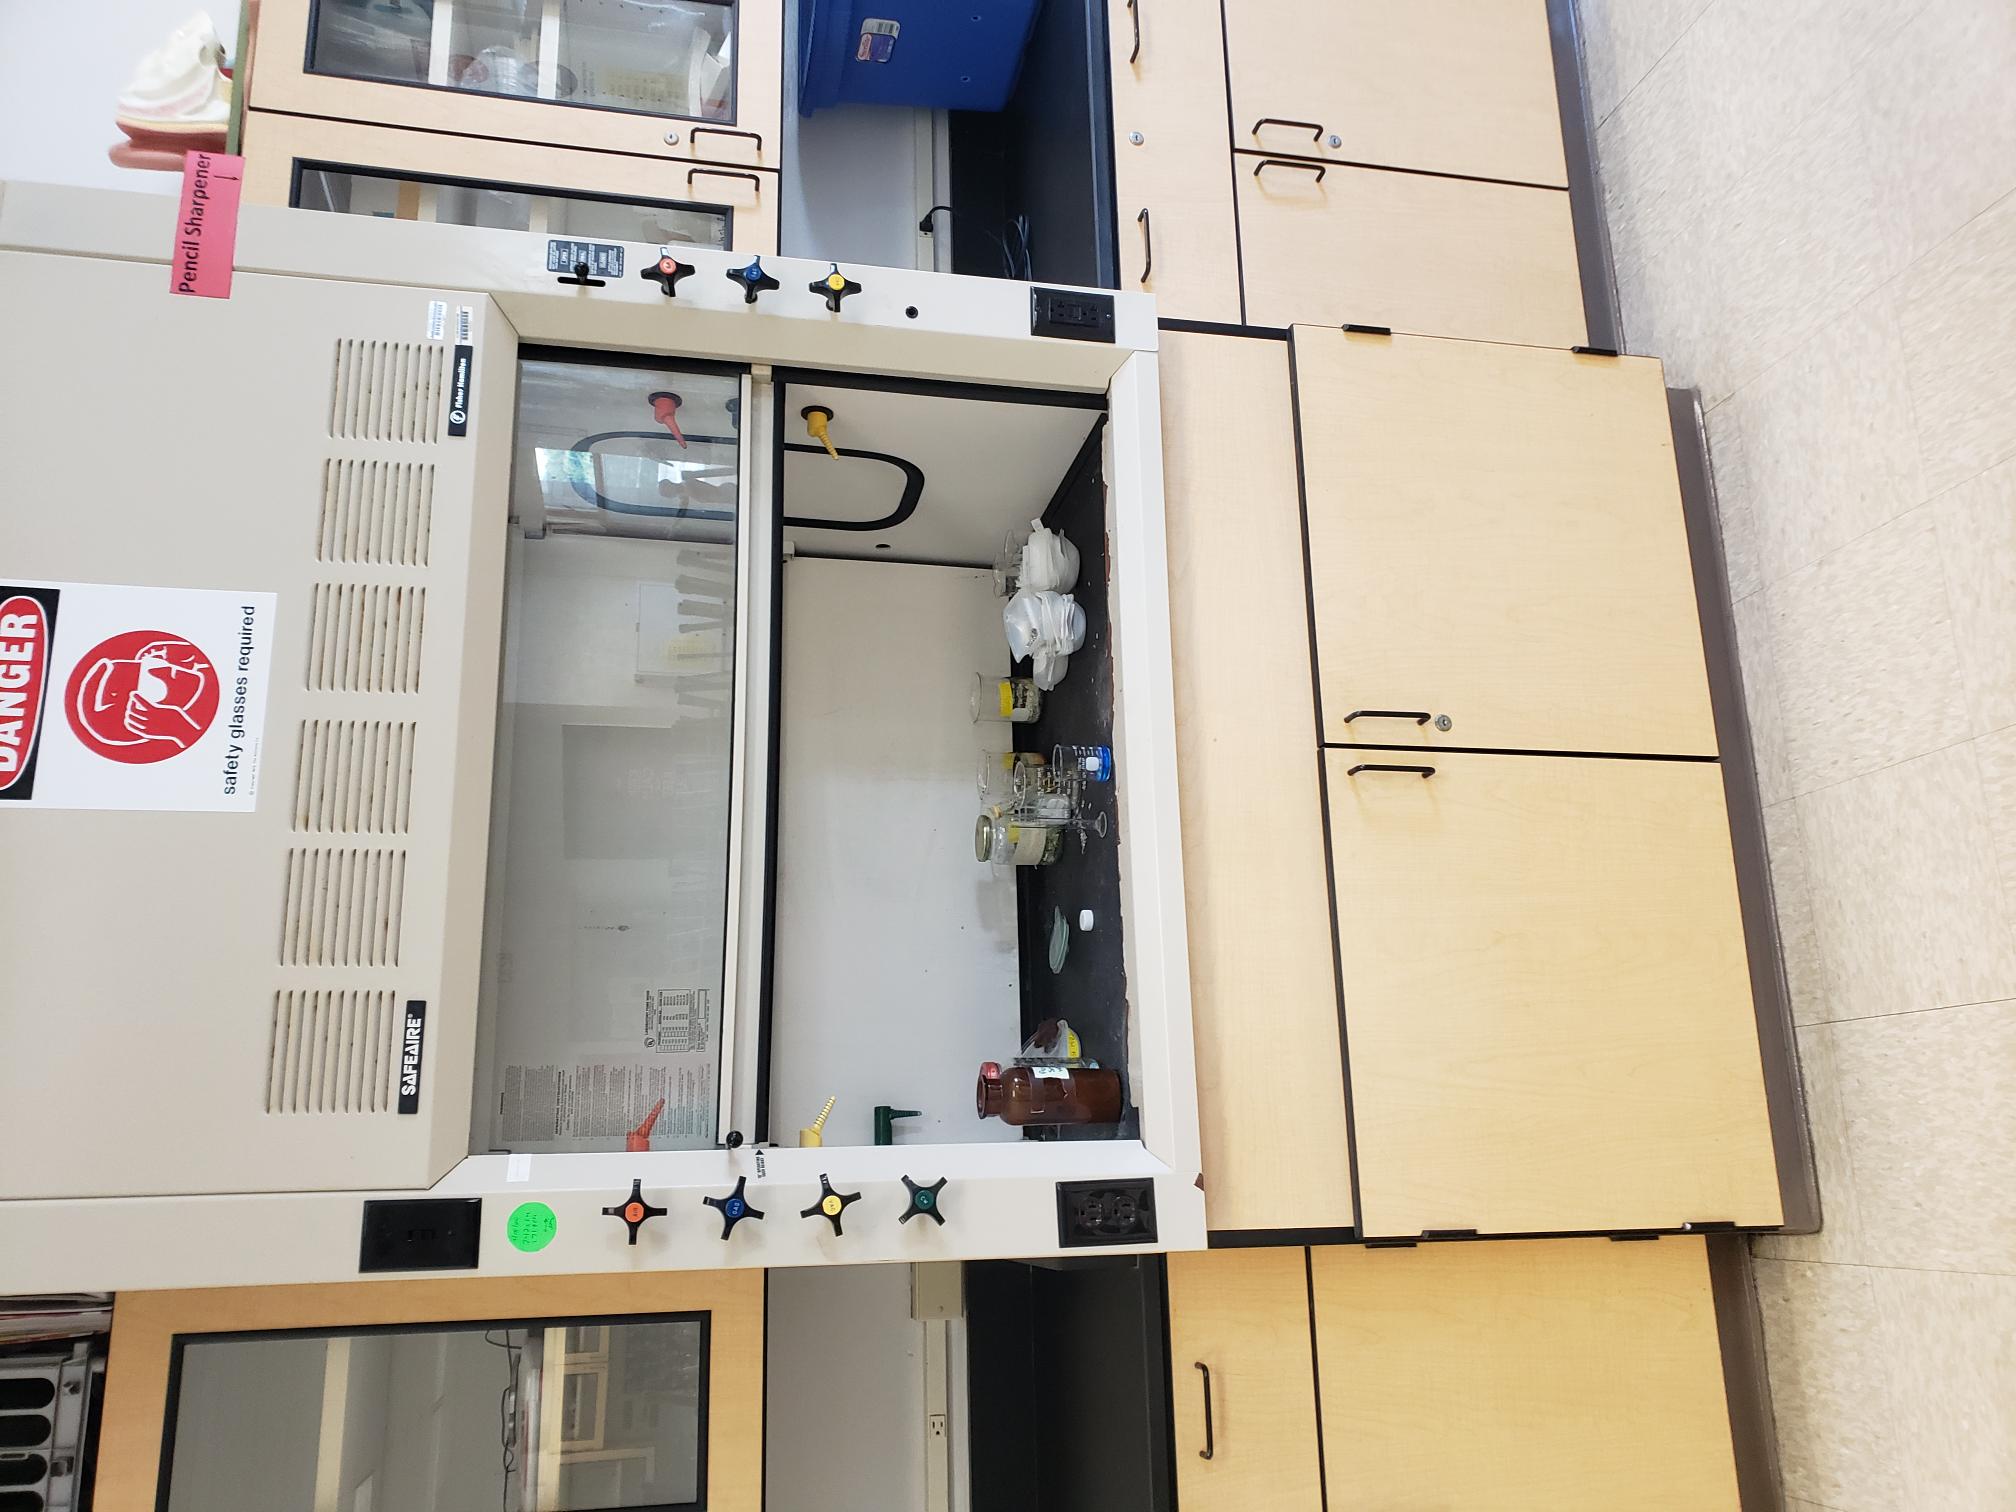
You should consult your fume hood manufacturer’s manual or contact the manufacturer to determine the specification for face velocity for your fume hood. This number can vary quite a bit if you are doing an internet search for this figure, so to be safe, utilize the information from the equipment manufacturer.
The face velocity and displace air volume figures can be greatly impacted by the room’s HVAC system. If the room has a high positive air pressure, the measurements for air flow in the fume hood will be higher. Just the opposite is true if the room has negative air pressure. Take measurements under the normal operating conditions in the room and if the results are out of acceptable range, you will need to look at room conditions to see if that is impacting the air flow rates.
Fume Hood Openings
To determine the specified average face velocity for the fume hood being tested, perform the following test. With the sash in normal operating position, typically opened 18 inches, turn ON the exhaust blower. The face velocity shall be determined by averaging the velocity of the readings taken at the fume hood face. The number of readings taken with an 18 inch height is based on the width of the opening of the fume hood as shown in the chart.
How To Test Fume Hood Face Velocity
| WIDTH OF OPENING | NUMBER OF MEASUREMENTS |
|---|---|
| 24" to 36" | 6 Readings |
| 37" to 48" | 8 Readings |
| 49" to 60" | 10 Readings |
Readings shall be taken at the centers of a grid made up of sections of equal area across the top half of the fume hood face and sections of equal area across the bottom half of the fume hood face. 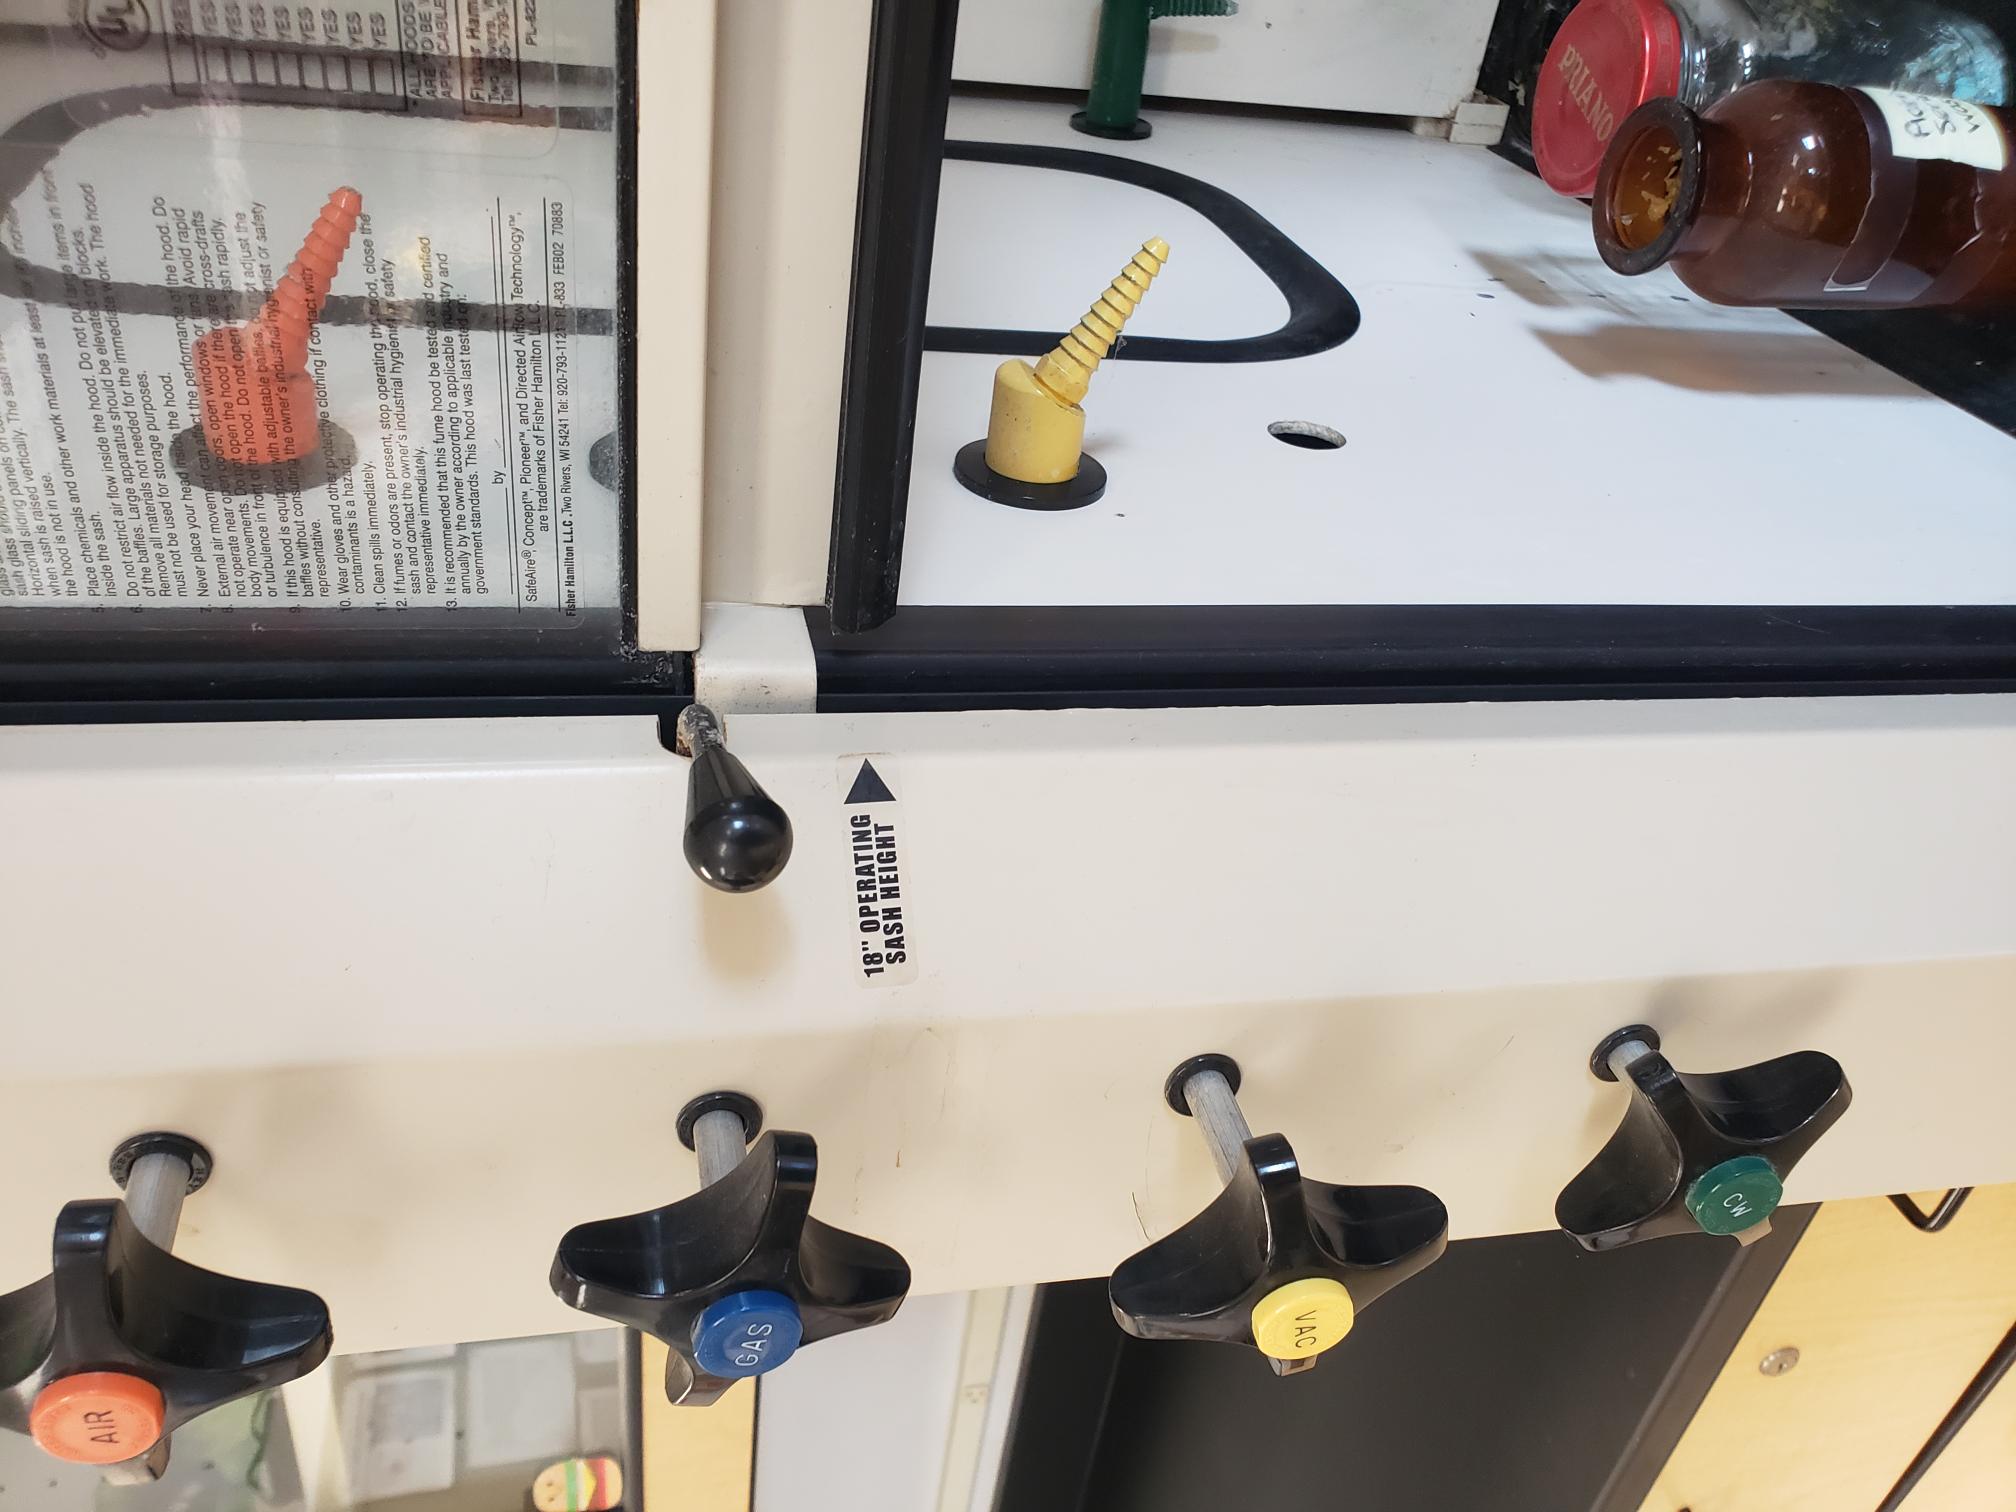
Once you determine the size of your grid and the number of measurements, you can take measurements by placing the wand of the Anemometer in the plane of the window opening. Your meter should be set to read feet per minute (FPM). Position the wand so the air flow arrow is pointing towards the fume hood, which is the direction air will flow. Allow the readings to level out, which takes about 15 seconds, and record that measured value. Repeat this procedure for each of your grid sections. Determine the average reading by adding the readings together and then dividing that by the number of measurements you have taken. Record the average face velocity and if the reading is within parameters, add a sticker to the fume hood with the date of the test and note that it has passed.
Place a sticker on the side of the fume hood
WATER MANAGEMENT PLANS FOR MINIMIZATION OF LEGIONELLA PNEUMOPHLIA:
If you have a water cooling tower on your school property, you are required by law to have the tower registered with NY State. Inspections are required when the tower is first opened for operation and then at 90 day intervals until the tower is shut down for the season. If your cooling tower has been shut down or left untreated for five or more days, you must complete full startup procedures before turning it on or continuing to use it, as follows:
- Clean and disinfect the cooling tower through power-washing or scrubbing all tower components to remove biofilm and debris. Disinfect with approved biocides to kill pathogens such as Legionella. Furthermore, all other system components (including heat exchangers, chillers and pipes) must be cleaned and disinfected. Follow the manufacturer’s recommendations to be sure all parts are clean (e.g., some equipment may need to be taken apart for proper cleaning). Further cleaning and disinfection guidance should be described in your MPP.
- Fill system and circulate water, biocides and chemicals as specified in your MPP. The cooling tower system is now considered operational and must meet all New York City regulatory requirements, including routine system monitoring, maintenance and waterquality sampling.
- Conduct a compliance inspection. Your qualified person must complete a physical assessment; inspect all components for the presence of contaminants and other adverse conditions; make sure that the water treatment equipment is functioning properly; and make sure that operational records are complete.
- Collect and analyze a water sample for the presence of Legionella within 14 days. The sample must be analyzed by a laboratory certified by the Environmental Laboratory Approval Program (ELAP) of the New York State Department of Health (i.e., an ELAPcertified laboratory).
- Keep detailed records of all procedures and actions performed.
It is imperative that the company who is performing your maintenance and inspections on your cooling tower provide you with the proper documentation. If you have a positive test for Legionella, you are going to need to need to contact your local Department of Health immediately and they will want to know what steps you have and will take for the cleanup process. Have a documented history of maintenance on the cooling tower, as the Department of Health will request this information. Having a well documented log book will be a blessing for you. You should review the log entries with your service technician to verify all information has been recorded. Reviewing the logs with the technician also give you a better understand of the maintenance and inspection process. Please read all details below as this process has many steps and due to the health risks an infected tower can create, you should be familiar with all aspects of the maintenance and inspection procedures.
If you need to register a water cooling tower, the information below will be required You can work with your service provider to gain some of the information needed.
Refer to this step-by-step process to Register a Cooling Tower:
- Create an NY.Gov account or login.
- Add a property owner. Please create an account for each property owner. You can use the same email for multiple accounts, just be sure to create a new account ID.
- Add building information.
- Add equipment information for the building.
- Once you've added all buildings and equipment, print a page for your reference.
- Return to account overview to add more buildings or equipment.
Ready? Have with you:
Building Details
- Street address of the building where the cooling tower is located. New York City residents will need to include borough, block and lot.
- Name, address, telephone number and email of all owner(s) of the building
Equipment Details
- Intended use of the cooling tower
- Name of the manufacturer of the cooling tower
- Model number of the cooling tower
- Specific unit serial number of the cooling tower
- Cooling capacity (tonnage) of the cooling tower
- Basin capacity
Equipment Maintenance Details
- Whether systematic disinfection is maintained manually, through timed injection, or through continuous delivery
- The contractor or employee engaged to inspect and certify the cooling tower
- Commissioning date of the cooling tower
- Date of last routine culture sample collection, sample results, and date of any required remedial action
- Date of any legionella sample collection, sample results, and date of any required remedial action
- Date of last cleaning and disinfection
- Dates of start and end of any shutdown for more than five days
- Date of last certification and date when it was due
- Date of last inspection and date when it was due
- Date of discontinued use
CLICK HERE for more information concerning registering your tower.
Overview and Details
New York State requires that all water systems have a Water Management Plan to minimize the potential for Legionella to grow and prosper in water systems in buildings. The purpose of this section is to establish Legionellosis Risk Management requirements for building water systems.
This section provides minimum Legionellosis Risk Management requirements for potable and non-potable water systems. Included in this section are requirements for design, construction, commissioning, operation, maintenance, repair, replacement and expansion of new and existing buildings. The ANSI/ASHRAE Standard 188-2021 is a great resource to use as reference for maintaining these critical systems throughout a building. This section of this handbook will only serve as a very brief overview of these requirements – and we will concentrate on Cooling Towers. Information for the other water systems in the facility are found in Standard 188-2018.
Before a comprehensive Water Management Plan can be developed – it is imperative that a detailed Legionella Environmental Assessment Form (LEAF) be completed on the cooling water systems in the facility. During a risk assessment, baseline data and ongoing data is collected to assist the water safety and management team in evaluating the effectiveness of current minimization efforts. Possible sources of Legionella are identified. These Risk Assessments are designed to identify if the system is at risk for Legionella growth and spread. A critical part of the Risk Assessment is to begin developing an understanding of the mechanical operation at the facility. The information gained during this risk assessment serves as the foundation of the Water Safety and Management Plan and enables the team to audit the existing Water Management Plan.
The team that is developed for each site should include personnel with pertinent knowledge of the system(s). These may include – but are not limited to – Maintenance Manager, Safety (EHS) Manager, Water Treatment Professional, Contractors, Risk Management Manager, Financial Manager).
The Center for Disease Control and Prevention (CDC) has a very effective form for conducting this assessment - Legionella Environmental Assessment Form (LEAF). It can be found at www.cdc.gov/legionella/outbreak-toolkit.
After an on-site risk assessment has been completed, the field data, notes, sketches and photos are used to develop a report of the major observations and concerns. After any lab results are received and interpreted the final risk assessment report can be developed. This report will include recommendations on what/if any further actions are needed to control Legionella growth in the cooling tower. These recommendations are usually based on evidence from previous issues, peer-reviewed literature and Legionella guidelines and standards.
An effective Water Management Plan should include the sections as outlined in Standard 188-2021. Another very informative document is ASHRAE Guideline 12-2020. It is essentially the “how” for ASHRAE Standard 188-2021. It provides information and guidance to assist with control of Legionella in building water systems.
The following components constitutes an acceptable Water Safety and Management Plan:
- Plan Team
- The ability to oversee the program.
- Knowledge of the water systems.
- The ability to identify control locations and limits.
- The ability to identify and take corrective actions.
- The ability to monitor and document program performance.
- The ability to confirm program performance.
- The ability to communicate regularly about the program.
- The ability by all to “Buy In”.
- Building/System Water Flow Diagrams and Descriptions of Systems
- Water System Risk Assessment
- What water systems are involved? Cooling Towers, Eye Wash, Decorative Fountains?
- Have there been previous issues with Legionella in these systems?
- Is there a current Water Management Plan in place?
- What is the water source for the system?
- Appropriate Control Measures
- Monitoring of the Plan
- Daily Monitoring Logs
- Lab Test Results
- Maintenance Records
- Corrective Action Reports
- Start Up/Shutdown Procedures and Reports
- New Construction Commissioning Reports
- Corrective Actions
- Confirmation and Response Plan
- Documentation and Communication
- Every Cooling Tower must have a Water Management Plan and Program. This is a documented plan that outlines all of the information discussed above points 1 through 8. This document must be updated at any time a change is made to the program. This document must be on site and readily available at any time it is asked for by the NYS DOH or any Jurisdiction Having Authority (JHA).
- All activities outlined in the Water Management Plan must be implemented and documented as completed.
- Every tower must be inspected prior to startup – seasonal and year round. These inspections must be conducted by an individual that is trained to do these inspections. These inspections involve looking at many different aspects of the tower operation and equipment.
- The tower(s) must be inspected within 90 day intervals.
- (ELAP Certified) must be used in New York State. These samples are collected in special sample bottles.
- Every tower must be cleaned and disinfected at the appropriate intervals. Documentation of these procedures must be included in the Water Management Plan.
- Appropriate chemical treatment with approved chemistries must be used for scale/corrosion inhibition and microbiological control. This treatment must be done by a NYS DEC Certified Pesticide Technician/Applicator.
- Maintenance Program and Plan (MPP) – The MMP is the playbook for how the cooling tower needs to be operated and maintained. It must be completed by a Qualified Person – per LL77 – and should be updated anytime the law changes, or anything related to the tower, or the compliance team changes.
- 90 – day Legionella Sample Results – Legionella samples must be pulled from the tower at least every 90 days (this does not mean once a quarter). Samples must be processed through a NYS ELAP certified laboratory. All Level 4 sample results must be communicated to the NYC DOH. Additional samples may be necessary following certain high bacteria counts, or Legionella results. A pre-start up sample must be collected prior to starting a cooling tower after a 5-day shutdown.
- 90-day Qualified Cooling Tower Inspection – Tower inspections must be completed by a Qualified Person at least every 90 days. Inspections must address the mechanical components of the tower, the overall cleanliness of all wetted surfaces and the chemical feed equipment. Any deficiencies requiring a corrective action must be addressed immediately.
- Twice Annual Cooling Tower Cleaning and Disinfection - Twice annually all cooling towers must be physically cleaned and chemically disinfected. The disinfection must be completed by a NYS DEC 7G licensed technician/applicator. All cooling towers that are shutdown for 5 or more days must be cleaned prior to start-up. Additional cleanings may be required following a level 4 Legionella result or back-to-back Level 4 weekly bacteria results.
- Weekly Bacteria Monitoring - Bacteria dip slides, or Heterotrophic Plate Counts (HPC) must be conducted once a week on the cooling tower water. Dip slides must be inoculated weekly, incubated for 24 to 48 hours and then interpreted. Results of the dip slides or HPC may require corrective actions.
- Weekly Visual Tower Inspections –Once a week a basic observation must be made of the cooling tower addressing all wetted surfaces, chemical levels and chemical feed equipment functionality. Any deficiencies must be addressed with a Qualified Person.
- Weekly Chemical and Biocide (C&B) Summary – A weekly summary of all chemicals and biocides must be kept indicating the proper dose of chemical is being introduced to the tower. This report should indicate the chemical name, purpose, day and time of dosage and the weekly summary.
- Semi-Annual Routine Mechanical Maintenance – Routine mechanical maintenance, as described in the MPP, and based on manufacturers recommendations must be completed twice per year.
- 3-Times Per Week Water Quality Testing – A Responsible Person must test the cooling tower water quality 3 times per week, with no more that two days between tests. Conductivity, pH, temperature and biocide residual must be measured and recorded. Any deficiencies must be addressed with a Qualified person.
- Annual Certification – A certification must be filed with the3 NYC DOB/DOH annually by November 1st. The certification should be an honest representation of how well the MPP was followed during the previous 12 month period.
The Plan Team should consist of individuals with some detailed knowledge of the water systems, management desires, local/state/federal mandates or requirements and mechanical systems within the water system. The team should have:
This Team Might Include: Building Owners, Maintenance Manager, Safety Officers, Water Treatment Professionals, Contractors or Consultants, Risk Management Manager, Municipal Water Department and/or Financial Manager.
This section of the Water Management Plan outlines what system(s) our plan will cover. It cannot be generic, we must be specific to the unique system(s) at hand. The developed plan must address the various aspects of these unique systems. Building water flow diagrams and descriptions of the water systems being controlled are critical for this section. This data can be graphical or schematic, show what equipment the water passes through and show any treatment that is added. CAD drawings are not needed – but a clear and complete understanding of the water distribution must be documented to allow for the appropriate actions and measures van be implemented to maintain a system with MINIMIZED Potential for Legionella growth.
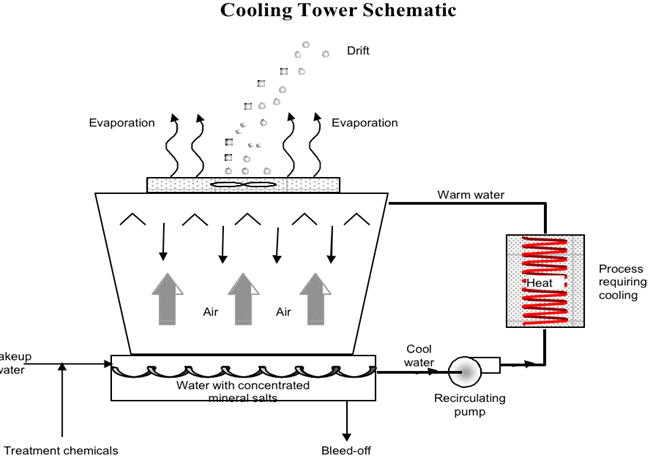
In order to identify potential issues with the water system(s) throughout the facility – we must do a RISK ASSESSMENT. The Center for Disease Control and Prevention (CDC) has a great tool to conduct this thorough evaluation. It is the Legionella Environmental Assessment Form (LEAF). This form is available from the CDC website at www.cdc.gov/legionella. Conduct this survey of the building water system(s) – know the building, equipment, and the potential for Legionella and other Waterborne Pathogens. This data enables the Team to gain a thorough understanding of the system(s). Data that should be collected includes:
After the Risk Assessment has been completed, the Team will have learned what the good and the bad is of the water system throughout the facility. A well thought out plan must have Appropriate Control Measures in place to minimize potential issues in the water system. The Team must identify the hazards and then assess those hazards. These hazards must be managed. The Team must decide on the appropriate measures, must implement those control measures and must monitor the success being shown to control these hazards. The activity must be reviewed periodically to insure that control is maintained.
Potential hazards may include (but are not limited to): Stagnant water flow areas, Dead legs in the recirculation system, COVID 19 shutdowns, dirt and debris in the system, construction projects, conditions favorable for bacteria growth, etc. The desire is to identify potential issues and address them BEFORE a more “catastrophic” issue arises.
The Team must decide on what Control Measures will be a part of the plan and then be certain that these controls are maintained. Conductivity, pH, scale/corrosion inhibitor levels, biocide concentrations to be maintained, total bacteria counts, inspections of the equipment, Legionella testing, cleaning and disinfection practices are all possible parameters to monitor and control.
It is critical that there are documents available to demonstrate that the plan developed by the Team is effective. This is accomplished by Verification (are we doing what we said we would do?) and Validation (is the designed program working as desired?). To determine this – testing must be done and recorded. The system must be monitored – Inspect what you Expect. Records that are a part of this are:
Develop the appropriate Action Plan(s) to investigate and correct control issues. Develop a Strategic Planning Approach to evaluate the current and future position. Is there an exceedance that is an Actionable level? What is the proper action to take? The Legionella Environmental Assessment Form (LEAF) may need to be done again – if corrective actions are required. Is in necessary to establish new parameters? The Water Management Plan is a “Living Document” that can be changed – as needed to insure that control is maintained. Any changes to the plan MUST be documented and updated in the Water Management Plan for that system. Any actions taken must be in line with any protocols, codes, etc. for the that system according to local/state/federal mandates. NYS DOH has addressed this – more to follow later in this section. Below is a schematic that demonstrates a Strategic Action Plan that allows for this evaluation.
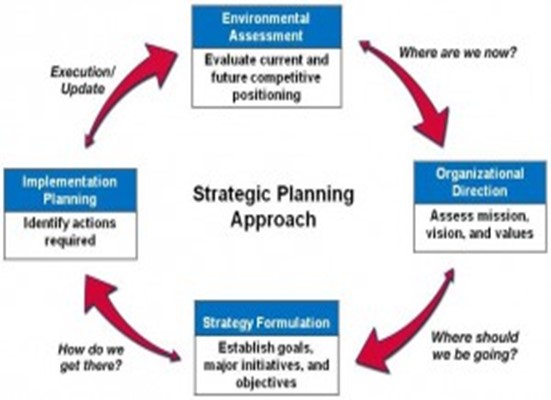
This section of the Water Management Plan details the routine testing for Legionella Pneumophila and other waterborne pathogens. It describes when and where we will be sampling the water system(s), how the samples will be collected, what to do if an exceedance occurs and what the Plan of Action is if/when a cleaning and disinfection is required. This allows for a well thought out plan that addresses what occurs if a Plan of Action is required – while taking the emotion out of the equation. There is a plan and the plan will be followed.
This section has all of the documents needed to maintain compliance within New York State. Logbooks that contain the regular system testing results for inhibitor, pH, Conductivity, biocide concentrations are kept in the Water Compliance Manual. Tower Inspection Reports, Legionella test results, Heterotrophic Plate Counts (HPC) – Total Bacteria Slide Results, Team meeting agendas and notes, Cleaning and Disinfection Certificates, Compliance Certifications and any pertinent information regarding the operation of the system are kept in this section. This information is critical so that verification (are we doing what we said we would do?) and validation (is the program in place actually working and is it effective?). This auditing practice allows the Team to determine if any modifications to the Water management Plan need to occur.
The Water Management Plan must also address the effects of construction and renovation. This is important because there are a number of risks that are increased during this period. Dirt and debris are much more prevalent. The potential for water stagnation increase. Potential interruptions in system operation are possible. Consideration must be made for commissioning new equipment. Flushing and disinfection of water lines may be required (look for water discoloration). These efforts must be coordinated with all involved and should begin during the design phase of a project.
Following the steps outlined above will assist in creating a quality Water Management Plan that follows the recommendations contained in ASHRAE Standard 188-2021. It is important that the Team understand the content in this document and that the actions laid out are completed and verification of completion can be made. As stated before, EVERY water system should have a Water Management Plan – specific to that system.
It is critical to understand that New York City (NYC) and New York State (NYS) have separate protocol that must be followed to maintain compliance with NYS DOH. NYC consists of the five (5) boroughs throughout the city. The remainder of the state follows the requirements outlined for NYS.
New York State Compliance Requirements:
Cooling towers operating outside of New York City must have documentation indicating that various actions have been completed on a yearly basis. These areas of concern are:
Appendix 4-A of the New York State Regulations – updated 07-06-2016 – DOH Document – Protection Against Legionella
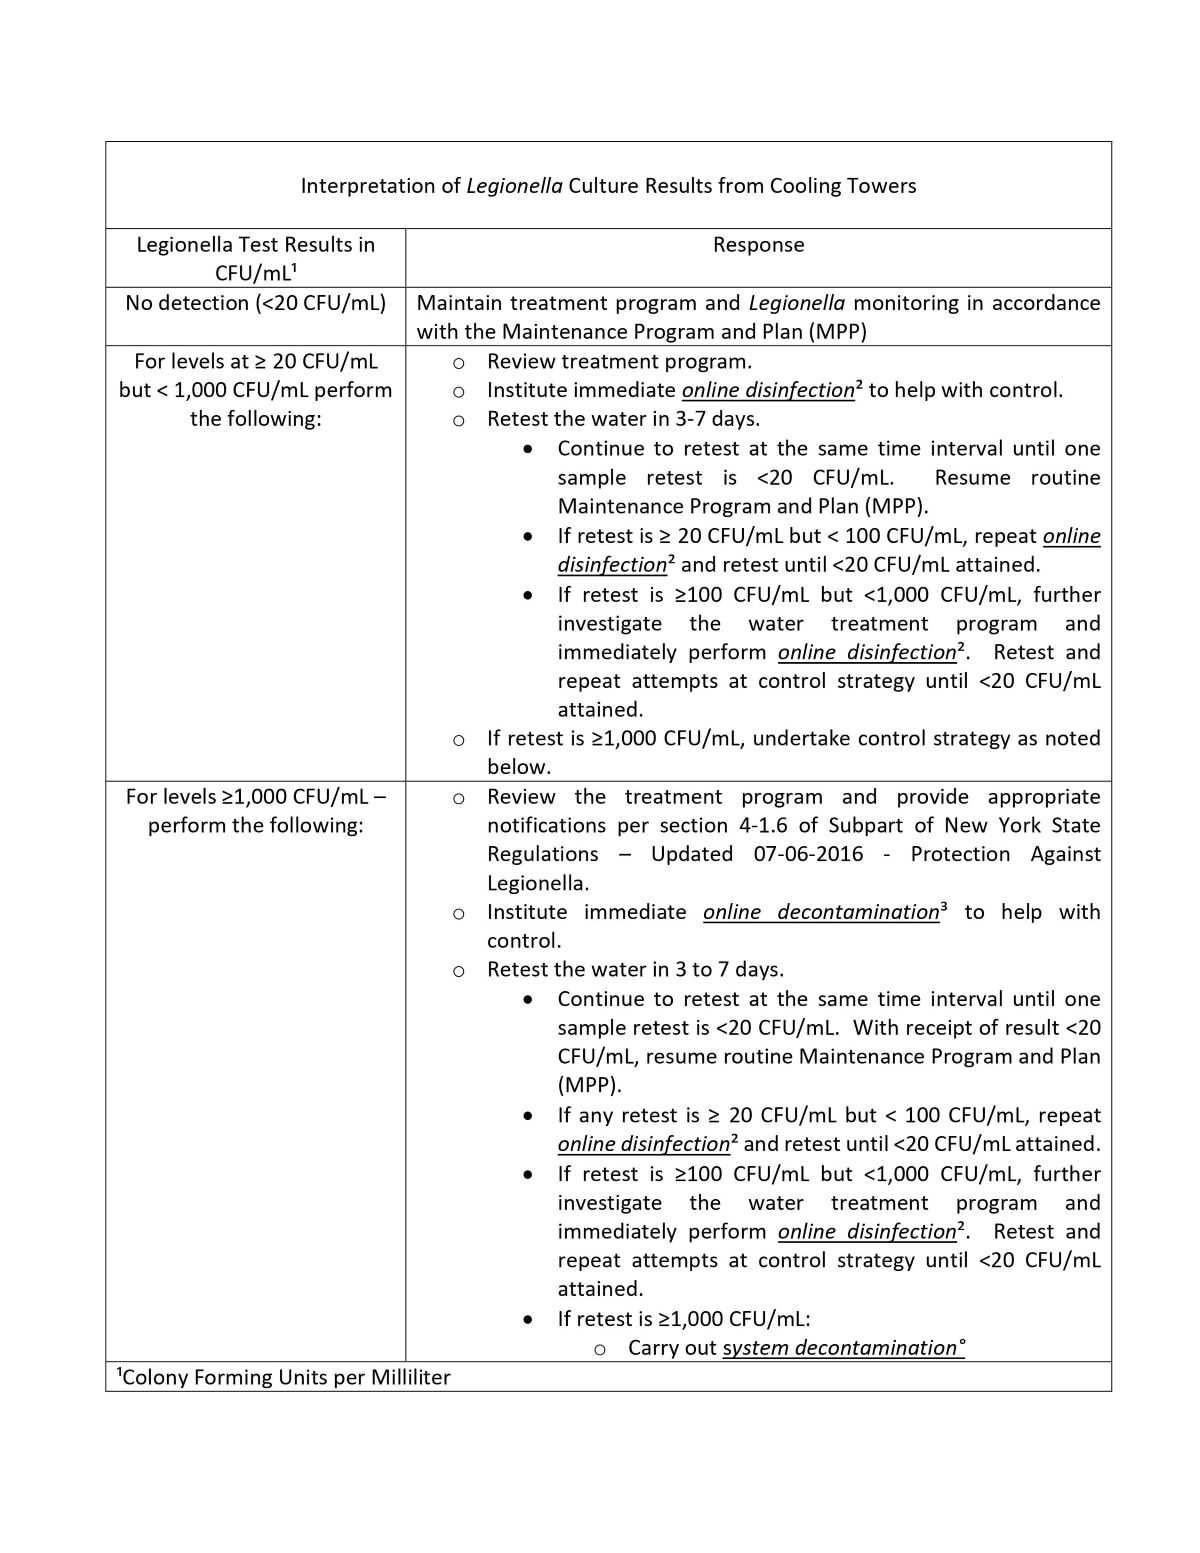
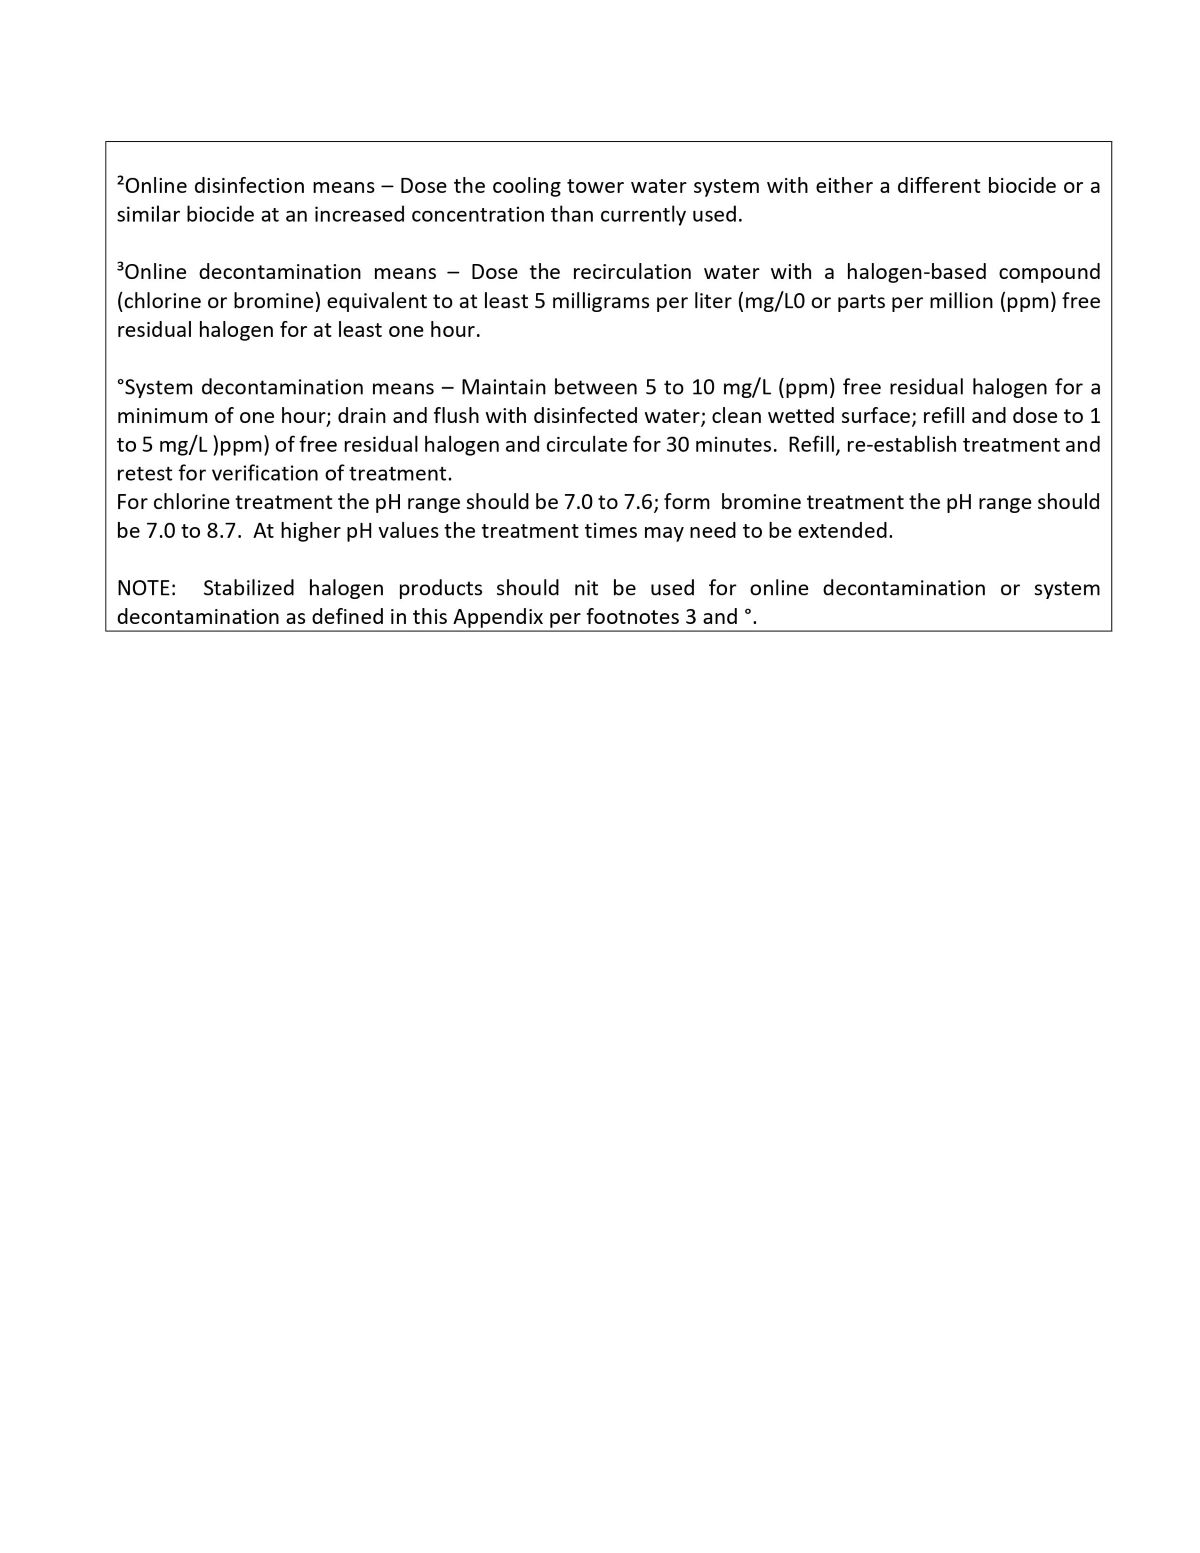
In New York City – the requirements are outlined in Local Law 77 that requires that all cooling follow a stricter protocol. The requirements of Local Law 77 are:
New York City Requirements
Needs to be performed every 90 days when a cooling tower is in use (90 days ≠ Quarterly)
Positive results require corrective action on a 4 tier scale (followed with an additional sample test).
| Level 1 | 10 CFU/mL. | No corrective action necessary |
| Level 2 | 10 – 100 CFU/mL. | Biocide Addition |
| Level 3 | 100 – 1,000 CFU/mL. | Biocide Addition/Review |
| Level 4 | +1,000 CFU/mL. | Full cleaning + Items above |
A reputable water treatment company should be able to provide the appropriate guidance to maintain this compliance.
Your building’s sprinkler system is to be inspected annually and you must document and save the records from these inspections for a period of 3 years. Typically, these inspections are performed by an outside contractor. Unless you have trained and certified personnel on staff, you should always have a reliable vendor perform this inspection work. If in doubt, speak to your district’s property insurance provider. The inspection process should entail the visual inspection of all sprinkler heads and the inspection and testing of components in your sprinkler mechanical room. Leaking or corroded sprinkler heads should be repaired/replaced.
901.6 Inspection, Testing and Maintenance
Fire detection and alarm systems, emergency alarm systems, gas detection systems, fire-extinguishing systems, mechanical smoke exhaust systems and smoke and heat vents shall be maintained in an operative condition at all times, and shall be replaced or repaired where defective. Nonrequired fire protection systems and equipment shall be inspected, tested and maintained or removed.
Types of Sprinkler Systems
BY VALERIE ZIAVRAS, Technical Services Engineer, NFPA
Wet Pipe Systems
Wet pipe sprinkler systems are the most common. In this system the sprinkler piping is constantly filled with water. When the temperature at the ceiling gets hot enough the glass bulb or fusible link in a sprinkler will break. Since the system is already filled with water, water is free to flow out of that sprinkler head. Contrary to what Hollywood would have you think, not all sprinkler heads will operate at once in this type of system. The temperature around that specific sprinkler head needs to be high enough to break the glass bulb or fusible link that is holding water back. Once that happens, water will immediately start flowing from only that head.
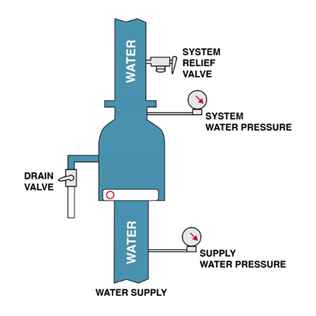
Dry Pipe Systems
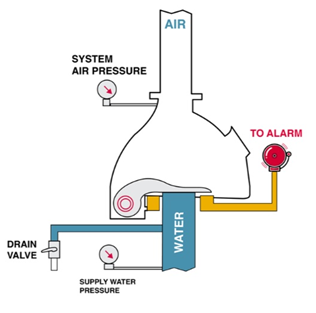
A dry pipe system is a great option for unconditioned spaces, or locations where the temperature of the space cannot be guaranteed to be high enough to prevent water in the system from freezing. It is important to note that a least the portion of the building where the water comes in and the dry pipe valve is located will need to have temperatures hot enough to prevent freezing.
Preaction Systems
Of all the sprinkler system types perhaps the most complicated is the preaction system. There are three different types of preaction systems, a non-interlock system, a single interlock system, and a double interlock system. The main difference between preaction systems and wet and dry pipe systems is that a specific event (or events) must happen before water is released into the system. This might sound similar to a dry pipe system, but the differences lie in what event triggers the release of the water:
- For a non-interlock system: the operation of detection devices OR automatic sprinklers
- For a single interlock system: the operation of detection devices
- For a double interlock system: the operation of detection devices AND automatic sprinklers
To better explain how these types of systems work, we will walk through an example using a room that is protected with sprinklers fed from a preaction system. In addition to sprinklers, the room has complete automatic heat detection. Typically, the detection system will have a lower temperature rating than the sprinklers. This will help ensure that the detection system activates before a sprinkler head operates. In this case, heat detectors that have a rating of 135°F will serve as our detection system, and the sprinklers will have a temperature rating of 165°F.
In a non-fire event, such as accidental damage to a sprinkler head that results in the glass bulb breaking, the system would fill with water in a non-interlock system, and water would flow from the broken sprinkler head. The same situation in a single interlock preaction system would not result in waterflow because the broken glass bulb will not trigger the system to be filled with water. Only the operation of detection devices will result in a water filled system for a single interlock system.
In the same room, the non-interlock and single interlock systems operate very similarly if there was a fire event. The heat detectors should activate first since they have a lower temperature rating. For both a non-interlock and a single interlock system, the activation of the heat detectors would result in the system filling with water. Then, if the temperature continues to rise, a sprinkler will operate. Since the “event”, heat detection, has already happened, the system is filled with water, and we would expect it to act like a traditional wet pipe system. In this same situation, a double-interlock system will not fill with water upon the activation of the heat detection. Instead, the system will only fill with water after the activation of the heat detection system and the operation of a sprinkler head. Therefore, a delay in water delivery similar to what is seen for dry pipe systems will occur. For this reason, double interlock preaction systems have similar size restrictions as dry pipe systems, whereas non-interlock and single interlock are just limited to 1000 sprinkler heads per preaction valve.
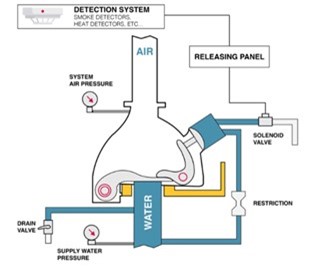
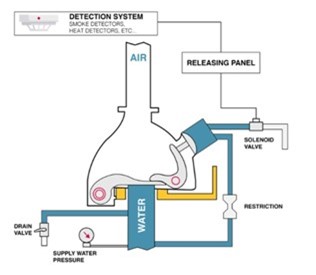
Each system type has its own unique benefits. It is important to consider the pros and cons of each system type when selecting which sprinkler system is appropriate for your specific environment. An entire building may be protected with a combination of systems. For example, one of the more common designs in the Northeast is to protect the portions of the building that are conditioned with a wet pipe system and to use dry pipe systems in the attic and other unconditioned areas. Combining different types of systems for full building protection allows the designer to consider each unique environment and apply the most appropriate system type to that space without sacrificing what is best for other areas of the building.
OSHA Standard - 29 CFR 1910.134
Personal Protective Equipment - Respiratory Protection
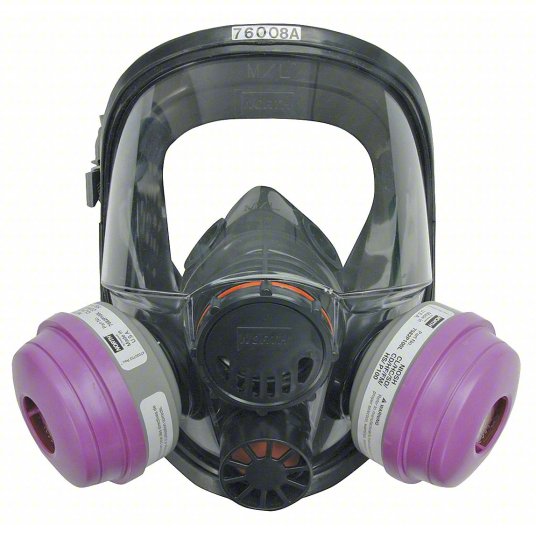
The goal in controlling occupational diseases caused by breathing contaminated air is to prevent atmospheric contamination by using effective engineering controls. When this is not feasible, appropriate respirators must be provided and a Respiratory Protection Program must be established. Types of respirators include disposable masks, half-mask air purifying, full facemasks (air purifying), and supplied-air respirators. Enforced by New York State Department of Labor - PESH Unit
COMPLIANCE ISSUES
- Engineering measures to control atmospheric contamination must be instituted where feasible.
- Employers must select and provide appropriate respirators for each job, when necessary, to protect the health of employees. Selection must be in accordance with ANSI Z88.2-1969 and respirators must be both Mine Safety and Health Act (MSHA) and National Institute for Occupational Safety and Health (NIOSH) approved.
- Employers must have a written Respiratory Protection Program including standard operating procedures for the selection, use, and care of respirators. The program must be evaluated regularly to determine its effectiveness. A qualified “Program Administrator” must oversee the Respiratory Protection Program.
- An employee’s physical ability to use a respirator must be determined by medical evaluation before he/she starts using a respirator and periodically thereafter (usually annually). The employer shall identify a physician or other licensed health care professional to perform medical evaluations using a medical questionnaire or an initial medical that obtains the same information as the medical questionnaire.
- Employees must use respirators according to instruction and training in the proper use of respirators and their limitations. Dust masks are not covered under the regulation. However, if the employer provides a respirator for voluntary use or if the employee provides his/her own respirator in the workplace, the employer is responsible for providing the employee with Appendix D of the Standard. Appendix D will explain to the employee precautions to be taken when using a respirator.
- Frequent random inspections of proper respirator use must be conducted.
- Proper respirator fit is essential. Respirator wearers must check the face-piece fit each time a respirator is worn. The wearer’s diligence in having the proper fit must be evaluated by periodic check. Fit testing can be qualitative or quantitative, and must be conducted at least annually.
- Respirators must be cleaned, disinfected, inspected, and maintained regularly.
- Respirators must be stored in a convenient, clean, and sanitary location.
- Surveillance of work area conditions and the degree of employee exposure must be determined.
- Recordkeeping – Requires medical evaluation, fit testing, and written Respiratory Protection Program.
TRAINING REQUIREMENTS
- Respirator users and supervisors must be trained in the proper selection, use, maintenance, and limitations of respirators.
- Training must include at least the following:
- Why the respirator is necessary and how improper fit, usage and maintenance can make the respirator ineffective.
- What the limitations and capabilities of the selected respirator are.
- How to use the respirator in emergency situations, including situations in which the respirator malfunctions.
- How to inspect, put on and remove, and check the seals of the respirator.
- What the respirator maintenance and storage procedures are.
- How to recognize medical signs and symptoms that may limit or prevent effective use of the respirator.
- The general requirement of the Respiratory Protection Standard.
- Training should be conducted annually.
First off, what is a CMMS? A Computerized Maintenance Management System (CMMS) is a program that can help streamline facilities management and asset management tasks. Its primary purpose is to help districts effectively maintain and manage their assets, such as equipment, machinery, vehicles, technology, buildings, and infrastructure.
What can a CMMS do for you?
- Improve Equipment Reliability. CMMS helps you coordinate and track maintenance tasks, reducing downtime by ensuring that equipment and assets are regularly inspected and PM’s are performed on time and with consistent procedures.
- Work order management. A CMMS will simplify work order entry, management and execution. Staff will have a consistent simple way to request work, managers will have dashboards with sort and filter options, maintenance teams will have all the proper information at their disposal to perform the fix.
- Asset management. A CMMS allows the tracking and organization of any fixed or movable asset within the facility or grounds. This allows you to see maintenance history, warranty information, photos, PDF operation manuals. Using your CMMS to track assets allows you to link work orders and inventory items to them for streamlined maintenance.
- Digital floorplans. A newer offering of CMMS is digital floorplans. Having these digital blueprints allows you to track assets and work orders on a live floorplan. These can be a valuable tool for improving efficiency, streamlining trainings, and increasing building awareness.
- Inspection audit trail. With the growing amount of required inspections tracking them can be time consuming and tough to produce the proper documentation upon request. Leverage your CMMS to log every inspection document and link it back to the asset. When the time comes for an audit or if an issue arises you can produce the required information quickly and efficiently.
- Improve Safety. Having your CMMS manage all safety inspections ensures they are not missed or delayed. Important maintenance procedures that improve safety can also be loaded into the system for consistent workflows.
- Improve internal communication. Having all notes, and previous work orders linked to assets greatly improves internal communication. There is no longer an opportunity to duplicate efforts when used properly. A properly configured CMMS will also communicate important information to the requestor about when the work will be started, when in-progress, and when completed.
- Make informed repair/replace decisions. A CMMS will allow you to make data driven decisions by analyzing purchase cost, lifespan, replacement cost, & maintenance costs to make the best decision of repair or replacement. With the amount of work orders that come through for equipment it is hard to identify a problem piece that is costing more to maintain than it would be to replace with new.
- Streamline inventory and parts management. Most CMMS softwares will have an inventory module that can track consumable inventory. This can be anything from paper products, cleaning products, water treatment chemicals, sidewalk salt, belts, filters and everything between.
The BCS is the key force in driving a new capital project for your district. The BCS is a thorough investigation of the infastructure of your district. It is performed by your architect and/or enginer, with critical input from you, the Director of Facilities.
NYSED Facilities Planning requires a BCS to be performed every 5 years. This survey is staggered accross the state so all districts do not perform them in the same year and they are also spaced across your region. By spacing out the BCS, it lowers the work load on Facilities Planning so they are not reviewing more than 700 BCS reports in one year. It also provides for a better bidding environment when districts in the same region are not competing with each other for a limited contractor pool.
As a Director of Facilities, you play a critical role in your district's BCS, as you will be counted on to provide insite into the deficiencies in your infrastructure. If you are new to your district, take time to read the previous BCS or two. Getting familiar with what deficiencies were identified and what their current state is, can be very insightful. You might not have the same architectural firm that performed the latest BCS, so getting a good understanding of what was identied will help you converse with your new architect.
It is strongly suggested that you keep a log of BCS/Capital Project needs. Finding an issue in the back of the crawl space will be hard to recall in 2 or 3 years when you are going to do your BCS. Add deficiencies as you find them to your log. You will certainly look impressive when you come to the kickoff meeting of the BCS and deliver a list of your findings. You should also enlist the input of your staff. Be certain your technicians, and custodial staff are given the opportunity to provide input. They are ones who see issues with regularity and can report these findings to you. Don't wait until the BCS to ask for this information, but make it a regular occurance so you can put their information into your log.
Speak with your architects about what tests or inspections can be done under your BCS. Take advantage of the funding that is alloted for the BCS process. Each district is allowed to use an amount based on the square footage of your buildings times a financial figure (last we $.41 per square foot) Here are a few things you can have done under a BCS:
- Thermal Roof Scan - Scan to look for wet areas on your roof or where you are having a heat loss issue.
- Video of Your Piping - Get a video of your storm and/or sewer lines to find collaped pipes or slope issues.
- Generator Loading - Check to see the load on your generator and verify life safety devices are being powered properly.
- Building Envelope Thermal Scan - Check to see where you are losing heat in your building. This can lead to energy savings.
- Scan Your Construction Prints - You can have your construction prints and construction manuals put into digital format.
- Utility Map - If you do not have a reliable print showing the location of all your incoming utilities, this is a great way to get that document created.
- Other things to consider are Building Security, Door Hardware Operation, Lighting Levels, and more.
Additional BCS Notes From Facilities Planning
- BCS is submitted into the NYSED Secure Business Portal by the Architect and Superintendent.
- The BCS is performed by a team that includes at least one licensed architect or engineer.
- Survey all normally occupied structures (not press boxes, storage, concession stands, dugouts, etc.).
- Waivers if requested:
- New buildings substantially completed within the year
- Buildings with extensive renovations substantially complete within the year
- 2022 reimbursement rate is $.41/sf (Rate is update after July 1st of each BCS year)
- Claim on SAMS Form FB at Items #138 & #139
- Expense incurred in 22/23 fiscal year – claim in 23/24 SAMS
STRATEGY FOR EXECUTIVE SUMMARY
- 5 Year Capital Facilities Plan is prepared with the Building Condition Surveys as the base.
- Conduct a building inventory via walk-around district property.
- Add additional buildings: sheds, dugouts, press boxes, storage containers, etc.
- The Executive Summary submitted with projects is expected to be a few pages, hence, a summary.
- Include the date completed/updated.
- Use District Letterhead.
- Prioritize work. Critical building element items take precedence.
- As projects are completed, those scope items are removed.
- As new scope is discovered, add it.
- Fiscal Associates expect a few pages.
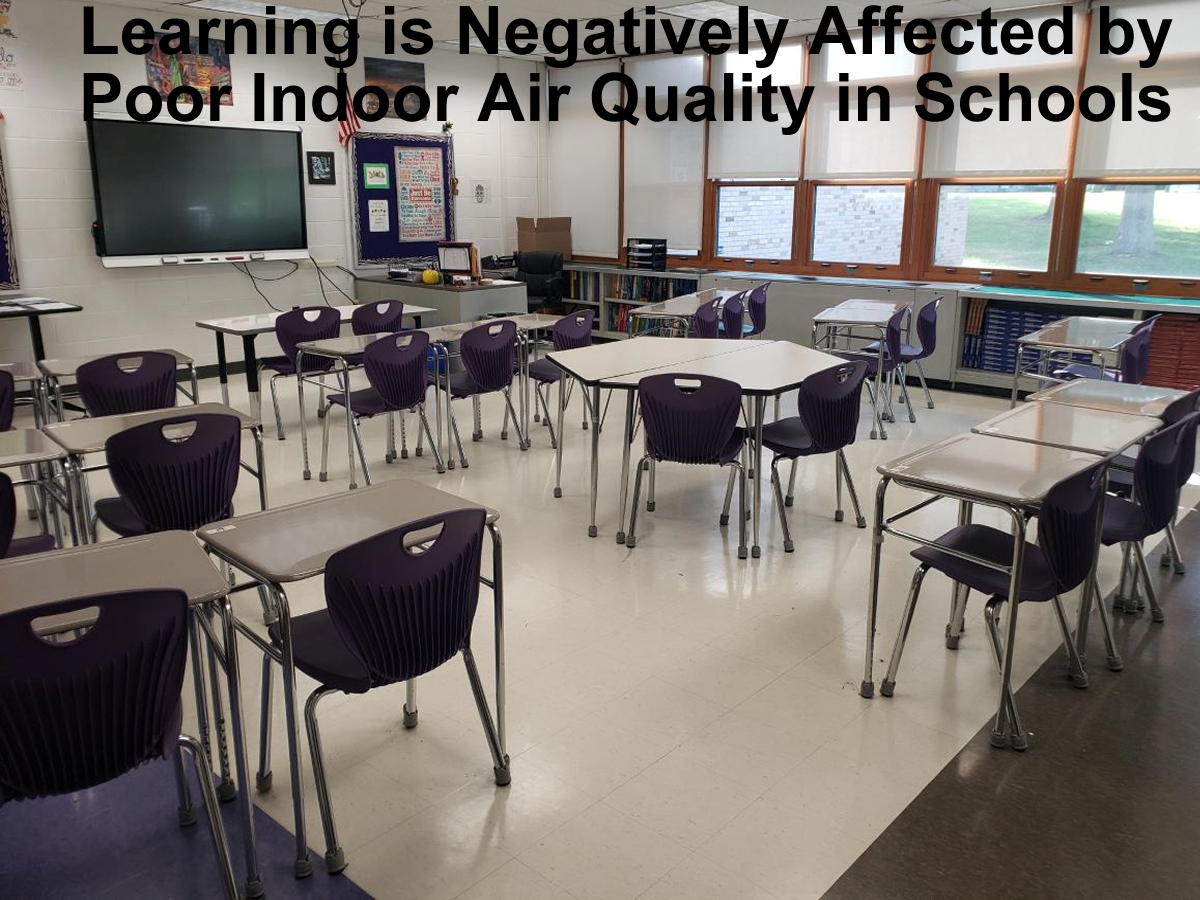
The Covid-19 pandemic has had a significant impact on school buildings, particularly with regards to ventilation. It is now widely recognized that indoor transmission of the virus is a major concern, and proper ventilation is essential to reduce the risk of infection.
Inadequate ventilation can result in stagnant air that can increase the concentration of airborne particles, including the virus that causes Covid-19. Poor ventilation can also lead to higher levels of carbon dioxide, which can cause symptoms such as headaches, dizziness, and difficulty concentrating, affecting students' academic performance.
To mitigate the risk of Covid-19 transmission in schools, the Centers for Disease Control and Prevention (CDC) has issued guidelines recommending that school buildings increase ventilation and improve air quality. This includes increasing the flow of outdoor air into the building, improving air filtration, and ensuring that ventilation systems are properly maintained.
Ventilation is crucial in maintaining healthy IAQ in public school classrooms. Proper ventilation ensures that indoor air is replaced with fresh outdoor air, reducing the concentration of pollutants and maintaining a comfortable temperature and humidity level. Inadequate ventilation can lead to the accumulation of indoor air pollutants, such as carbon dioxide, volatile organic compounds, and particulate matter, which can cause various health problems.
The American Society of Heating, Refrigerating and Air-Conditioning Engineers (ASHRAE) recommends a minimum of 15 cubic feet per minute (cfm) per person of outdoor air for classrooms. School districts should ensure that their HVAC systems are working efficiently and providing adequate ventilation to their classrooms.
The ASHRAE standard for ventilation in schools is a set of guidelines and requirements established by the American Society of Heating, Refrigerating and Air-Conditioning Engineers (ASHRAE) to ensure adequate ventilation and indoor air quality in educational facilities. The standard is known as ASHRAE Standard 62.1-2019, "Ventilation for Acceptable Indoor Air Quality".
The ASHRAE standard requires that schools provide a minimum amount of outdoor air to classrooms and other spaces, based on the occupancy and square footage of each space. It also sets requirements for the filtration of outdoor air and recirculated air, as well as guidelines for controlling indoor air pollutants.
The standard recognizes the importance of proper ventilation in creating a healthy indoor environment for students and staff. Inadequate ventilation can lead to a buildup of indoor air pollutants, including carbon dioxide, volatile organic compounds, and particulate matter, which can negatively impact student health and academic performance.
By following the ASHRAE standard for ventilation in schools, educational facilities can ensure that their indoor environments are healthy and conducive to learning. The standard provides a framework for effective ventilation system design, operation, and maintenance, helping to minimize the risk of indoor air quality problems.
Mold is a common problem in public school buildings, especially in areas with high humidity levels or water damage. Mold can grow on surfaces such as walls, floors, and ceilings, as well as in HVAC systems, and can produce allergens, irritants, and toxins that can affect indoor air quality. Exposure to mold can lead to respiratory problems, such as allergies and asthma, as well as headaches, fatigue, and other health issues. School districts should implement regular mold inspections, identify the source of the mold growth, and take appropriate remedial action, such as repairing leaks and improving ventilation to prevent mold growth.
The New York State Mold Regulation (Article 32 of the New York State Labor Law) is a set of guidelines and requirements designed to protect the health and safety of building occupants by preventing and remedying mold growth in indoor environments. The regulation was implemented in 2015 and applies to all commercial and residential buildings in the state of New York. School districts can model responses to mold issues requiring remediation by utilizing this regulation as a guideline and reference. DOL Mold Progragm.
The regulation requires that all mold assessments and remediation activities be conducted by licensed professionals who have completed appropriate training and certification. This ensures that mold-related activities are performed by qualified individuals who have the necessary knowledge and skills to identify and remediate mold growth.
The regulation also establishes specific mold assessment and remediation protocols that must be followed, including the development of a mold remediation plan, use of appropriate personal protective equipment, and the proper disposal of contaminated materials. In addition, the regulation requires that building owners or managers provide written notification to occupants about mold remediation activities and the results of mold testing.
By implementing these guidelines and requirements, the New York State Mold Regulation aims to improve indoor air quality and protect the health and safety of building occupants. It also provides a framework for effective and safe mold remediation practices, helping to minimize the risk of mold-related health problems and property damage.
Filter changes are an essential part of maintaining healthy IAQ in public school classrooms. HVAC systems use filters to remove particulate matter and other pollutants from the air. Over time, these filters can become clogged with pollutants, reducing their effectiveness and increasing the concentration of indoor air pollutants. ASHRAE recommends that HVAC filters be changed every three to six months, depending on the filter type and the level of indoor air pollution. School districts should implement a regular filter maintenance schedule and ensure that their HVAC systems are using the appropriate filter type for their building's IAQ needs.v
The EPA Tools for Schools program is an initiative aimed at improving indoor air quality in schools across the United States. The program provides a range of resources, guidelines, and tools to help schools identify, prioritize, and address indoor air quality issues that can impact the health and academic performance of students and staff.
The program offers a comprehensive Indoor Air Quality (IAQ) management plan that outlines best practices for maintaining a healthy indoor environment, including tips for cleaning, maintenance, ventilation, and pest control. The program also provides guidance on how to develop and implement a comprehensive IAQ management plan, including conducting indoor air quality assessments, identifying and prioritizing indoor air quality concerns, and developing and implementing effective corrective action plans.
The EPA Tools for Schools program also provides a range of free resources to help schools improve their indoor air quality, such as fact sheets, checklists, posters, and presentations. Additionally, the program offers training and certification courses for school staff and administrators, as well as technical assistance and support from EPA professionals.
By participating in the EPA Tools for Schools program, schools can improve their indoor air quality and create a healthier, more productive learning environment for students and staff. The program provides the necessary resources, tools, and support to help schools effectively manage indoor air quality and ensure a safe and healthy environment for all.
The EPA document "Mold Remediation in Schools and Commercial Buildings Guide is a comprehensive resource that provides guidelines for the identification, assessment, and remediation of mold in schools and commercial buildings. The guide offers a step-by-step approach to mold remediation, including detailed instructions for assessing the extent of mold contamination, developing a remediation plan, and selecting appropriate remediation methods.
The document also provides guidance on personal protective equipment, proper containment procedures, and effective cleaning and disposal techniques. It includes detailed information on preventing mold growth in the future, such as identifying and addressing sources of moisture, improving ventilation, and controlling humidity levels.
The guide emphasizes the importance of taking a proactive approach to mold prevention and remediation in schools and commercial buildings. It recommends that building owners and managers establish an Indoor Air Quality (IAQ) management plan and conduct regular IAQ assessments to identify potential sources of mold growth and other indoor air pollutants.
By following the guidelines outlined in the EPA's Mold Remediation in Schools and Commercial Buildings Guide, building owners and managers can effectively address mold contamination and ensure a healthy indoor environment for building occupants. The document is a valuable resource for anyone involved in mold remediation or indoor air quality management in schools and commercial buildings.
School districts should prioritize IAQ improvement in their buildings and work with HVAC professionals to ensure that their HVAC systems are operating efficiently and effectively. By taking these steps, school districts can ensure that their students and teachers have a safe and healthy learning environment.
In conclusion, IAQ in public school classrooms is an essential issue that affects the health and academic performance of students and teachers. Adequate ventilation, mold prevention, and regular filter changes are critical in maintaining healthy IAQ in public school classrooms.
ADDITIONAL HELPFUL LINKS
Click for the Link to the EPA Indoor Air Quality Tools For Schools Kit
Click for the Link to the EPA Indoor Air Quality Master Class Training Webinar
Click for the Link to EPA Indoor Air Quality Guide on Maintaining Healthy Air
Click for the Link to EPA Indoor Air Quality One Page Guide
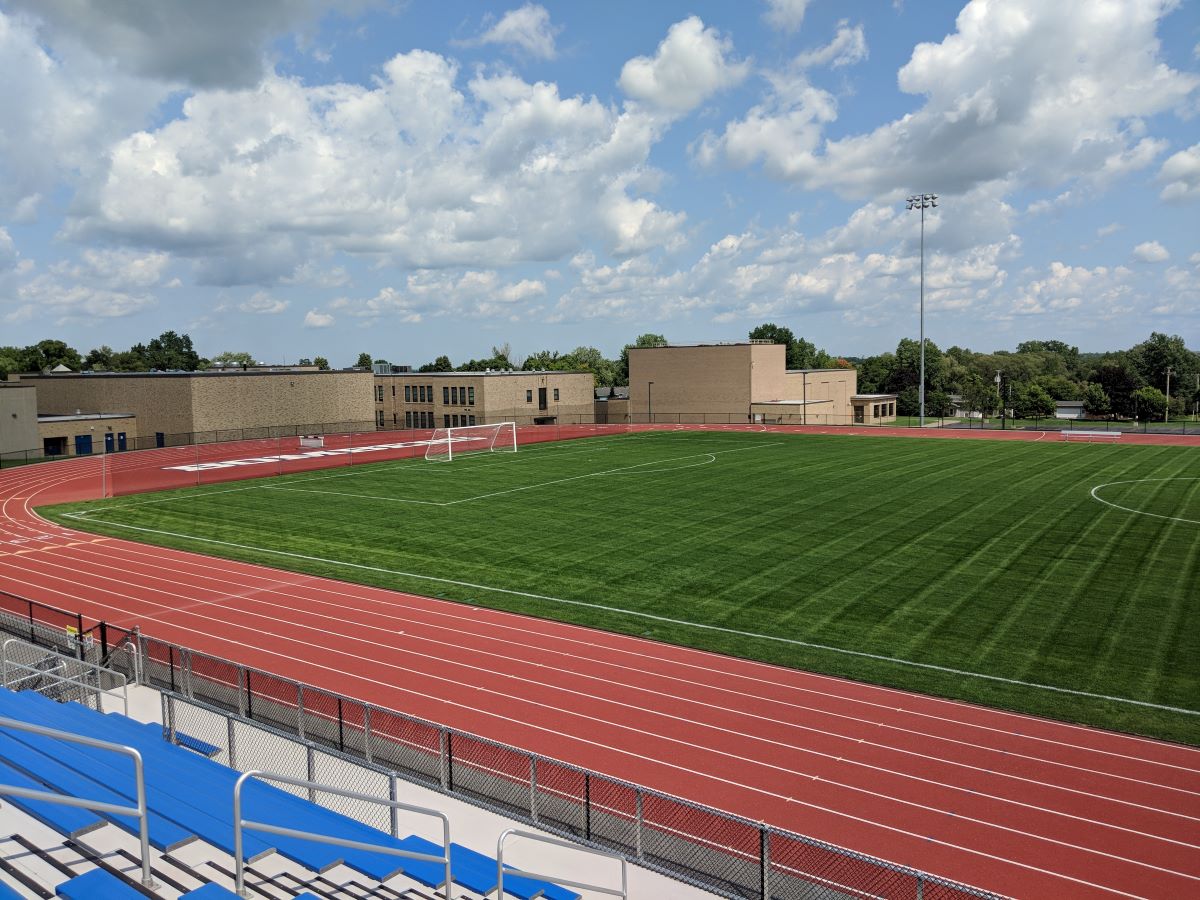
Introduction To Athletic Field Maintenance
Athletic fields are the community's window to the schools. Well-maintained aesthetically pleasing fields have a very positive effect on the people you need to support your efforts.
The first thing you must understand is athletic fields are designed to be damaged. Athletic practices, games and events put stress on your playing surfaces. Having said that, our job is to keep them healthy and well maintained so they recover quickly. An athletic field expert will tell you there are constant challenges and sometimes you need to think outside the norms of growing grass. Athletic Field Maintenance is a process, not an event and you should attack the process one field at a time. The following outline may help you in your decision-making process.
- Manage Expectations - Meet with the powers that be and ask them what they expect field quality to be. Everyone wants Yankee stadium until they see the cost.
- Plan Your Work And Work Your Plan - A calendar can be your most useful tool both in getting equipment, materials and maybe even some extra labor to help meet or exceed expectation.
- Think A Season Ahead - When baseball season is under way audit your fall sports fields and plan.
- Do A Little a Lot, Not A Lot A Little - Its easier to carve 30 minutes out to say repair a pitcher’s mound than it is to carve out 2 days to rebuild it.
- Do Not Be Afraid To Know What You Do Not Know - Nobody can be an expert in all things. Groundskeepers in general love to help solve problems. They probably have made all the mistakes that you might make and can help head them off.
- Networking Is A Valuable Skill - Getting involved with your associations is time well spent!
I hope this helps you whether you are a seasoned veteran or brand new. Really the best piece of advice is never stop learning.
Baseball Infields
Speaking with Nicole Sherry, Head Groundskeeper for the Baltimore Orioles, she shared that most of the job skills required to excel at maintaining a baseball field are learned on the job. Nicole is a graduate of the University of Delaware with a degree in agriculture, but at no time during her education were classes devoted to baseball infields. Nicole stated that she learned by watching those she worked with, asking lots of questions, and having a passion for job did not hurt.
The outfield at Camden Yards in Baltimore has Kentucky Bluegrass rooted in 12 inches of sand. That isn’t something most of us can do to our outfields. We don’t have the budgets to create a MLB field, so we do the best we can with what we have. We also don’t have the staffing to create what every community member and coach would like to see our fields and grounds look like. Nicole has around 30 people on her staff working on her field (you bet it is her field). Smaller school districts have one or two people working on sports fields and it is difficult for a small district with a limited staff to have a person dedicated to sports fields, let alone just one field. Even in the smaller districts, we have a softball field, baseball field and modified or JV fields to get ready. There are days in the season when we must get 2 or 3 fields ready to play, and more in the larger districts who also have lacrosse as a spring sport.
Here are a few tips to help get the staff you need to make your fields look amazing on a limited budget:
- Get Some Of The Girls Involved - Nicole is one of 2 female groundskeepers in MLB and there is room for more at many levels. As Nicole suggested, reach out to some of the girls who have graduated and are still in the area and have a passion for softball or baseball. They probably miss the game and getting them involved allows them to stay connected to the sport. They also have an opportunity to learn a skill that can be a career.
- Visit The College And Minor League Parks Nearby - You’ll find that those maintaining fields have tremendous pride in their fields and they love to show off their fields. Reach out to them and see if you and your groundskeeping staff can spend a day watching them work. But just don’t go there to watch, chip in and help, and also ask questions. Nothing like learning with hands on experience.
- Attend Local Training Sessions - When your sports field suppliers offer training classes, send your staff. You must invest in your staff so that they can have the skills to produce the results you desire.
- Partner Up With Neighboring Districts - Host a field day and bring in a few vendors to talk about equipment for fields and also expects on natural grass and infield skins. Great way to share knowledge amongst those who are doing the work on the fields. It is better for all the kids when they are playing on well-groomed fields. Don’t be the school that kids don’t want to play at because your fields are in poor condition.
- Create A Fields Budget - You should know exactly how much labor and material you commit to your sports fields each year. If the number is low, it gives you a chance to make a reasonable request for additional funds. If you are committing a lot of labor and materials to your fields, share this information with the appropriate people so they understand the commitment the district has to sports fields.
- Artificial Turf Infields - Without trying to sound biased, I will say that putting in an artificial surface infield reduces staff labor and offers conditions to play when a clay infield would not permit a game. That being said, there is just something special about playing on a traditional baseball or softball field. Sliding into home is not quite the same when it is not done on clay. The appearance of a freshly groomed baseball or softball field can be amazing. As a baseball fan and traditionalist, I will gladly commit the extra hours of labor and cost of materials to provide a surface that the greatest in the world play on each season.
In this section, we will touch on a few basic topics that constitute your lawns and sports fields, which are soil, grass, fertilizing, watering, weed control, and mowing. As stated, we cannot cover all the necessary details, but we will try to deliver an overview to provide a sufficient base for you to expand upon.
Soil
If we are to provide a healthy turf, we need good soil. No different than a farmer needs soil rich in nutrients to grow high producing crops, we too need good soil to cultivate strong and healthy grass. Unfortunately for us, we don’t have the luxury of being able to work the soil each spring like a farmer does. The turf areas we have are what we must work with. Anyone who has replaced the sod on a football field knows the work and costs that go into such a venture. We do not have NFL budgets and we cannot just regularly replace sod when it gets damaged. We need to improve and maintain the conditions we have, and the work starts at the bottom, which is our soil. Soils vary across the state based on your location. Some are sandy, some have a lot of clay, some have lots of rocks in the soil and so on. To know how to maintain the soil, you need to understand the makeup of your soil. That is accomplished by taking a soil sample and having it analyzed. You can have this done by the companies who supply you with fertilizer, grass seed or sod. You can also contact your local Cornell Cooperative representative. If you are fortunate enough, you may find that your Cornell representatives are also willing to offer their time to speak with your students at your district. The students love a day outside to learn.
A soil sample is gained by taking a core, which is about an inch in diameter, and around 6 inches deep. These core samples are taken from multiple locations in your fields, and these are used to measure the PH of your soil along with the nutrient status. This information will aid in determining what is the best fertilizer to apply to your turf. You can also use core samples to measure the compaction of your field.
There are other steps you can take to help improve your soil such as aeration, dethatching, and top dressing. Aeration is perforating the soil with small holes to allow air, water, and nutrients to get to the grass roots. The main purpose of aerating is to relieve the soil compaction conditions. When the ground is hard as rock, it takes more time for water to penetrate the soil and for roots to travel. Lots of sports activities and large area mowers will compact soil over time and the only way to correct this is by aeration. When aeration is done during active growing times, the areas exposed with the aerating tines will fill in quickly. Aerating a day after rain is better than trying to do this when the soil is dry and hard.
Thatch buildup will harm your fields by restricting water from penetrating the soil and it can also create conditions that will make your lawn susceptible to disease or mold growth. You typically get a thatch problem when you are mowing too infrequently, or the length of cut is excessive. If you have a thatch problem, remove it as soon as possible to reduce the risk of further damage and problems. Top dressing is performed by spreading a layer of sand or some type of mixture of sandy material evenly over your lawn surface. Topdressing adds nutrients to the soil and the sand improves drainage. Top dressing is a program that once started, you must continue to use it annually if you want to effectively maintain and improve the quality of your turf.
Grass
Cool season grasses are the most common grasses found in New York. Some of these varieties include: Kentucky Bluegrasses, Fine Fescues, turf type Tall Fescue, and Perennial Ryegrasses. Grass that you plant in shaded areas may not be the same that you plant in sections that receive full sun. Often we will use a mixture of grasses to take advantage of the strengths of each one of them. I would suggest you walk your turf areas with either your groundskeeper or your seed supplier representative. Learn the ins and outs of your grassy areas. Find out what the past problems were and work together to create a plan to address these deficiencies.
Kentucky Bluegrass - Kentucky bluegrass is what's known as a perennial, cool-season lawn grass. This means it comes back year after year and grows most vigorously during the cool seasons of fall and spring. Kentucky Blue Grass has the greatest cold hardiness of all the common cool-season U.S. lawn grasses. Compared to Tall Fescue, traditional Kentucky Bluegrass varieties have relatively shallow roots, which typically mean a lower tolerance for heat and drought. Even though Kentucky Blue Grass does not hold up in a drought, it does prefer full sun and does have limited shade tolerance.
Tall Fescue - Tall fescue offers greater heat tolerance than other cool-season grasses and greater cold tolerance than warm-season grass options. Tall fescue tolerates shade better than all common cool-season lawn grasses except fine fescues. It establishes easily from seed and germinates more quickly than Kentucky bluegrass. Tall fescue's naturally extensive root system can reach 2 to 3 feet deep, much deeper than other cool-season grasses. This contributes to superior heat and drought tolerance. Tall fescue has coarse, sturdy blades and deep roots, making it a great option for high-traffic lawns.
Fine Fescue - Due to their superb shade tolerance and ability to recuperate from stresses, fine fescues are often mixed with tall fescue to enhance performance in shady areas. It is drought resistant and rather than wither and die, this grass will turn brown until you water it. Fine Fescue is a blend of other fescue grasses.
Perennial Ryegrass - This is a cool-season lawn grass with many uses—it's a fast grower, a good companion for other grasses and seed blends, and it's low maintenance with many built-in resistances to pests and diseases. It has a few downsides, like patchy growth or difficulty handling shade or higher temperatures, but its pluses outweigh its minuses. It will go dormant in winter but returns in the spring in the North. Perennial ryegrass is so durable that it is a popular grass type for golf courses in northern climates. This is another grass with tough blades and a strong root system. In addition to being able to withstand heavy foot traffic, perennial ryegrass is also fast-growing and drought-resistant. Because this grass is a fast growing grass and durable, many schools will use this to maintain areas around goal creases on their soccer and lacrosse fields. Throw down some seed and let the players work it into the ground with their spikes.
Fertilizing and Watering
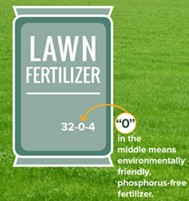
Fertilizers will be identified with a set of three numbers, which indicate the percentage of Nitrogen, Phosphorus, and Potassium, which is also identified as NPK (the chemical symbol for each of these elements). Nitrogen runoff impacts both surface and groundwater quality on Long Island. Suffolk and Nassau counties have their own fertilizer laws to restrict nitrogen from fertilizer from reaching waterbodies. Visit the counties' websites for details about their respective regulations.
Watering can be a bit tricky. I learned this a year ago when my newly installed sod on my football field was turning yellow in a few sections. It is the middle of summer and both my groundskeeper and myself assumed the new grass was stressed and needed more water. After a call to Dr. Rossi at Cornell, I learned that I was overwatering the field. We turned off the water and watched the yellow grass turn a nice dark green in a short period of time. So how much should we water a sports field. It is recommended by the Sports Turf Managers Association that one inch of water per week is sufficient. The lesson here is that too much water is not good and it is also costly.
Weed Control
Years ago, we would just go around our fence lines with Roundup and save a lot of time and labor. However, that changed in 2010. Under the State Education Law and Social Services Law, no school or day care center in NYS may apply pesticides on playing fields or playgrounds, except when a nonroutine emergency application is granted by the school district board, NYS Dept. of Health (DOH), or NYS Dept. of Environmental Conservation (DEC). The law applies to all public and private schools and day care centers across NYS. These include public school districts, non‐public schools, boards of cooperative education (BOCES), child and Head Start day care centers, and school or day care centers located at a college or university. If a pesticide application is needed to protect against an imminent threat to human health and the application occurs before a 48-hour notification can be issued, the school or day care must notify DOH using the Emergency Pesticide Application Notification Exemption Reporting Form within three business days of the application. DOH reviews this form to ensure that the circumstances warranted an emergency pesticide application. The school or day care facility should always make a good faith effort to provide the written notification required by the Neighbor Notification Law (see the section on Pest Management for details).
Here is a link for further details on the Pesticide Application Requirements at Schools.
We are extremely fortunate in NYS to have a world leading resource in our backyard, and that is Cornell University. They have regular YouTube presentations, offer training classes, and provide a unbelievable amount of information on this subject. Here are couple of outstanding links for more information.
- Cornell Turfgrass
- NYS Turfgrass Association
- NYS DEC
- YouTube For Cornell Webcast
- Sports Field Safety Checklist
- Cornell Guidelines for Turf Management
Here are a few helpful hints on weed control from Cornell University’s Department of Horticulture:
- Repetitive seeding: Add 4 lbs grass seeds per 1,000 square feet every two weeks in late summer to early fall (perennial ryegrass germinates the fastest).
- Mulch: Adding a weed barrier on the ground in playgrounds and fence lines using cardboard, fabric, or rubber covered with 4-6” of untreated mulch will prevent plants from growing. Add another 4” layer of mulch every year.
- Thermal weeding: Intense heat delivered using a propane weed torch or a steam weeding device will injure or kill young plants. It is best used in the spring and early summer when weeds are small and are most effective on annual plants.
- Turfgrass species: Low traffic areas can be seeded with fine fescues (Intrigue and Columbra II produce compounds that suppress weeds). Tall fescues have deeper roots, are more drought-resistant, and are less prone to grub damage.
- Fertilizers: Fertilizing the grass twice a year using 0.5 lbs nitrogen per 1,000 square feet near Memorial Day (spring) and Labor Day (fall) will increase turfgrass density.
- The length of cut should not exceed 1/3 of the length of your grass. In other words, if your grass is 4-1/2” inches tall, the most you would want to cut is one third of that, or 1-1/2”. You would then set your mower height to no less than 3” based on this information.
- Always mow with sharp blades and create a routine to regularly sharpen your blades and to have spares to rotate them often. If you don’t have a professional blade sharpening machine, you need to buy one. A dull mower blade may cause the turf to have a brown cast or look ragged after mowing and can make the turf more susceptible to disease.
- If the weather has kept you from mowing, do not try to get caught up in one mowing. Excessive grass clipping will create thatch and will damage your turf. If you must mow more than the recommended length, be sure to remove the excess clippings.
- Changing the direction in which you mow will help to allow the blades to grow straighter and healthier. Grass blades tend to grow in the direction in which they are mowed. Alternating the pattern allows the blades to return to a more upright position. If you mow the football field by length the first time, mow by width the next time and then at an angle.
Mowing
As school districts of various sizes, we do not all have the same equipment, nor do we have the same staffing levels, or budgets. Larger districts may have a dedicated grounds staff, while smaller districts may have the same person mowing who also works on the HVAC systems. Mowing is a never-ending task during the growing season. You probably pay closer attention to the mowing on your sports fields than you do to the grass areas around your buildings, so you may have different mowing criteria for specific areas. If you do, then you have given thought to your mowing procedures and have a plan in place, which is very good. If you don’t have a plan in place, you need to create one. The baseball coach will not complain about clumps of grass near the courtyard, and the Superintendent will want the grass perfect by the main entrance. Take all of this into account knowing where you need to spend more time and where you can get away with less attention to detail. So here are some basic dos and don’ts for mowing.
ARTIFICIAL TURF
THIS SECTION STILL UNDER CONSTRUCTION
Brochure For Synthetic Turf Maintenance10 Things For Synthetic Turf Maintenance
Just a few items of note.
- This latest round of lead testing must be completed by December 21, 2025.
- Currently, there are no forms to complete for reimbursement of remediation costs. When this information becomes available, we will update this page with instructions, forms, and links to apply for funds.
- Water samples are best taken early in the morning.
- Water must not have been used for no more than 18 hours and no less than 8 hours.
- You can get sample bottles from your water testing lab and draw the samples yourself, or you can pay the lab to perform the task.
- When drawing a sample, you are to sample the water that first comes out of the faucet. You are not to flush the faucet before taking a sample.
- Faucets with mixing valves do not need to be tested, but must be marked as "Non-Potable Water, Not For Drinking".
New York State Laws and regulations require all public school districts and Boards of Cooperative Educational Services (BOCES) to test drinking water for lead contamination. They must also act when results from compliance sampling for lead exceed the actionable threshold. When results from compliance sampling/samples of any fixture exceed the lead action level (5 micrograms per liter), it must be immediately taken out of service until actions are taken to mitigate the lead levels. Schools must notify staff, parents, and guardians of students in writing when outlets exceed the action level indicating contamination. They also need to maintain test results, including the full laboratory reports, on their websites.
Plumbing materials may add lead to drinking water. The materials include pipes, new brass faucets, and fittings, as well as valves (including those advertised as lead-free). Water not consistently in use runs the risk of having higher lead levels if the plumbing contains lead. This is why it is important to identify and address elevated levels of lead in drinking water in schools as part of reducing a child’s overall exposure to lead in the environment.
Revisions to Public Health Law (PHL) §1110, which governs school potable water testing and standards, went into effect December 22, 2022. The key revisions to the law which will require changes to Subpart 67-4 include:
Information for Schools
- The revised action level of lead in drinking water is 5 parts per billion (ppb), reduced from 15 ppb.
- School buildings deemed “lead-free” are no longer exempt from testing requirements.
- Should it be necessary to provide water to school occupants following an outlet being taken out of service due to an action level exceedance, it must be provided free of charge.
- Copies of lead sampling results including laboratory reports and any lead remediation plans must be made available to the public and posted on the school’s website.
- Compliance testing will occur on a triennial (every 3 years) schedule.
Guidance Manual: Lead Testing in School Drinking Water Program - February 2021
This guidance manual provides information and templates to assist New York State schools to develop and implement plans to test for lead in school drinking water, as well as examples of best management practices that a school may choose to implement to minimize the potential for exposure to lead in school drinking water. This manual will be amended to incorporate revisions to PHL §1110, but continues to be a useful resource.
Testing and Remediation
Public schools and BOCES must test all water outlets that are used, or could potentially be used, for drinking or cooking by or for students. Watch this NYS DOH video that shows how to sample for lead in school drinking water. You may also refer to the Sampling Quick Reference Guide Schools must use a laboratory that is approved to perform lead testing in potable water by the Department’s Environmental Laboratory Approval Program (ELAP).
Find a Certified Laboratory for Conducting Lead Testing in School Drinking Water.
Following any lead action level exceedance, the school must take remedial actions to mitigate the lead level at the exceeding outlet(s). These sample signs (en español) may be posted on outlets.
View the presentation provided to the schools for the 2023-2025 compliance period for testing, remediation, and reporting information.
Reporting
- Schools are required to report lead results to the public, their local health department, the NYS DOH and NYS Education Department.
- To report test results and other required information to the NYS DOH and NYS Education Department, schools must complete the School Lead in Drinking Water Reporting form using the NYSDOH’s electronic reporting system called HERDS. To access the form in HERDS, schools must use the Health Commerce System (HCS). For assistance in gaining access to the HCS and HERDS review these instructions.
- If you need additional assistance, email Send Email or call 518-402-7650.
Additional Resources for Schools
Lead In School Drinking Water Status Report
The biennial status reports provide an overview of the program’s status, including a summary of test results, program implementation updates and actions taken.
- 2017 Lead in School Drinking Water Status Report
- 2019 Lead in School Drinking Water Status Report
- Lead in Schools Report to the Governor
Information For Families
You can find your school’s available lead test results on Health Data NY by searching the Lead Reporting Interactive Search.
Tips For Success
If you memorized this entire handbook, that knowledge would only be a small percentage required to be a successful Director of Facilities. Here are a few tips to help you on the path to success.
- Assign tomorrow’s work orders today. You can do this when you first arrive in the morning but doing them before you leave for the day is good practice. If you get tied up in the morning, you'll know that your staff is fully loaded with their assignments.
- Promptly Respond to Emails. Answering emails in a prompt manner sends a positive message. You will always have emails that you note “I will get to that one later”. Answer the ones that can wait before you leave for the day.
- Over Communicate – If you are working on a repair for a staff member, let them know when you expect the work to be done and if that timeline does not meet their expectations, explain the circumstances to them. When staff do not hear from you, either in writing or personally, they feel they are being ignored.
- Follow-up – It never hurts to touch base with staff to see how things went on a task and to be sure the expectations of the requestor have been met.
- Bond with your staff – Your staff is what will determine your success or failure. Be sure your goals are aligned, and you are all working together. When times get tough, and they will at some point, you want your staff there helping to get over obstacles, not creating more obstacles for you.
- Regularly Scheduled Meetings – Have a weekly meeting with your Maintenance Staff, Custodial Staff, Athletic Director, and your direct supervisor. Discuss the plans for the week, upcoming events, problems that arise, and any other issues. Make sure your staff is providing input and if not, solicit it by asking questions they need to respond to. “John, we are having a problem with the drinking fountain that continues to trip out. What do you think might be the problem? We need to correct this issue, so what suggestions can you make to resolve this?”
- Plan– schedule inspections, preventative maintenance, and disruptive work in advance so not to interfere with instruction time in your buildings.
- Use the Oven, not the Microwave – Do not try to get all the tasks done in a hurry. Pay attention to details and do the job so expectations are met or exceeded. Do not rush work (microwave) when a little extra time and effort (oven) will grant better results and fewer complaints.
INSPECTION CHEATS SHEET
This is a great link for a cheat sheet for inspections. PDF Inspection List and MS Word Inspection List Use this to schedule inspections and make sure you are not overlooking a requirement. You could have other inspection requirements at your district, so you can adjust this sheet accordingly.
Acknowledgements
The following information was developed and created as a result of the NYS Comptroller audit of SED’s safety plan programs.
These documents were created to allow districts a better manner of complying with the SED requirements, Commissioner's Regulations and dates that support them.
OUTLINE
NYSED Requirements
- Safety Teams and Planning
- District-wide Safety Team
- Districe-side Safety Plan
- Building-level Safety Team and Planning (Emergency Response Plan)
- Emergency Response Team
- Post Incident Response Team
- Test The Plan
- Other Considerations
STATE REQUIREMENTS
NYS Education Law 2801-a
School Safety Plans
The board of education or trustees, …of every school district within the state, however created, and every board of cooperative educational services and county vocational education and extension board and the chancellor of the city school district of the city of New York shall adopt and amend a comprehensive district-wide school safety plan and building-level emergency response plans regarding crisis Intervention, emergency response and management…Such plans shall be developed by a district-wide school safety team and a building-level emergency response team.
Commissioner's Regulation 155
District-wide school safety plan means a comprehensive, multi-hazard (ALL-HAZARD) school safety plan that covers all school buildings of the school district, BOCES or county vocational education and extension board, that addresses crisis intervention, emergency response and management at the district level.
Schools must develop and annually update school safety plans each year.
Original plans created and filed with the Education Department
District-wide Safety Plan (DWSP):
Building-level Emergency Response Plan (ERP):
SAFETY TEAMS AND PLANNING
DISTRICT-WIDE SAFETY TEAM
- District-level team appointed by the board of eductation
- Create/annually update the District-wide safety plan and submit to the school board for adoption.
- Team members include but not limited to:
- Representative of school board
- Administrator
- Teacher
- School safety personnel
- Parent organization
- Student representative (by approval of the board)
Developing/Updating the Plan
Once a DWST has been designated for the school year, the DWST must;
- Establish Authority (As mandated by FEMA)
- Identify safety leadership
- Span of control
- Communication procedures and protocols
- Transfer of command procedures
- Recovery
- Review and update the District-wide Safety Plan
- Complete the self assessment form to help in discovering vulnerabilities or inconsistencies within the plan.
- Checklist for compliance
- Offer amendments to the Superintendent annually
- Stay informed and train on the latest school safety procedures
BOARD OF EDUCATION
ROLE: District oversight of District-wide Safety Plan
Responsibilities:
- Review and approve all district and Building-level safety plans.
- Adopt the District-wide Safety Plan by SEPTEMBER 1ST of each year.
- Post the plan on district website;
- No later than 30 days from adoption;
- No later than OCTOBER 1ST of each year; AND
- Distribute copies of DWSP to local emergency response agencies.
Prior to adoption of the District-wide Safety Plan
- Ensure AT LEAST ONE PUBLIC HEARING is held for school personnel, student, and pubic participation.
- Make plan available to the public for a 30 day comment period.
SUPERINTENDENT
- Role: Chief Executive Officer
- Responsibilities:
- Chief Emergency Officer (Role may be delegated to a competent employee(s).
- Lead efforts of the DWST – selection and coordination.
- Ensure completion, update, and submission for all safety plans.
- Coordinate communications between staff, law enforcement, and other emergency agencies.
- STAFF TRAINER
- Superintendent shall coordinate required safety, security and emergency training for district and school staff by SEPTEMBER 15TH each school year.
- DWSP - ALL DISTRICT EMPLOYEES
- ERP - BUILDING LEVEL EMPLOYEES
- Ensure other yearly requirements are completed such as safety drills (e.g. lockdown drills, fire drills, evacuation drills) – Education Law section 807.
- Assist in the selection of security technology and procedures (e.g. building access, surveillance, and communications).
Responsibilities
BUSINESS OFFICIALS
- Role: Chief Financial Officer
- Responsibilities:
- Assist superintendent to fulfill state and federal financial requirements and documentation.
- DWST member
- Financial resource management and acquisition from state and federal agencies during an emergency.
- Important role with continuity of operations and recovery
DIRECTOR OF FACILITIES
- Role: Chief Operations Officer
- District Level – Operations Section Chief
- Building-level - Includes planning and logistics
- Responsibilities:
- Assess building systems and resources for plan development
- Track building assets for value and risk
- DWST member
- BLERT member
- May be designated as incident safety officer
THIS SECTION STILL TO BE COMPLETED
At this time, a mandate for radon testing does not exist per se, however some school districts have done testing in the past when radon has been a hot topic in the news. There have also been efforts to legislate a requirement for radon testing, but they have not progressed into law or a required test. There is a requirement for districts to understand and mitigate any radon hazards.
One of the things that is of concern with so many new Directors of Facilities on the job is a loss of institutional knowledge around radon. In the past, districts may have brought in more fresh air into classrooms or installed crawl space venting fans or made other changes. The new Directors may not know about the changes and why they were made. Since this is not a requirement, some may not see the importance of sharing or documenting changes and steps that were taken in a district with respect to radon, may not be passed on.
Interpretation of Radon Testing Results
WHAT IS RADON?
Radon is a naturally occurring radioactive gas that is odorless, colorless and tasteless. It comes from the natural decay of uranium that is found in nearly all soils in the United States. Radon gas is in the air, both inside and outside. When people are outside, the radon levels are so low that they pose no health threat. Unfortunately, radon gas inside homes and schools can build up to levels that become unhealthy.
WHY IS RADON A PROBLEM?
National studies have found that exposure to radon is linked to lung cancer. Radon is the second leading cause of lung cancer, after cigarette smoking. There is no scientific evidence that children are at a higher risk than adults from radon. The risk estimates are based on exposure over a lifetime, and most lung cancer cases occur after age 60. Radon does not appear to be linked to any other diseases, such as asthma. When considering the risk to children, keep in mind that children spend 12 percent of their time in school and more than 75 percent of their time at home, during the year. It is important to test schools for radon; it is even more important to test your home and mitigate if there are high levels of radon.
HOW DO I READ THE SCHOOL RADON TEST RESULTS?
The Environmental Protection Agency recommends that all frequently occupied rooms (such as classrooms and offices) that are in contact with the ground, or are directly above unoccupied areas of the basement, should be tested. Every first-floor or basement room tested should have a number; you may need to ask for the coding scheme if the numbers are codes. Each room should have an entry on the test results form next to the units “pCi/L,” or “picocuries per liter.” That is its radon concentration.
WHAT LEVEL OF RADON IS A PROBLEM AND HOW CAN IT BE FIXED?
The U.S. Environmental Protection Agency (EPA) recommend that action be taken to reduce levels if the concentration of radon is 4 pCi/L or higher. For school rooms with levels of 4 pCi/L or more, venting systems can be installed that vent radon gas from below the ground to the outside, where it is quickly diluted to very low levels. Sometimes heating-ventilation-air conditioning systems are adjusted to increase ventilation or air pressure so that radon levels are reduced.
SHOULD CHILDREN BE RELOCATED IF RADON LEVELS ARE HIGH?
EPA recommends that if radon concentrations are near 100 pCi/L, schools should contact the state radon office (see contact information below), and consider relocating until levels are reduced. In many cases, levels of radon can temporarily be reduced by: 1) increasing ventilation, to dilute the radon, or 2) increasing air pressure, to keep radon from entering the classroom.
New York State Department of Health
Bureau of Environmental Radiation Protection
547 River Street
Flanigan Square, Room 530
Troy, NY 12180-2216
518-402-7556
800-458-1158
Email DOH About Radon
If you do feel that you need to have a radon test performed at your district, the person performing this test must be certified. Radon testing firms may be certified by the American Association of Radon Scientists and Technologists (AARST), National Radon Safety Board (NRSB), State of New Jersey (NJ), or State of Pennsylvania (PA). NYS does not certify or license radon testers.
The companies listed HERE are certified as radon testing firms, meaning that a representative(s)from these businesses have been trained to use the equipment or provide detectors for the testing of radon. Contact information is arranged alphabetically and can be sorted by county.
Remember that, while a certified radon tester may collect samples, anyone who analyzes and provides the results of those tests must hold New York State Department of Health Environmental Laboratory Approval Program certification. ELAP certification ensures that the results obtained from an individual or firm are accurate and reliable. This means that, while charcoal canisters, alpha track detectors and/or continuous radon monitors may be deployed by radon testers certified by AARST, NRSB, NJ, or PA, the actual test must be analyzed and the results reported by an ELAP-certified lab.
Here are some additional helpful links:
Notice of Emergency Adoption and Proposed Rule Making Emergency Rule
On Friday, March 4, 2022, the State Fire Prevention and Building Code Council (the “Code Council”) adopted a rule that adds specific provisions in relation to the installation, modification, use, and maintenance of grease interceptors (commonly referred to as “grease traps”) to the New York State Uniform Fire Prevention and Building Code (the “Uniform Code”). The rule was adopted as an emergency rule, and will become effective on March 22, 2022.
The rule applies to existing grease traps and to new grease traps. Regulated parties who own, operate, or are otherwise responsible for existing grease traps should take all steps necessary to bring their grease traps into compliance with the new requirements no later than the March 22, 2022 effective date. Regulated parties who own, operate, or are otherwise responsible for new grease traps should take all steps necessary to assure that their grease traps comply with the new requirements.
Adoption of the rule will be formalized by the filing of a Notice of Emergency Adoption and Proposed Rule Making. This filing will adopt the rule on an emergency basis, effective March 22, 2022, and propose the rule for adoption on a permanent basis. Please note, however, that the emergency rule will take effect on March 22, 2022. Once again, regulated parties who own, operate, or are otherwise responsible for existing grease traps should take all steps necessary to bring their grease traps into compliance with the new requirements no later than the March 22, 2022 effective date and regulated parties who own, operate, or are otherwise responsible for new grease traps should take all steps necessary to assure that their grease traps comply with the new requirements.
BACKGROUND
Chapter 753 of the Laws of 2021, Approval Memo No. 116, and Chapter 47 of the Laws of 2022 will amend Executive Law §378 to add a new subdivision eighteen to provide that the Uniform Code shall address the following subject:
Standards requiring that grease traps or interceptors located in a place that may be accessible by the public, or located inside any food service establishment, or located in any other building that is open to the public, shall be designed and maintained to withstand expected loads and to prevent unauthorized access. Such standards shall also include requiring the installation of a warning sign or symbol, as determined by the council, on or in the vicinity of such grease traps or interceptors. Such standards shall apply to new and existing grease traps and interceptors. For the purposes of this subdivision, "food service establishment" shall have the same meaning as in part fourteen of title ten of the New York code of rules and regulations.
The amendment to Executive Law §378 shall be effective March 22, 2022; provided, however, that effective immediately, the addition, amendment, and/or repeal of any rules or regulations necessary for the implementation of the amendment to Executive Law §378 on its effective date are authorized to be made and completed on or before such effective date.
AMENDMENTS TO THE UNIFORM CODE
A copy of the Rule Text is available HERE.
A copy of the full text of the Regulatory Impact Statement is available HERE.
As discussed above, the rule will be adopted as an emergency rule, effective March 22, 2022, and proposed as a permanent rule by the filing of a Notice of Emergency Adoption and Proposed Rule Making. it is anticipated that the Notice of Emergency Adoption and Proposed Rule Making will appear in the April 6, 2022 edition of the State Register. On and after April 6, 2022, the April 6, 2022 edition of the State Register can be viewed HERE . The Notice of Emergency Adoption and Proposed Rule Making will include the Text of the Rule, Summary of Regulatory Impact Statement, Regulatory Flexibility Analysis for Small Business and Local Governments, Rural Area Flexibility Analysis, Statement regarding Job Impact Statement, Statement of Findings Regarding Necessity for Emergency, Additional Matter Required by Statute, and Certification of Rule Text.
Guide for Public Employers
How to Compply with Workplace Violence Regulations
12 NYCRR Part 800.6
Getting Started
The majority of workplace violence incidents in the public sector workplace include: assaults and verbal and non-verbal threats from customers, patients, clients, co-workers and inmates. It is important that those who are establishing workplace violence prevention programs understand the different types of violence and the varying types of responses they require.
Effective Dates
- The Employer’s Policy Statement, Step 1 below, shall be completed within 30 days after the effective date of this Part.
- The workplace risk evaluation and determination, Step 2 below, shall be completed within 60 days of the effective date of this Part.
- The workplace violence prevention program, Step 3 below, shall be complete within 75 days of the effective date of this Part.
- Employers shall be in compliance with the entire regulation (Steps 1 through 5) within 120 days of the effective date of this Part.
To view the details of these requirements, please CLICK HERE.
Examples:
- Violence directed at employees by customers, clients, patients, students, inmates or any others whom the public employer provides a service to. This is the predominant type of violence in an institutional setting typical to healthcare and social services.
- Violence against coworkers, supervisors, or managers by a present or former employee.
- Violent acts by criminals who have no other connection with the workplace but enter to commit a robbery or other crime.
- Violence in the workplace by someone who does not work there, but has a personal relationship with an employee. This includes domestic violence and is usually perpetrated by an acquaintance or family member while the employee is at work.
Employers are ultimately responsible for preparing, determining the content of and implementing workplace violence prevention programs. Successful programs usually start by forming a group, committee, or using an existing safety and health committee. The workplace violence prevention regulations require the participation of authorized employee representatives in:
- evaluating the physical environment;
- developing the workplace violence prevention program;
- reviewing workplace violence incident reports at least annually to identify trends in the types of incidents in the workplace; and
- reviewing the effectiveness of mitigating actions taken.
Step 1 - Develop and implement a workplace violence prevention policy statement.
- Develop a written policy statement on the workplace violence prevention program goals and objectives and provide for full employee participation through an authorized employee representative. Briefly describe the incident alert and notification policies for employees to follow in the event of a workplace violence incident.
- Post the policy statement where notices to employees are normally posted.
See sample policy statement on preventing workplace violence at Appendix-1 PDF Format or Appendix-1 MS-Word Format
Step 2 - Conduct a risk evaluation and determine what risk factors are present.
- Examine records including those compiled in the previous year that concern workplace violence incidents to identify patterns in the type and cause of injuries. Examples:
- Injury and illness documentation (SH 900, SH 900.1 and SH 900.2)
- Workplace violence incident reports
- Workers’ compensation reports and disciplinary reports.
- Assess policies, practices, and procedures that may impact the risk of workplace violence. Examples:
- Policies regarding sexual harassment
- Firearms policies
- Work practices requiring work in public settings, including exchanging money with the public, working alone or in small numbers, and working with potentially violent clients.
- Evaluate the physical work environment for the presence of factors which may place employees at risk of workplace violence, with the participation of the authorized employee representatives.
See sample checklist to assist with evaluation of the workplace at Appendix 2-B PDF Format or Appendix 2-B MS Excel Format.
Step 3 - Develop a workplace violence prevention program.
- The program must be developed with the participation of the authorized employee representative. Only employers with 20 or more full-time permanent employees are required to have a workplace violence prevention program that is in writing.
- Safety and health programs developed and implemented to meet other federal, state or local regulations, laws or ordinances are considered acceptable in meeting this requirement if those programs cover or are modified to cover the topics listed below. An additional or separate safety and health program is not required by this paragraph if an existing program is modified to cover the topics listed below.
- The program must include the following:
- A list of risk factors identified in the workplace examination completed in Step 2.
- The methods the employer will use to try to prevent workplace violence incidents. Examples include enforcing existing workplace rules, training to increase employee awareness of the signs/effects of workplace violence and the importance of reporting workplace violence. Determine methods that are applicable to your workplace and include the list of those methods in your program.
- A hierarchy of controls to which the program shall adhere as follows: engineering controls, work practice controls, and personal protective equipment. In situations where the hazard cannot be completely eliminated, the employer must use control measures to reduce the risk to employees:
- Engineering Controls reduce the hazard through substitution or design. An example of an engineering control would be the installation of a physical barrier to protect employees from a member of the public (windows, deep counters). Engineering controls are not always feasible. If engineering controls are not feasible, the employer must then consider work practice controls.
- Work Practice Controls reduce the hazard by changing organizational policies and procedures. An example of a work practice control would be requiring check-in procedures and/or itineraries to account for employees who work alone and are not under the direct supervision of management.
- Personal Protective Equipment for the most part, this type of intervention is not relevant to workplace violence prevention. An example of personal protective equipment would be ballistic body armor for law enforcement personnel.
- The methods and means by which the employer shall address each specific hazard identified in the workplace evaluation. Take the list of risk factors compiled in the beginning of this Step and assign control measures for each specific hazard identified.
- A system designed and implemented by the employer to report any workplace violence incidents that occur in the workplace. The reports must be in writing and maintained for the annual program review. Include a description of your workplace violence incident reporting system in the program.
- A written outline or lesson plan for employee program training.
- A plan for program review on at least an annual basis. Such review and update shall set forth any mitigating steps taken in response to any incident of workplace violence.
Note: the regulations do not require the disclosure of information that is otherwise kept confidential for security reasons. The written program may need to explain how to deal with such confidential information.
See sample document to assist with listing risks and corresponding mitigation at Appendix-3 PDF Format or Appendix-3 MS Word Format
Step 4 - Provide information and training to employees on workplace violence.
- Upon completion of the workplace violence prevention program, provide each employee with information and training on the risks of workplace violence in their workplace(s).
- Training must be provided at the time of the employee’s initial assignment and at least annually thereafter. Information as necessary shall be provided to affected employees whenever significant changes are made to the workplace violence prevention program.
- At a minimum training shall address the following:
- The requirements of the workplace violence regulations, described here, and the risk factors that were identified in the risk evaluation and determination;
- Measures that the employees can take to protect themselves from the identified risks including specific procedures that the employer has implemented to protect employees, such as incident alert and notification procedures, appropriate work practices, emergency procedures and the use of security alarms and other devices;
- The location of the written workplace violence prevention program and how to obtain a copy (again, a written program is only required for employers with 20 or more full-time permanent employees).
See sample workplace violence prevention training outline at Appendix-4 PDF Format or Appendix-4 MS Word Format.
Step 5 - Develop a system to record workplace violence incidents and maintain those records.
- Establish and implement reporting systems for incidents of workplace violence to ensure that all workplace violence incidents are reported in writing. Note: Reporting systems developed and implemented to meet other federal, state or local regulations, laws or ordinances are considered acceptable in meeting this requirement if they cover or are modified to cover the information listed below. An additional or separate reporting system is not required.
- A workplace violence incident report can be in any format but, at a minimum, shall contain the following relating to the incident being reported:
- Workplace location where incident occurred;
- Time of day / shift when incident occurred;
- A detailed description of the incident, including events leading up to the incident and how the incident ended;
- Names and job titles of involved employees;
- Name or other identifier of other individual(s) involved;
- Nature and extent of injuries arising from the incident; and
- Names of witnesses.
- Conduct a review of workplace violence incident reports at least annually, with the participation of the authorized employee representative(s), to identify trends in the types of incidents in the workplace and review of the effectiveness of the mitigating actions taken.
- If the case is a “privacy concern case,” remove the name of the employee who was the victim of the workplace violence and enter “PRIVACY CONCERN CASE” in the space normally used for the employee’s name. Privacy concern cases include cases involving:
- Injury or illness to an intimate body part or the reproductive system;
- Injury or illness resulting from a sexual assault;
- Mental illness;
- HIV infection;
- Needle stick injuries and cuts from sharp objects that are or may be contaminated with another person’s blood or other potentially infectious material; and
- Other injuries or illnesses, if the employee independently and voluntarily requests that his or her name not be entered on the report.
See a sample workplace violence incident report form at Appendix-5 PDF Format or Appendix-5 MS Word Format
Employee Complaints to the Commissioner of Labor
Employee complaint procedures under the workplace violence regulation are different than those under the PESH Act.
Any employee or his or her authorized employee representative who believes that a serious violation of the employer’s workplace violence prevention program exists, or that a workplace violence imminent danger exists, shall bring such matter to the attention of a supervisor in the form of a written notice and shall afford the employer a reasonable opportunity to correct such activity, policy, or practice.
Written notice to an employer is not required where workplace violence imminent danger exists to the safety of a specific employee or to the general health of a specific patient and the employee reasonably believes in good faith that reporting to a supervisor would not result in corrective action.
If, after notifying the supervisor and giving the employer a reasonable opportunity to correct the situation, the employee or the authorized employee representative still believes that a serious violation of a workplace violence prevention program remains or that imminent danger exists, such employee may request an inspection by notifying the Public Employee Safety and Health Bureau (“PESH”) at the New York State Department of Labor. Such notice and request shall be in writing, shall set forth with reasonable particularity the ground(s) for the notice and shall be signed by such employee or their authorized employee representative.
Discrimination
No employer shall take retaliatory action against any employee because the employee exercises any right accorded him or her by the workplace violence prevention regulation.
